Click here to view recipe.
Refrigerator Pickles
Twelve years ago when life and food shopping was much more simple, I wrote a post for marinated cucumber salad. As the years passed, I find myself making this “salad” but calling them pickles, and I like to have them on hand as part of a sandwich (try them on top of tuna fish sandwiches or burgers or hummus sandwiches). I like that I can use English cucumbers and that this is so easy to make.
I have yet to find an adult or child who isn’t in love with these pickles!
~*~*~*~*~*~*~*~*~*~*~*~*~*~*~*~*~*~*~*~*~*~*~*~*~*~*~*~*~*~*~*~*~*~*~*~
Originally posted on July 23, 2014
During the long, warm days of summer I love eating cold (or room temperature) crunchy, cool and juicy fruits and vegetables. It’s hard to choose among my favorites – but this dish is tried and true … I’ve been making it for at least twenty years and it never fails to please me. I would often suggest this salad when catering for large crowds because it is inexpensive to make, beloved by the masses and, for some reason I haven’t quite figured out, it always rounds out menus and buffets and even small family gatherings. I bring this to picnics or barbeques in place of a green salad or coleslaw. Brunch, lunch, dinner … barbeques or spontaneous picnics in the park, this should be on YOUR “to try” list too.
I happen to own a really inexpensive mandoline for slicing the raw cucumbers, and I also have a sturdy protective glove for using the mandoline so I don’t cut my fingers off since I’ve come close to doing that more times than you can imagine. However, you can slice the cucumbers by hand as long as you can make even and thin slices about an eighth of an inch thick. For me, the mandoline works better and I can make this salad in the blink of an eye. It keeps for several days in the refrigerator – although the color isn’t as vibrant. No worries about that though – you can use leftover cucumber slices as a fresh and delicious addition to summer sandwiches.
I usually use English (aka Burpless) cucumbers, and recently picked up what I thought was this variety. However the vendor at the farmers market (pictured here) informed me these cucumbers were Japanese Slenders because they had “bumps” instead of ridges. I love learning new things! Either English or Japanese cucumbers will work; neither requires peeling and they have tiny seeds that don’t need to be removed.
Super easy, very few ingredients, healthful. Salty, a bit spicy, sweet. Delicioso! Just my kind of recipe…
Marinated Cucumber Salad (AKA Refrigerator Sweet Pickles)
Serves 4 or more
![]()
Ingredients
- ¼ cup apple cider vinegar
- ¼ cup granulated sugar
- ½ tsp. crushed red pepper flakes
- 2 tsp. fine Sea Salt
- 2 English or Japanese cucumbers
- Purple onion or radishes for color or garnish, if desired
Instructions
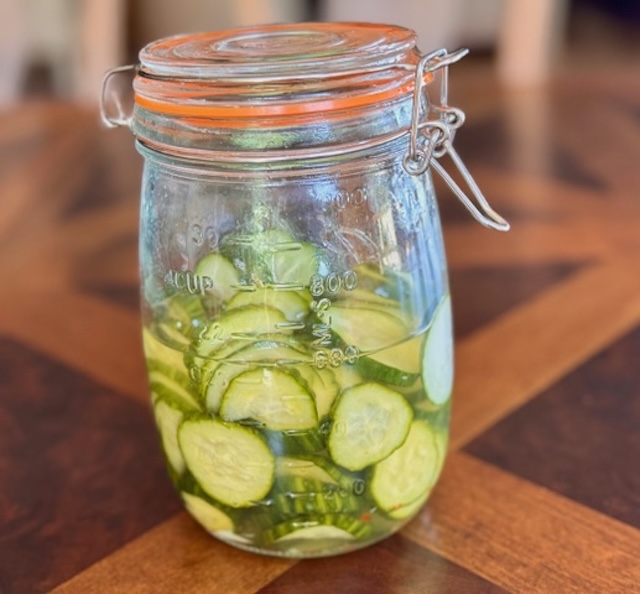
Slice the cucumbers (unpeeled, not seeded) into a large glass bowl by hand or with a mandoline. Boil together the vinegar, sugar, red pepper flakes and salt just until sugar dissolves, about 5 minutes from the start. Pour hot dressing over the cucumbers, stir around a bit and refrigerate the glass bowl with everything inside covered with plastic wrap. Leave in the refrigerator for about an hour. Once the salad has cooled, transfer everything to a tupperware container with a lid that you can seal and shake to distribute the dressing and coat all the cucumber slices. Refrigerate overnight or for several hours, and shake it around a few times when you remember to do so.
Drain before serving – the salt in the recipe causes the cucumbers to release a lot of liquid. Wonderful and easy!
Note: if you use regular cucumbers, be sure to peel the skin, cut the cucumber in half lengthwise and remove the seeds! Then slice into half rounds and proceed.