Anti-COVID Soup

Comforting & Colorful Anti-COVID Soup

I’m writing this on March 17 from Antigua Guatemala. My husband and I are down here and were scheduled to return home to Seattle at the end of March.  Seattle, as you know, is like 9/11 Ground Zero with respect to the Coronavirus, and at first, it was very chill and relaxing to be here in Antigua, away from the constant changes related to the virus.  However, almost two weeks into our visit the panic hit (for good reason) and all flights and roads and waterways into the country were canceled.

I sat on the phone with United Airlines for three hours the other day, trying to figure out return reservations, and still, no one knows anything for sure.  Everything is closed for at least two weeks, all eat-in restaurants are closed, yoga studios and gyms are not open, stores are closed, just pharmacies and banks and the supermarket are still open for shorter hours.  No public transportation is available, no one is to be out after 4 pm, no alcohol from 6 pm until 5 am. Lots of rules, not as much panic as in Seattle – but this is just starting here.

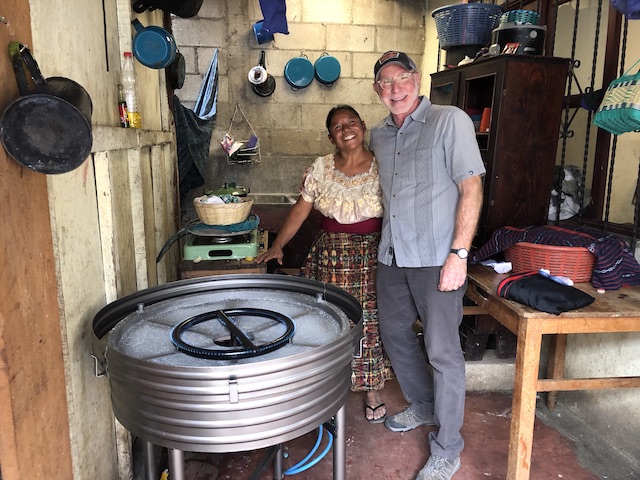
Wayne in the Bodegona (the “supermarket” in town) loading up on staples. Plenty of TP and no hoarding!

These new regulations were announced by the president and began yesterday and we decided not to eat food that we did not personally prepare.  I have a teeny weeny kitchen in our rented apartment with three pans, one frypan and maybe 10 utensils. It is enough, really – particularly when I compare what I have to what the poor Guatemalans cook with every single day.  I mean, there is electricity in this apartment and I have soap and running water too.

This morning we got up at 5 am and walked to the one large supermarket in town to be there when it opened at 6 am.  Last night it was bustling and people’s carts were loaded, not to mention that everyone was standing shoulder to shoulder.  No thank you! I took my hand sanitizer and Chlorox wipes and an N-95 mask in case it was crowded. We watched the store unload pallets of canned fish, Coca-cola, laundry detergent and the like.  FINALLY at 6 am, we entered and within 20 minutes we had our non-perishables-lots of kinds of rice and grains, several varieties of beans, Corn Flakes (not for me, but for Wayne), eggs, boxed and canned milk to name a few things.  We came back, washed our hands for 20 seconds, cleaned all the containers with bleach and water and then realized how tired we felt.  

Post-shopping — not a soul on the streets!

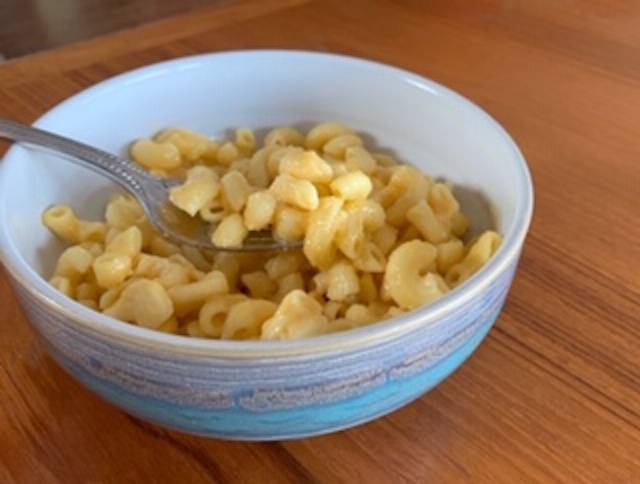
My yoga teacher here did an online (Zoom) yoga class that I followed virtually. I had to manage on our tile floor, but it was just what I needed.  Meanwhile, I heard a lot of cupboard doors banging, a lot of chopping, water running, the fridge opening. When I finished my virtual class, Wayne was almost done making chicken soup using the bones and a little meat from a rotisserie chicken along with leftover white beans, fresh carrots, fresh corn kernels from two ears of corn and tomatoes and cilantro and lime and tiny new potatoes and and and.  We now have a large pot of this soup – really more of a stew – and I made some couscous to add alongside. What is left of the couscous will turn into a couscous salad with diced veggies, lime and olive oil.

We decided after eating a couple of bowls of the soup that every week that we are self-isolated, we will come up with a different version of vegetable soup.  It will be simple, it will not be gourmet, but it will be comforting and nourishing and hopefully keep us healthy until we can fly back to Seattle.

The “recipe” here isn’t really a recipe, but here is how it happened.  First, take any bones from a previously cooked chicken and cover them with water by two inches.  Add about one tablespoon of water and one teaspoon of pepper. Simmer 45 minutes, and strain. Next, add about two huge peeled and sliced carrots, two cups of diced potatoes (I like mine abut ¾ inch in diameter), three sliced tomatoes (don’t bother to seed and peel-this is a rustic soup), about two cups of trimmed green beans, a cup of fresh corn kernels, two cups of leftover beans if you have them, and a handful of chopped cilantro.  Add and simmer another 20 minutes and season with more salt or pepper or cilantro to taste. Make some couscous or rice or barley to add to the soup when you serve it.

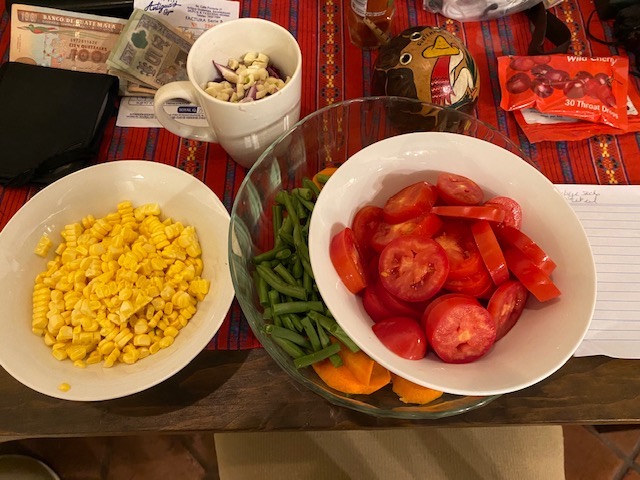
Wayne’s mise en place (perched on the table that doubles as our counter).

Stay healthy and stay safe!

Share
Posted in Central America, Soups | Tagged | 3 Comments

Carrot Cake – Again!

A Girl and Her Cake

When my granddaughter speaks, I listen. She – and everyone else in my family if I’m being honest – tells me that my carrot cake is better than any other.  So I figured I’d remind you all about this amazing recipe.

I cooked this up for her 4th birthday, grinding up the nuts (the kids don’t like them big) and adding sprinkles and princesses on top, per my granddaughter’s request.

~*~*~*~*~*~*~*~*~*~*~*~*~*~*~*~*~*~*~*~

Old School Carrot Cake

Click here to view recipe.

My Very Favorite Carrot Cake

My Very Favorite Carrot Cake

The other day I was in a cleaning frenzy and decided to tackle my cookbook shelves – arranging the books from large to small and determining if any of my very old cookbooks could be gifted, sold or donated.  I stumbled upon a cookbook my daughter’s class produced in her early elementary school – 30 plus years ago!  Actually, Rachel recently connected with a former classmate from this second grade class – both of them are now almost 38-years old, and the friend told Rachel she still makes the carrot cake published in this cookbook – my very own recipe with my handwriting and all! At this point, I have no recollection of who passed this recipe on to me – but I am eternally grateful.

The Sweetest Recipe Book Ever

The Sweetest Recipe Book Ever

My Chicken Scratch

My Chicken Scratch


Gazing at the worn spiral bound book, I realized it was a precursor of how Rachel would turn out as an adult.  She was an early adapter and defender of the recent Supreme Court Ruling – way before everyone put a rainbow background on their facebook profile page, she was coloring rainbows and hearts.  And it never occurred to me back then how talented and artistic my 7-year old daughter would become.

Here is a toast to old recipes, to not abandoning butter and sugar and flour and…to carrot cake.  This is still one of my favorites to put together and to eat.    It’s a great recipe to make with kids, too.  And here is a bigger toast to daughters who become mothers and who teach their mothers about creativity, and who always stay in touch with past friends.

I love this recipe – I changed it from what is in the book by toasting the walnuts and reducing the frosting by one half.  I mean, how much frosting is really necessary in one serving?   I love this cake so much that I never, ever order carrot cake at a restaurant.  I’ve tried it at various places and it always falls short of this old, tried and true recipe.  And what you see here, the rectangular sheet cake rather than a beautiful round layer cake, is the result of my need to freeze this for future family gatherings.  Yes, it freezes so beautifully.

My Carrot Cake

pf-icon2


Cake Ingredients
  • 1 ½ cups (yes one and one half!) cooking oil
  • 1 ¾ cups white granulated sugar
  • 4 large eggs, beaten
  • 1 teaspoon pure vanilla extract
  • 2 cups all purpose flour
  • 2 tsp soda
  • 2 tsp aluminum free baking powder
  • ½ tsp table salt
  • 2 tsp ground cinnamon
  • 3 cups grated carrots
  • ¾  cups chopped walnuts, toasted and cooled
Instructions

Preheat the oven to 350.

Whisk together the first four ingredients, oil through vanilla.  Sift together all dry ingredients and incorporate this into the egg/oil mix.  Finally stir in the shredded carrots and toasted nuts.  Put everything into a greased and floured 9 x 13 pan or two round 9-inch cake pans.  Bake for 40-45 minutes until a toothpick comes out clean.

Cool on a rack and then frost with cream cheese frosting and sprinkle with toasted nuts.  NOTE: I cut the frosting called for by half, so if you are into frosting  you might want to make double the recipe here!

Frosting Ingredients
  • 4 ounces cream cheese, softened
  • 2 Tbsp butter
  • 2 tsp vanilla
  • 2 Tbsp milk
  • ¼ pound powdered sugar (looks like a little over a cup)
  • To top the frosting if you’d like: ¼ cup finely chopped toasted walnuts
Frosting Instructions

Mix cream cheese and butter and vanilla until smooth, then slowly add powdered sugar and enough milk to make a thick but spreadable frosting.

Refrigerate or freeze the frosted cake and eat with a tall glass of milk.  This tastes great for up to a week, but it never stays around my kitchen that long.

Share
Posted in Cakes & Pies | Tagged | Leave a comment

Not Your Grandma’s Tuna Noodle Casserole

This post was originally published over three years ago! It’s so comforting – such an oldy-AND-a-goody – that I couldn’t resist posting it again. Some days – nothing can beat the food mom used to make.

~*~*~*~*~*~*~*~*~*~*~*~*~*~*~*~*~*~*~*~*~*~*~*~*~*~*~*~*~*~*~*~*~*~*~*~ 

Click here to view recipe.

Tasty Tuna Noodle Casserole - A Modern Twist

Tasty Tuna Noodle Casserole – A Modern Twist

If any of you were born in the mid 1900’s (THAT sounds old!) you will absolutely know what tuna noodle casserole is.  This comfort food graced every table in my youth in some form – usually that of canned tuna (not line caught, not wild), elbow macaroni or thin egg noodles (certainly not penne made from fine Semonlina flour) and cream of mushroom soup (from a can, naturally).  School cafeterias served this, some called this “end of paycheck casserole” and it was kind of a go-to meal for many families.  Oh, and some lucky kids had it served with crumbled potato chips on top!

At my house, my mom must have prepared this from time to time.  For sure it was an option for hot school lunches.  Believe it or not, I sometimes get a hankering for the taste of mushrooms, tuna and noodles.  But I’m happy to report that today, I have what I believe is a much better version.  I even tried it out on my grandkids when they were in town. The verdict? Huge hit! Of course.

Basically, this is an easy dinner with leftovers to boot.  You make a white sauce, stir in sauteed veggies and spices, then fold this into cooked bowtie pasta along with high quality canned tuna and frozen peas.  Crispy panko crumbs (available in most grocery stores in the Asian section) which have been sauteed in butter are added as topping during the final part of baking.  Oh, and because my grandsons pick cooked mushrooms out of foods, my daughter had the brilliant idea for me to put the mushrooms in my Nutribullet and chop them to almost a mushroom paste.  In other words, you end up with a mushroom taste without the visual look and texture of mushrooms.  In other, other words, the perfect way to fool your kids (or adult sons, not that I am naming names…Daniel) who THINK they don’t like mushrooms.

Not Your Grandma’s Tuna Noodle Casserole

Serves 6-8 (at least)
pf-icon2

Ingredients:
  • 2 cups 2% milk (heat in microwave or saucepan until hot)
  • 8 oz bowtie pasta-egg noodles or whole wheat if you can find them 
  • 1 stick salted butter
  • ½ large onion, finely diced
  • 2 stalks celery, finely diced
  • ⅓ c red or orange or yellow bell pepper, finely diced
  • 2 cups sliced brown mushrooms (If you have kids, put these in the food processor or nutribullet so they become mushroom mush and are not identifiable as mushrooms.)
  • ¼ cup unbleached flour
  • 1 ½ cups frozen peas
  • 3-5 ounce cans of water packed tuna – drained (15 ounces total)
  • ½ tsp dried dill or 1 ½ tsp fresh chopped dill
  • 1 tsp salt
  • 20 grinds black pepper
  • 1 cup breadcrumbs (I used panko which was crunchy and good)
  • 1 ½ Tbsp butter (for breadcrumbs)
Instructions:

Butter or oil a 9 x 13 pan.

Preheat the oven to 350 with the rack in the middle.

Start a large pot of water to boil the pasta – add a half a teaspoon salt.  When it is boiling, add bow tie noodles and cook until al dente but not totally soft.  Drain well.

Meanwhile, (noodles can be cooking away) melt butter and sauté the diced onion, celery, pepper and mushrooms or mushroom moosh.  When everything is soft, sprinkle with flour.  Stir and cook about three minutes. Continue stirring then add heated milk slowly until it makes a thick sauce.  Cook another minute.  Turn off the heat and add the  dill, drained tuna, and frozen peas, salt and pepper  Stir to combine and taste to see whether you might need additional salt or pepper.

Scrape everything into the prepared baking pan and bake uncovered at 350 for 20 minutes.  

While the tuna casserole is baking, heat the 1 ½ Tbsp of butter in a small fry pan on medium heat, add panko crumbs and stir until they get a little brown. Remove from the heat.

After 20 minutes pass, remove the baking pan from the oven and top with browned panko crumbs and bake an additional ten minutes.  Remove the pan from the oven, let it rest about ten minutes and serve with a nice fresh fruit salad and green salad.

Leftovers reheat well!

Cook’s note:  this is also good if you prefer leftover or canned salmon or even cubed chicken/turkey in lieu of tuna.  


Share
Posted in Fish & Seafood, Pasta | Tagged | Leave a comment

Apricot Whole Wheat Scones

Click here to view recipe.

The Most Amazing Apricot Scone

I know, I know, I have told a lot of people that I am not a pastry person, that I could easily live without doughnuts or cakes or scones or breakfast breads.  This is actually true if you are talking about commercial bakery items. But I must come clean. I accidentally found a scone that is so good, so geared to my funny, odd taste buds… this scone is so sublime that I cannot stop making and eating these.  

I make these without any machinery, instead, I use a pastry cutter for the butter and a spatula to mix everything together.  In the end, I knead the dough six times then make the circle of dough right on the cookie sheet, cut it there and spread out the wedges.  Fewer dishes to wash!

It doesn’t happen often, though it’s happened before — I land upon some type of food that I really love and I repeatedly eat it over and over and over and over, often until I simply cannot eat another one. I’ll let you know when that happens!

BEST EVER Apricot Whole Wheat Scones

Yield 8 nice sized scones (6 if you make them big)

pf-icon2


Ingredients
  • ¾ cup regular unbleached flour
  • 1 cup whole wheat flour 
  • 2 teaspoons baking powder
  • 1 pinch of fine sea  salt
  • ¼ teaspoon freshly grated nutmeg
  • Orange rind grated from ½ of a large naval orange
  • 2 heaping tablespoons dark brown sugar
  • 5 tablespoons cold salted butter, diced into ¼ inch cubes
  • ½ cup (or a bit more) dry apricots (chopped in ¼ inch pieces)
  • ½ cup 2% milk-save 1/2 tsp for topping before baking
  • 2 Tbsp whole Greek yogurt Or kefir
  • 1 tbsp raw Turbinado sugar for the topping 
 Instructions

Set a rack in the middle of the oven, and preheat oven to 400°F. Line a baking sheet with parchment paper. 

In a large bowl, combine the flours, baking powder, salt, and nutmeg. Whisk to blend well. Add the orange rind and brown sugar, whisking again, and then add the pieces of butter. Using a pastry cutter, work the butter into the flour mixture until there are no lumps of butter bigger than the size of a pea. Stir in the dried apricots.   Add about three-quarters of the milk , and using a fork, stir it into the dry ingredients. If it seems too dry and crumbly, add more milk as needed, but start sparingly, so that the dough doesn’t wind up sticky. Once the dough is coming together, put down the fork and finish bringing it together with your hands, pressing it and turning it to incorporate all the flour. 

Turn the dough out onto the parchment-lined cookie sheet and pat dough into an 8-inch circle.  Brush the top with the reserved milk mixture (or extra milk if you needed the entire milk/yogurt mix for the dough) and sprinkle the top with raw sugar, pressing lightly to be sure it sticks.   Cut into eight even triangles like a pie and arrange on the same cookie sheet.

Bake for about 15-18 minutes, or until the tops are lightly golden. Cool on a rack.  Serve warm – or, if eating later, reheat gently before eating. 

So so so good. These stay in the freezer once cooled and wrapped for up to three months.  As if!


Share
Posted in Breakfast | Tagged | 1 Comment

Giant Blueberry Frittata

Click here to view recipe.

Fabulous Blueberry Frittata

I love making pancakes, although standing at the stove pouring, flipping and then trying to keep everything warm and fresh isn’t much fun.  I spotted this recipe online this summer and tried it the following week.

Can I just say… Wowza!  This is quick, easy and I probably made it five times during blueberry season. This fall I tried making these with out-of-season blueberries.  Not as good. There’s just really nothing like fresh berries although I am sure fresh frozen ones would work as well.  

Hot out of the oven

It’s so simple! You just mix up the batter, let it cook a bit on the stovetop, then shove it into the oven to finish.  The entire pancake/frittata is flipped onto a plate, bottom side up and then sliced and served, much like a skinny cake.  Easy, but oh so good. This is adapted from a recent summertime Bon Appetit recipe.

Giant Blueberry Frittata

Serves 4-6

pf-icon2


Ingredients 
  • 1 cup unbleached flour (I am sure this would work with ⅓ whole wheat and ⅔ plain flour)
  • ⅓ cup medium or fine grind cornmeal
  • ¼ cup granulated sugar
  • 1 Tbsp baking powder
  • ½ teaspoon baking soda
  • 1 teaspoon sea salt
  • 2 large eggs
  • 1 ½ cups plain unsweetened kefir or plain buttermilk, divided
  • 2 Tbsp salted butter, melted 
  • 1 cup fresh blueberries (I used about ¼ cup more!) tossed with 1 tsp flour
  • 1 Tbsp avocado oil
  • 2 Tbsp salted butter
  • Pure maple syrup to serve
Instructions

Preheat your oven to 375.  

Whisk flour, cornmeal, sugar, baking powder, salt, soda, and cornmeal together in a small bowl.  

Whisk eggs, kefir or buttermilk, and two tablespoons melted butter together and gently combine with dry ingredients. Be careful not to overmix – nothing wrong with a few lumps here and there.  Fold in blueberries.

Heat oil and remaining 2 Tbsp butter together in a large (at least 10 inches in diameter), oven-safe, non-stick frying pan over medium-high heat.  When the foaming subsides, scrape in the batter and spread it to the edges. Reduce heat to medium and gently rock the pan back and forth so it will come out of the pan easily at the end.  Cook until bubbles form on the surface – about six minutes when the edges might be a little brown.

Transfer the entire pan to the oven and cook another ten minutes until puffed and set.  Invert onto a large plate. Cut into wedges like a pie and serve with butter and syrup or plain yogurt and jam.  Leftovers (if there are any!) can be refrigerated and reheated and are pretty darned good.


Share
Posted in Breakfast | Tagged | Leave a comment

Cauliflower Burritos

Click here to view recipe.

Colorful Cauliflower Burritos

I’ve said it before, but cooking is my “art form.”  I love to eat, I have no rules or diets I have ever, ever followed.  I adore the colors, the textures, the creativity of food I prepare. What does this have to do with Cauliflower Burritos? Allow me to explain…

It was a Monday at the end of July.  Meatless Monday. It happened to be my shopping day at the grocery store day as well.  I only go food shopping when I have over 15 things on the list, and before I go I have a general idea of which meals I am going to prepare – based on when we might be eating away from home, who might drop over for dinner or lunch.  My point is, shopping for food is not random for me. I go with a list, click off each item, and get through the store quickly (I even arrange my grocery list according to the aisles of the store. Don’t knock it, it’s super-efficient). The checkers at the cash register always ask me what I am making and sometimes I even bring them leftover food.  Last week I dropped off some potato salad to Rena, for example.

In case you were wondering, my meals that week included miso-marinated chicken stir-fried with fresh green and yellow beans and tons of fresh herbs, tuna noodle casserole, grilled bruschettas, tuna/bean salad, spaghetti with homemade, basil-laden tomato sauce, and CAULIFLOWER BURRITOS.

Now, I did not have a recipe for said burritos.  I had an idea and a plan, and everything went seamlessly and exceeded my expectations.  It was easy, and we stuffed ourselves to the gills. We ate every morsel on the serving platter along with a fair amount of wild rice pilaf I made.

Clean Plate Club

Here you go, and you are most welcome.

Cauliflower Burritos

Serves two famished eaters (Each of us had two whole burritos.  Honestly one would have sufficed but they were so darned good we just kept going.)

pf-icon2


Cauliflower Ingredients
  • 1 head of cauliflower, cut into 1-inch florets
  • 1 ½ Tbsp extra virgin olive oil
  • ½ tsp of chili powder
  • ½ tsp of cumin
  • ¼ tsp of garlic powder
  • ½ tsp of salt
  • 20 grinds of fresh black pepper
Instructions

Preheat the oven to 425 degrees and line a sheet pan with aluminum foil.  I roasted my cauliflower in my handy dandy toaster oven. Toss all the ingredients together in a large bowl and place on the baking sheet.  Roast for 25 minutes, turning once with a spatula midway. Taste to be sure it is perfect, and place into a dish for serving after it is ready. The spices really punch up the flavor here.

All the fixin’s

Meanwhile, prepare a platter with: 

  • Chopped lettuce or napa cabbage (You will see I used leaf lettuce from my garden)
  • ½ large avocado, diced
  • Wedges of lime to spritz on top
  • Sliced cherry tomatoes (mine were homegrown) or diced fresh tomatoes
  • ¼ cup plain unflavored yogurt
  • Fresh DILL (I bet you thought I was going to say Cilantro!  Nope, gotta have something unexpected.)
  • Bottle of hot sauce
  • 4 large flour tortillas.  I put all 4 of ours between two damp paper towels and microwaved them for 30 seconds.  They were so perfect. You can keep them wrapped in a dish towel to keep them warm.

To serve, you can make any type of rice – I had a very non-Central American type of wild rice pilaf here.  Rice can be a side dish or go into the burrito. Put a large tortilla on each plate and let everyone fill their burrito according to their taste.  Add hot sauce if you wish. Enjoy!

PS: Fresh Fruit is great as a side to these.

Share
Posted in Vegetables | Tagged | Leave a comment

Chocolate Chip Tahini Bars

Click here to view recipe.

Crave-Inducing Chocolate Chip Tahini Bars

I am a huge tahini fan, an even huger dark chocolate fan, and I am always on the hunt for new and easy dessert type bars to make.  This recipe adapted from The Washington Post fits the bill on oh so many levels!  One bowl, one pan, easy to eat and freeze and interesting flavors.  

Chocolate Chip Tahini  Bars

Makes 12 bars 

pf-icon2


Ingredients 
  • ½ stick salted butter 
  • ¾ cup dark brown sugar less 1 Tbsp. (140 grams if you have a scale)
  • 1 large egg, room temperature
  • ½ tsp pure vanilla extract
  • ½ cup well-stirred Tahini  (Soom brand, of course)
  • ¾ cup (106 grams) all-purpose flour
  • ½ tsp fine sea salt
  • ½ tsp baking powder
  • 3 oz dark bittersweet chocolate chunks (I use Guittard and chop half a bit more, then leave the other half as is.  I toss the chocolate with about ½ tsp of flour.)
  • ~ ¼ tsp fresh ground sea salt to top the brownies
  • 2 tsp white sesame seeds to sprinkle on top before baking
Instructions

This is for a brownie sized pan but can be doubled for a 9 x 12.

Preheat the oven to 350 degrees with the oven rack in the center.  Line the square brownie pan with aluminum foil, letting there be a little extra on the lip of two opposite sides so you can lift the cookies out as they are cooling.  Spray the foil lined  brownie pan with Pam.

Place the  butter in a pyrex measuring cup and melt in the microwave. (Cover the container loosely with a napkin so it doesn’t mess up your microwave.  Or you can melt this in a sauce pan.)  Cool while you measure out everything else.

Using a rubber spatula, mix the melted butter with the brown sugar, add the egg, and keep mixing, then add the vanilla and tahini.

I dump the flour, salt and baking powder on top of the mixed batter, slightly combine it then fold it into the mix (but don’t overmix).  It is like a soft, soft dough. Fold in the chocolate. Scrape the gooey batter into the prepared pan and even it out with a greased offset spatula.  Grind some sea salt on top and sprinkle the top of the brownies lightly with sesame seeds.  

Bake mid oven for 20 minutes or until a tester comes out clean. If you’re doubling the recipe and using a larger pan –  bake a bit longer, say 22-25 minutes. 

Let cool ten minutes in the pan, then lift the foil-wrapped brownies onto a baking rack.  Once completely cooled, cut into 12 even pieces.  

SO SO GOOD.  These freeze well for up to four months.

Share
Posted in Cookies | Tagged | 2 Comments

Juana

Juana with my grandsons Isaiah and Asher

My husband and I have been traveling to Guatemala every other month for a year. This magical place is so different from what I pictured in my mind or what I read about the country in numerous news publications.  Our base camp is mostly in beautiful Antigua, which is the “jewel” of Guatemala – a UNESCO World Heritage Site with so many great inexpensive restaurants, yoga studios, and tourism. Clearly, Guatemala is more populated, and less modern than, say, Mexico or Belize but I really love the amount of culture everywhere and the sheer physical beauty in many spots.  Antigua is not representative of Guatemala.  Of course, there are flat, arid areas that are like the wild west too and a lot of abject poverty.!

My favorite part of travel always centers on getting to know the natives.  We have met some very nice ex-pat Americans, Europeans, and Canadians here as well, but I seem to gravitate to the Guatemalans I have met at the daily Mercado, in the park, and on the streets.  Life for most of them is really really difficult, particularly because so many are not able to read or write.  

Every day there are a few hundred Mayan women (and children) milling around the central park, the main tourist street, and a few touristy spots. Most are selling knick-knacks, many of which are made in China.  Most venders sell identical merchandise – scarves, table runners, plastic toys, LED lights, food for pigeons. Day after day, year after year the women come to Antigua to sell their goods to tourists.  

So it was that I got to know Juana, who lives a bus ride away from Antigua.  She is in her mid 40’s and has three sons and a husband. She is unable to do any other type of work since she does not read or write.  Her Spanish, since her main language is a Mayan tongue, is slow and easy for me to understand. She’s a smart woman, this much I know.

Just so you are aware, a lot of really poor Guatemalans hustle the foreigners and ask for money for things such as a sick Grandmother, food, or rent.  I don’t give money randomly for these requests because a lot of the stories are fabricated and I believe in helping someone help themselves. That said, I have been known to buy a nice dinner for an elderly Mayan Grandmother who was begging outside of a restaurant.  

Juana had a story about her husband Miguel needing surgery so that he could work again.  Skeptical me, I had my husband go with the family to a public, church-sponsored hospital appointment and sure enough, he badly needed an operation.  We told Juana and Miguel that we would pay for the surgery and all the tests and medications before and after which amounted to less than 400 dollars.  The surgery was performed in September and both were so grateful to us for our help. This has enabled Miguel to resume his work tilling the coffee fields.  

Juana continued to come to the park to sell her trinkets and we saw that, during the low season when there were few tourists, it was pretty futile  We asked her what else she could do to support her family, She explained that she is unable to find work even as a maid. But then she exclaimed, “I could make and sell tortillas!”  

In two days I found myself in a car en route to a nearby town to purchase a “comal” or special gas-driven griddle specifically constructed for tortilla making.  Juana bargained hard and so did I but she had a lot better Spanish and credibility. I ended up paying $120 US dollars for this huge stove. Next, we loaded the griddle in the Uber and drove to her village of about 300 families.  

Wayne, Antonio & Comal!

The narrow walkway leading up to her “house” wouldn’t accommodate a car, so my sturdy 70-plus-year-old husband and the 38-year-old Uber driver Antonio (now a friend of ours) carried the stove about six blocks uphill to her residence.  We opened the door to the corrugated metal outside and I must tell you I have rarely seen anything like this Chickens and roosters running around, no plumbing, no electricity, no running water, just a smallish room for a family of five.  To earn more money, they even rent a cot to someone who sleeps by the kitchen. Wayne set up a propane tank to the stove, we bought her oil and cornmeal and voila, she was in business.

Her youngest son made a sign for the tortillas which she now sells three times a day.  I spoke with Juana about a week later and she was so thrilled with her new business and was earning about 70 quetzales per day, or around $10.   Not bad in a country where the average wage per family is around $1.70 per day! She no longer makes the daily trek to Antigua to sell trinkets.   

Family

I am humbled by Juana and her family. Though I know she and Miguel and their children are thankful for the things Wayne and I have done for them – I believe I am the one who is most grateful.  Just knowing that we’ve been able to make a difference in their lives – and perhaps even their children’s lives for generations to come – makes me verklempt. Best of all – Juana and her family have become our family. And I’ve got to add – she makes the best darn tortillas I’ve ever tasted!

Share
Posted in Central America, Travel | Tagged | 8 Comments

Giant Raisin Oatmeal Cookies – New and Improved

Click here to view recipe.

The Perfect Cookies!

I keep 99 percent of my recipes on my computer so that I can access them anywhere in the world I might be.  Sometimes I open documents to share with friends, sometimes I need to retrieve a recipe to make in another location, and sometimes I just want to keep my recipes in a place for posterity.  One category – “Things I Love” – is the subset I go to time and time again to peruse beloved family recipes and old old old, tried but true recipes that never disappoint.  

My previously published recipe for raisin oatmeal cookies was one of those all-time faves.  I should mention that I try lots of new recipes (I do have a folder called “Things to try”.)  However, to be very clear, once I land on what I perceive to be the perfect, never fail formula I am risk-averse with certain things – think chicken soup, apricot strudel, Caesar salad.  My raisin oatmeal cookies were one of those tried and true faves, so I felt I didn’t need to search any longer for a superior recipe.

So what prompted me to go into uncharted territory?  After all, I don’t even like raisins.  For some unknown reason, my other half had a hankering for raisin oatmeal cookies, my son Daniel was coming to visit and I wanted to have some treats ready to go in my freezer.  And then, as if the universe was conspiring, I stumbled upon a recipe in a newspaper* with the title: The Best Oatmeal Cookie Recipe We’ve Ever Tried – accompanied by a photo that made my mouth water.

I compared the list of ingredients to my original recipe, and found the same components….BUT the quantities were really different and the method of preparation took a u-turn as well. All righty then, after reading comments from cooks who actually made these, I decided to go forth and bake, incorporating some of the suggestions from bakers’ comments.  I used salted butter then cut the added salt down. The original recipe called for keeping the measured, flattened cookies in the fridge for four days, but I have no time and no patience for such a thing. I wanted and needed them pronto and couldn’t see myself waiting four days to try them. (Just so you know, I made the first cookie sheet’s worth and refrigerated the others on the tray for 15 minutes or so) .  Finally, I used a bit less granulated sugar.

Fresh out of the oven

Let me tell you what.  My condo building smelled like a bakery, and these really huge cookies hit the mark.  My husband and I cut one in half to try it, then we cut another in half to be sure it was really good (it was!). Then I packed up a half dozen to take to my daughter’s house for dessert and received a text later that night that said:  

Cookies are AMAZING.

J  had a brilliant idea and we shared one with some vanilla ice cream. OH MY GOD. I would almost give up chocolate chippers for them! (Don’t tell anyone) 


Giant Raisin Oatmeal Cookies

Makes 15 cookies

pf-icon2


Ingredients
  • 1 cup raisins (I love Trader Joe’s Thompson raisins – very small and plump and superior for these cookies)
  • 1¼ cups all-purpose flour
  • 1 tablespoon plus 1 teaspoon ground cinnamon
  • 2 teaspoons baking soda
  • ¾ teaspoons fine sea salt 
  • 1½ sticks salted butter, slightly softened 
  • 1 cup light brown sugar, firmly packed
  • ⅓ cup granulated sugar
  • 2 cups old-fashioned or rolled oats
  • 1 large egg
  • 1½ teaspoons pure vanilla extract
Instructions

Soak raisins in hot water for 20 minutes, then drain and shake so all the water is removed.

Preheat the oven to 350 degrees with a rack in the center of the oven.  Meanwhile, in a small bowl, stir together flour, cinnamon, baking soda, and salt.

With an electric mixer cream together butter and sugars on medium speed until light and fluffy, scraping down frequently. Do not to overbeat.

Add flour mixture to creamed butter and sugar and mix on low speed until just combined. Everything will look way too dry, but do not fret.  Mix in oats, followed by drained raisins, egg and vanilla and beat until just combined.

Use a ¼-cup ice cream scoop (or do this by hand) and measure dough onto a parchment paper-lined baking sheet. Cover the sheet of balled cookies with a piece of waxed paper and flatten each blob with the base of a flat bottomed measuring cup so they are around 3 ½ inches across.

Before baking

To bake cookies: put one sheet of cookies at a time in the preheated oven.   Bake until cookies are golden-brown on the outside but still soft in the middle, about 17 minutes. Remove from the oven and let them rest on the cookie sheet for five minutes, then transfer with a spatula to a rack to cool.

These stay perfectly in an airtight container in the fridge for a few days, or in the freezer for up to a month. 

Cook’s Notes:
  • The cookies are about 4 ½ inches in diameter after baking, so I suggest putting only five cookies per sheet and baking one at a time mid-oven.  Before baking, they measured three inches in diameter so you need to allow for the spreading that takes place.
  • The original newspaper recipe included a note that this recipe was “Adapted from Melissa Weller of Sadelle’s, New York City.”  Bravo, Melissa … BRAVO!  Very very well done!
Share
Posted in Cookies | Tagged | Leave a comment

Easy Peasy Mac & Cheesy

Click here to view recipe.

So Easy! SOOO Good!!

I heard on the street that mac and cheese can be made in the pressure cooker or instapot.  That sounded a little counter-intuitive to me, and I’m a skeptic to boot. BUT I was being open-minded and decided, while on 10 days of babysitting duty for my 10, 7 and 3-year-old grandkids, to try this.  HUGE HUGE HIT, huge huge amount of mac and cheese produced without powdered cheese or a box, and huge huge huge oohs and ahhhhs from the kids.

This takes less than 10 minutes stove to table, and I am here to tell you it is so good.  We ate like starving animals the first time through, and the kids had enough leftovers for lunches at school and after-school snacks. In other words, you get a lot of bang for your buck.  

You are golden if you own either an instapot or a pressure cooker. If not, borrow a friend or neighbor’s pot.  I’m a pressure cooker owner and I’m not about to buy another kitchen workhorse, so the directions here are for a pressure cooker.  If you are an instapot owner 1) Good for you and B) you’ll have to adapt the directions for the instapot. I suspect it will take longer to come to full pressure is all.

Easy Peasy Mac & Cheesy

Serves 8-10 at least

pf-icon2


Ingredients
  • 1 pound dry elbow macaroni
  • 4 cups water
  • 2 tsp sea salt
  • 3 Tbsp salted butter
  • 12 oz can of evaporated milk
  • ¼ cup water
  • 3 cups shredded sharp cheddar cheese (I was lazy and got the pre-shredded kind.  Each package had 2 cups worth so I used 1 ½ packages and saved the rest to melt on toast)
Instructions:

Place the dry macaroni, 4 cups of water and 2 teaspoons of salt in a pressure cooker.  Stir together and lock the lid, bring to full pressure and set a timer to cook it for exactly 4 minutes.

After the four minutes are up, use the quick (manual) release.  I always wear hot mitts when I do this and I keep a towel wrapped around the valve so the stuff that bubbles out doesn’t make a huge mess or burn my hands.

Unlock and remove the lid away from you so the steam doesn’t come rushing out at you.  The noodles will be cooked and the water absorbed. WOO HOO.

Stir in the butter, the evaporated milk and the quarter cup of water.  Then add the grated cheddar cheese a half cup at a time so it melts entirely.  Stir together, add pepper and serve hot. Leftovers can be dumped in a buttered casserole dish, refrigerated and eaten for up to three days later.  We reheat each serving briefly in the microwave oven, but I have to say my grandboys took this to school and ate it at room temperature.

Cooks Notes:

You could add either some drained tuna fish or flaked salmon or diced cooked broccoli at the end.  Me? I just love straight up mac and cheese every once in a while, particularly when it is dead simple to make.  

Our daughter, the mother of these three little angels we babysat, tried this when I made it yet again last night  She was blown away by how cheesy, I mean easy, it is.


Share
Posted in Pasta | Tagged | Leave a comment