Easiest Potato Kugel

Click here to view recipe.

Positively Perfect Potato Kugel

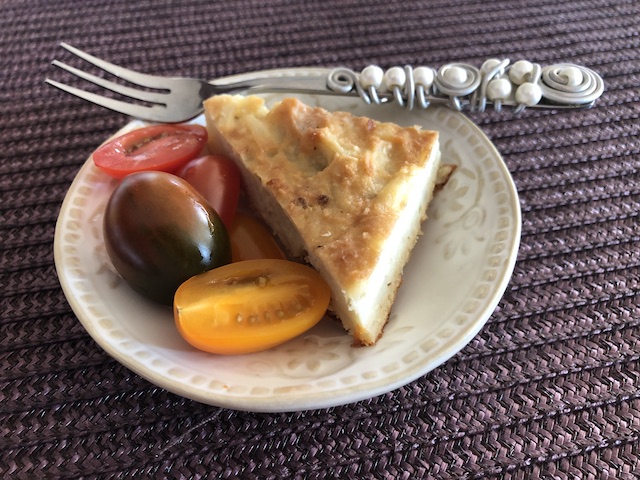
I had to get over myself to post this recipe!  By now you know that I rarely use anything that is processed in any way – pre-grated, canned, packaged…not usually my style.  BUT my sister Susan had a great recipe for potato kugel and she once whispered to me that I could cut corners and use frozen shredded potatoes rather than peeling and grating them myself.  Horror of horrors! But – I trust my sister, so I went to the store and read the package (only ingredient: frozen shredded potatoes) and decided, for once, to make things easy.

As it turned out, this has become one of my “go to” dishes to bring to potluck type meals and to prepare and reheat for us and for my many relatives who seem to drop by when they are starving.  And for some reason, this potato kugel, which is like a giant potato latke or a plate of better-than-hashbrowns, is one I always keep in mind. It tastes better and better as the days go by. Old people love it, 30- and 40-year-olds love it, and even babies love it.  Take it from one who knows!

Sister Sue’s Dumbed Down and Slightly Adapted Potato Kugel

Makes 9 x 12 ceramic deep dish

pf-icon2


Ingredients
  • 3 Tbsp neutral oil (such as avocado or canola oil)
  • 1 lb, 14 oz. package shredded FROZEN  Ore Ida potatoes (a little bit defrosted but not all the way unfrozen)
  • 1 ½ brown onions, skinned, peeled and chopped in the Cuisinart or Nutribullet
  • 3 large eggs
  • 2 Tbsp matzo meal or all-purpose flour
  • 3 Tbsp melted butter (cool slightly)
  • 1 ½  Tbsp salt  
  • Fresh ground white or black pepper
Instructions

Preheat oven with the rack in upper third to 400 degrees. Put the 9 x 12 pan in the oven with the three tablespoons of oil for about 10 minutes before you start to bake the kugel, and let the pan and oil heat up.

Grate or finely mince the onion in a food processor or Nutribullet.  In a large bowl, whisk eggs, salt, pepper and matzoh meal. Stir in potatoes/onions with hands until well combined. OK, wear disposable gloves if you don’t want stinky hands.

Pour the potato mixture into the preheated pan with preheated oil and spread evenly.  Bake uncovered at 400 degrees for 15 minutes, reduce heat to 375 and bake about 45-50 minutes more or until the top is crisp.  Brush top with a little melted butter 30 minutes before it is done if it looks too pale.

Cool before cutting.  Serve cut into squares with ketchup, plain yogurt or sour cream, whatever you like on hash browns.

Share
Posted in Side Dish | Tagged | 2 Comments

Mango Chutney

Click here to view recipe.

Mango Chutney with Brie – Sublime!

Antigua Guatemala seems to be my new “home away from home.”  For the past six months, we have been spending every other month in a tiny rented apartment near the center of town.  Wayne is volunteering once a week or so in a few International Planned Parenthood organizations and procures and donates medical instruments to some Guatemalan doctors after he teaches them the “no scalpel” vasectomy technique.  

I love Antigua for its springlike weather, its friendly people, the colorful native dress, the fabulous huge outdoor mercado and ease of getting around by foot or by chicken bus.  To top it off, I finally found a beautiful yoga studio I walk to most days, just a mile from where we stay.

I don’t mean to be rambling here – I’m simply smitten! That said, I’ll get to the point.  One of my excellent yoga teachers, Ginger, is MY AGE and an ayurvedic practitioner. In March she offered an affordable ayurvedic cooking class at her home, just on the outskirts of Antigua.  A four-hour class, which included a lecture about food and health according to Ayurveda, and a full-on lunch to boot.

Casa San Juan Lunch

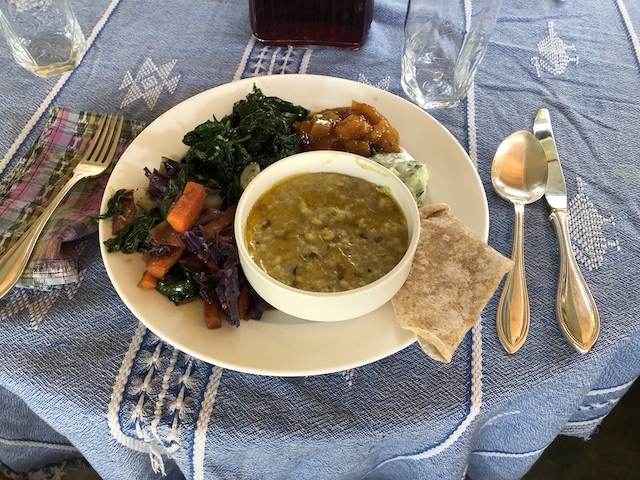
As pictured above – here’s what a “full-on lunch” means at Casa San Juan:

  • Kitchari porridge (ayurvedic staple) made with mung beans and basmati and a lot of ghee and spices
  • Mango chutney and raita for the kitchari
  • Injari (Indian flatbread)
  • Fresh veggies (onions, carrots, zucchini, purple cabbage, etc. sauteed in ghee with fenugreek)
  • Fresh sauteed spinach
  • Dessert: pureed mango and tapioca pudding

Not one to miss an interesting cooking class, I went to Casa San Juan.  And what a place Ginger has built!! If you are thinking of a retreat for writers, photographers, healers, yogis….check out the website: https://www.casasanjuan.com.gt. I have never been to a more beautiful space with such a well-designed kitchen!  And the food, mostly new to me, tasted so fresh and good. I mean, milk from the cows on the farm, vegetables from the garden, nothing from a can or jar or box or bottle.  I should have taken pictures of the pantry.

One of my favorite dishes was fresh mango chutney – an accompaniment to lunch.  I loved it, asked her for the recipe and got this text:

“Recipe was just for every cup of cut mango, add ½ cup brown sugar, ¼ cup vinegar, a few raisins, a dash of salt and some chili powder.   God knows what they really did….”

No directions as to how to cook it or if it was cooked at all.  Measurements seemed a little funny to me — too sweet and too vinegary.  And I like a little onion in my chutney.

So, I did what I usually do when I am on the hunt for a new dish to prepare.  I looked at recipes on the internet by Googling “ayurvedic mango chutney”. What I ended up with probably isn’t ayurvedic since it isn’t cooked, but in my eyes when there is vinegar and salt it kind of cooks itself.  Think ceviche.

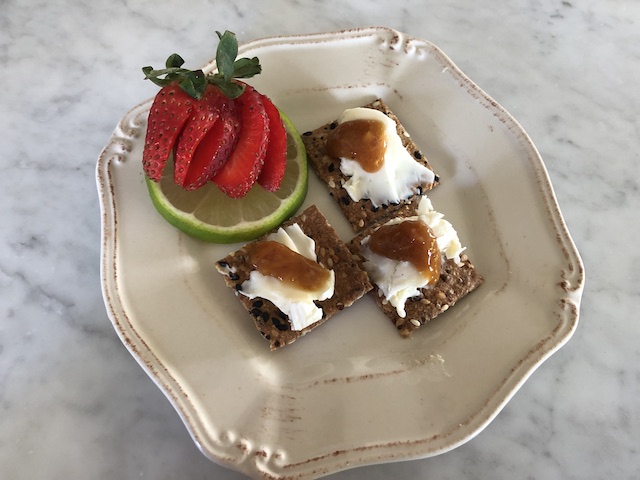
Nothing could be easier than what I did.  Since I returned I have been eating a smidge of this mango chutney with everything!  With grilled chicken, with fish, with lamb, and as an appetizer when served atop seeded crackers and a shmear of brie cheese (see picture).  AND I weighed and sort of kind of measured what I did to bring you the real deal. So here you go. Extra lucky for me is that mangos have been on sale here in Seattle for the past month!

Mango Chutney

Makes about 1 ⅓ cups

pf-icon2


Ingredients
  • 1 mango, roughly ¾ lb in weight (champagne variety), peeled and cubed ½ inch
  • 1Tbsp small diced red onion
  • 2 ½ Tbsp dark brown sugar
  • 3 Tbsp dried cherries (raisins would work but I didn’t have them, so I used cherries)
  • ½ tsp ground chili powder
  • 2 Tbsp red wine vinegar
  • ½ tsp salt
Instructions

I combine everything together in a quart-sized bowl, stir it and let it sit for about a half hour to bring out the juice.  I then pour everything into a nutribullet and barely whiz it, for two seconds at the most. I like chutney with some texture.  I supposed I could hand mash it a bit with a potato masher but you are reading a recipe by a lazy cook.

This keeps for a week in the fridge, probably a lot longer but we ate it nonstop and after a week it was gone and I had to make it again.  

Share
Posted in Condiment | Tagged | Leave a comment

Favorite Flavors Lentil Veggie Bowl

Click here to view recipe.

Luscious Lentils & Vibrant Veggies

You’d think over time I would get tired of grain or rice or quinoa bowls.  I mean, how many variations can you have that would pique your interest? In my case, evidently, grain bowls are one of my favorite types of food and I am always on the hunt for something new to try.

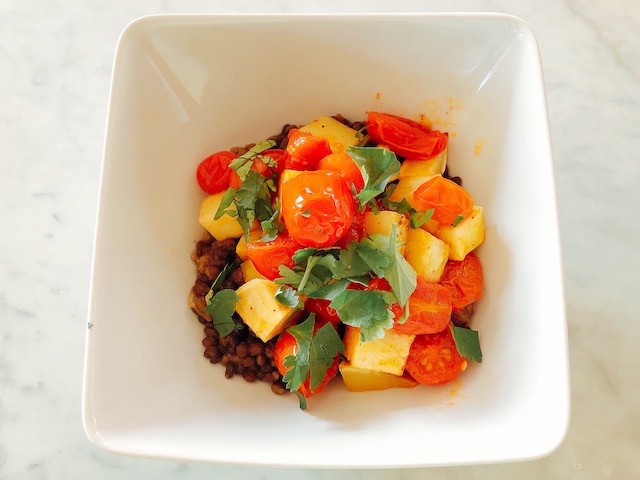
Soooooo, when I spotted a recipe from an online  Bon Appetit article, I earmarked it and waited for a day when the idea of black lentils and sweet potatoes and roasted tomatoes and cilantro sounded satisfying.  This just so happened to be early this March. Although the original recipe was supposed to serve four, I made it in parts and had it for kind of a cross between lunch and dinner and again the following day for lunch, and as a snack.  In my eyes, this would serve more like six people.

I made a lot of changes along the way. Ahead of the game, I decided to swap out some of the black beluga lentils, my favorites, for a bit of ground lamb.  Just because. I didn’t have coriander so I left out that spice. I thought the honey in the dressing was a little too sweet for my taste, so I cut it down.  And adding ground lamb along with sauteed white onion then combining it with the lentils made this much more of a main dish for me.

We ate this with some crusty bread and a very simple romaine salad, dressed with a shallot vinaigrette.  So perfect – nutrient-laden and appealing to the eyes and the stomach.  Eat this with a spoon; it is a lot easier.

Beluga Lentil, Sweet Potato, Burst Tomato & Cilantro Bowl

Serves 6

pf-icon2


Ingredients
  • 1 tsp sea salt plus more for seasoning
  • 1 cup black beluga lentils, rinsed
  • ½ lb ground lamb
  • ⅓ cup small diced onion
  • 3 Tbsp extra virgin olive oil
  • 1 Tbsp harissa (I buy mine in a tube and keep it in the fridge)
  • 20 grinds fresh ground pepper
  • 2 large sweet potatoes, washed and peeled and cut into ½ inch cubes
  • 4 cups (2 pints) cherry tomatoes, cut in half
  • 3 tbsp red wine vinegar
  • Scant tbsp honey
  • 1 Tbsp harissa
  • ¼ cup extra virgin olive oil
  • ½ cup diced fresh cilantro
Instructions

Preheat oven to 425 with the rack in the center of the oven.  Line a large rimmed cookie sheet with foil or parchment paper.

Bring a medium saucepan of water and the teaspoon of salt to a boil.  Add the rinsed lentils and simmer until barely cooked, about 25 minutes.  Drain lentils and put in a medium bowl. While the lentils are cooking, heat a frying pan and put the ground lamb and diced onion in, chopping up the lamb into tiny pieces as it cooks.  When everything is well browned including the onion, drain off the fat and add the lamb/onion mix to the lentils. Taste and add a bit more salt if needed.

Meanwhile, combine the diced sweet potato and halved cherry tomatoes in a medium bowl.  Whisk the three tablespoons oil, one tablespoon harissa, two teaspoons salt, and black pepper together, and with your hands coat the sweet potato/tomatoes.  Spread this out on the cookie sheet and slide into the preheated oven for 30 plus minutes or until the potatoes are cooked through, turning once. Remove and place the cookie sheet on the counter.

Whisk wine vinegar, honey and one tablespoon harissa in a small bowl.  Drizzle in the olive oil a bit at a time until it is combined. Taste and add salt and pepper to taste. Add half of this to the cooled lentil/lamb mixture until coated.  

Chop the cilantro.

When ready to serve, place some lentil/lamb mix in the bottom of a bowl.  Top with the roasted veggies and drizzle with a bit more of the honey vinaigrette.  Top with about one or two tablespoons of chopped cilantro and serve.

Cooks Notes:

As long as you keep the veggies, the meat/lentil mix, honey dressing, and cilantro separate, you can refrigerate leftovers and serve for the next 3-4 days.  Personally, I prefer to reheat the veggies and lentils a bit but they are fine at room temperature.

If you aren’t a fan of adding lamb or ground chicken to the lentils, cook 2 cups of lentils at the start and make this vegetarian.


My husband, who loves everything I make, said this was almost his favorite thing I have ever made.  Take his word for it. And I loved the sweet potato/tomato veggie mix so much that I would make that alone as a side vegetable!

Share
Posted in Salads & Dressings | Tagged | Leave a comment

Rhubarb Salad Dressing – Revisited

It’s RHUBARB SEASON! A huge cause for celebration in my house. I’ve posted at least six recipes containing this delicious fruit over the years and just had to re-post this salad dressing recipe (originally posted exactly SIX years ago). It’s that good!

~*~*~*~*~*~*~*~*~*~*~*~*~*~*

Click here to view recipe.

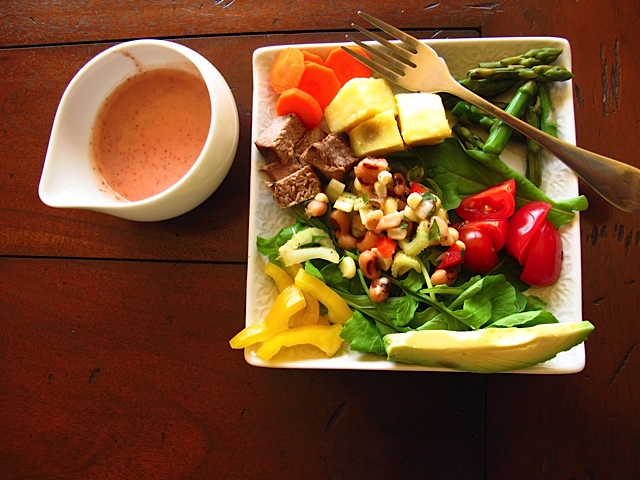
Sumptuous Salad with Rhubarb Vinaigrette

Sumptuous Salad with Rhubarb Vinaigrette

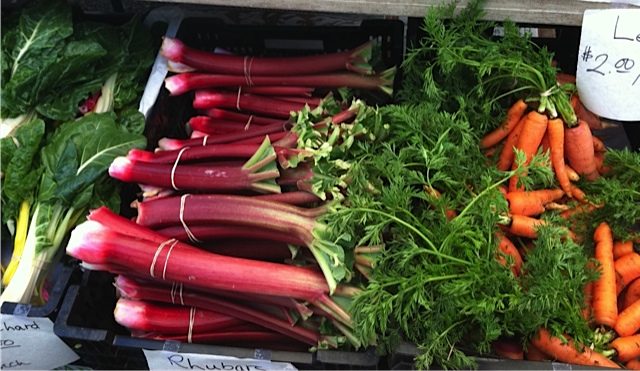
Although it is still pretty cold and on-and-off rainy here, bundles of rhubarb appeared everywhere at yesterday’s farmers market here in Seattle. I usually associate this vibrant vegetable (yes – it’s a vegetable!) with Springtime – so I was pleasantly surprised to see displays of the celery-like, ruby-colored stacks. I purchased a few bunches and immediately starting trying to figure out what I could make besides the traditional rhubarb crisp, rhubarb upside down cake or rhubarb pie. I was in the mood for something savory and two recipes popped into my mind: a wonderful sweet and sour type chicken dish, and a tangy, pink-colored salad dressing that would be good on a main dish salad.

Fresh Rhubarb at the Farmer's Market

Fresh Rhubarb at the Farmer’s Market

And it just so happened that I had a left-over chunk of rare beef tenderloin steak in my refrigerator along with some steamed sweet potatoes, blanched asparagus spears, toasted walnuts, and various peppers and root vegetables. And of course I had some organic salad greens – in this case arugula.

It took just one try to make a gorgeous, zesty salad dressing. Just a little different from my usual and a much more seasonal version. I was so pleased with the results that I’ve decided this vinaigrette is going right into my regular spring line up!

Rhubarb Vinaigrette

Makes about 1 cup

pf-icon2

Ingredients:
  • 1 medium sized rhubarb stalk, thinly sliced 
(about 1/2-cup)
  • ½ cup water
  • 2 Tbsp. honey 
(more or less to taste)
  • 2 tsp Dijon mustard (regular or grainy)
  • 2 Tbsp. unseasoned rice vinegar
  • 2 Tbsp canola oil
  • 2 Tbsp extra virgin olive oil
Instructions:

In a small saucepan, simmer the rhubarb in water, covered, for 5-10 minutes until it is very, very mushy.

Put the stewed rhubarb with all the remaining liquid into a blender with the honey, vinegar and mustard. Pulse until smooth. With the motor running, slowly pour in the oils until it thickens.

Store in refrigerator for about a week.

I love these seasonally inspired dinners! And many of you will find rhubarb growing in unexpected places or at local markets.  Be sure to watch for next week’s chicken rhubarb creation.

Share
Posted in Salads & Dressings | Tagged | Leave a comment

Best Ever Brussels Sprouts

Click here to view recipe.

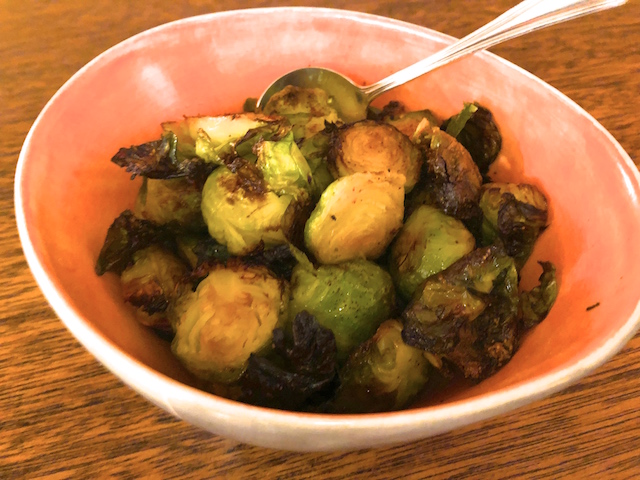
My Beloved Brussels

Most people have a love/ hate relationship with Brussels sprouts.  Personally, I have a “thing” for these tiny cabbage-like morsels. I love them, and I can eat them day after day after day.  A few years back, I was with my sisters in Boston and I believe all three of us ordered Brussels sprouts every night for probably five nights in a row.  That’s how we rock and roll.

Admittedly, this recipe with it’s method of cooking is a pain in the neck, I won’t lie.  Even though there are very few ingredients, it digresses from my usual steaming only or oven blasting.  BUT if and when you have the time and want to eat the best Brussels you have ever tasted, make these. It involves blanching, then sauteeing in a small amount of butter, and finally roasting.  The finished sprouts come out crunchy on the outside, creamy yummy on the inside, and I could eat pounds and pounds of these. But you already knew that.

Just one of the many steps – but SO worth it!

Best Ever Brussels Sprouts

Serves 2 large eaters (can be doubled or tripled)

pf-icon2


Ingredients
  • 10 ounces Brussels sprouts
  • 2 tablespoons salted butter
  • Pinch smoked paprika
  • Sea salt to taste
  • Few sprigs of fresh herbs: tarragon or mint if you have either, if not no worries
Instructions

Bring a large saucepan of water to a boil. Add 1 teaspoon of sea salt.

Wash and trim stems of all Brussels sprouts, then cut a  shallow X in the bottom of each sprout.

Put all sprouts in the boiling water and cook four minutes, uncovered. Remove the sprouts with a slotted spoon and place directly into an ice-water bath.

Once cool (~ five minutes), drain the sprouts in a strainer and shake off as much water as you can. Cut sprouts in half lengthwise.  Put them on a dish towel and pat to remove some of the moisture . Don’t get too carried away here, just blot them.

Meanwhile preheat your cast iron skillet if you have one AND your oven (or better yet, your toaster oven) to 450 degrees.

In a large 10-inch saute pan or cast iron skillet, melt the two tablespoons of butter. Add the sprouts cut side down, season with a bit of salt and a small amount of smoked paprika.

Brown the sprouts for about five minutes.  I shake the pan to get a layer of fat under the sprouts but I don’t turn them.    Once brown, remove to a rimmed cookie sheet or ceramic dish with enough room for them to be uncrowded and in a single layer. Include the leaves that fall off the Brussels sprouts too!

Place sprouts and the cookie sheet in the preheated oven(uncovered), and roast for about 20-30 minutes.    Shake the pan every 8-10 minutes. When sprouts begin to look almost burned, they are ready. I baked mine in the toaster oven and it took me about 20 minutes, but it will be longer in a conventional oven.  They should be slightly crispy and creamy in the center.

Put on a pretty serving dish and garnish with fresh herbs if available.  Sprinkle with a few grains of salt if you wish. My husband always dusts the tops with fresh parmesan, just a smidge but IMHO, this is over.   

For me, this is all I need for dinner!


Share
Posted in Side Dish, Vegetables | Tagged | Leave a comment

Chocolate Strudel

Click here to view recipe.

Chocolate Strudel!

OK, readers – pay attention. Because this chocolate strudel is one of the best things I bake.  Seriously. I have hemmed and hawed about sharing the recipe with you and finally I decided I am getting older and want my baking legacy to live on.  

Every time I serve this strudel, my eaters go a little crazy.  I’ve been told more than once that the strudel should be sold in pastry shops.  It is rich, chocolatey and it’s hard to imagine anything pairing so well with a cup of coffee or tea.  But be warned: you can’t eat a lot of these at one time or you’ll make yourself sick.

As for the origin, my mother used to make this chocolate strudel.  She got the recipe from my cousin Donnie’s first wife’s mother, Mrs. Schmuckler.  From Minnesota. This isn’t something I could make up. But I do have a recollection of being at Donnie’s wedding when I was probably around 10 or so. So I’ve gotta believe there’s some semblance of reality mixed in.

So, here it is: our world famous chocolate strudel.  I changed it up by adding bittersweet chocolate chunks in lieu of semisweet (always a good idea0 and toasting the nuts too.  


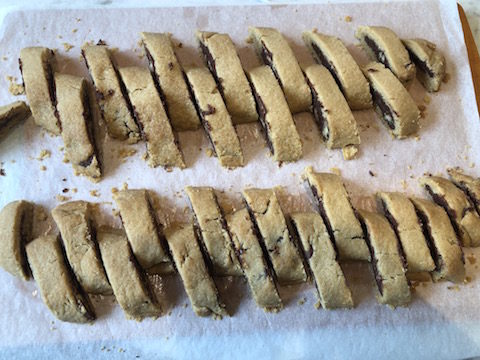
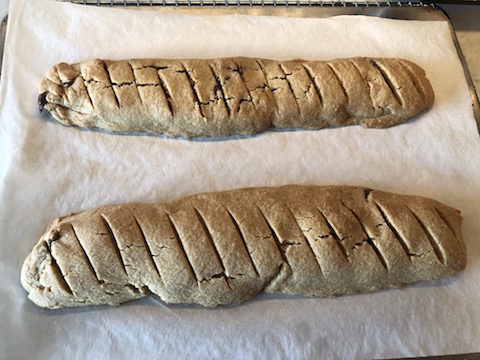
The dough is finicky in that it crumbles apart – so you’ll have to be persistent.  I find that a pastry cloth (not silicone) helps a lot. Also, Mom used to “score” the dough or make shallow slits in the finished strudel rolls before baking this and after the rolls were baked, she would slice them apart with an electric knife–not pushing down or sawing like you would a regular serrated knife.

Sliced Just So

Put on an apron, recognize you are going to have to be patient and careful and go forth and bake.  It’s totally worth it.

Chocolate Strudel

Makes about 64-70 pieces if you count the ends

pf-icon2


Dough Ingredients
  • 1 ¼ c salted butter (2 ½ sticks)
  • 1 cup packed dark brown sugar
  • ½  tsp. salt
  • 1 tsp. pure vanilla extract
  • 3 cups all-purpose flour
  • ¼ cup milk (2%)
Filling Ingredients:
  • 12 oz bittersweet chocolate chunks
  • 1 can Eagle brand condensed milk
  • 1 Tbsp butter
  • ¾ c coarsely roasted chopped pecans to top the filling
Instructions

Mix the dough ingredients using a food processor (I do it there) or a mixer – keep going until everything sticks together.  Knead it briefly, divide into four equal parts and pat each quarter into a smooth 4” x 3” rectangle. All four rectangles go into a Tupperware and chill at least two hours or overnight.

Preheat your oven to 350 degrees.

When you are ready to bake, take the dough container out at least 15 minutes before you start rolling.  Put out the pastry cloth.

Melt the chocolate, condensed milk, and butter in a saucepan over low heat until melted.  Remove from the heat and cool at least five minutes. Have the nuts toasted and cooled in a bowl nearby.

One at a time press one individual rectangle on a well-floured cloth and roll to about 8” x 13”. Be sure it doesn’t stick or you’ll be swearing. I leave the rectangles of dough in the fridge while I work on one roll at a time. 

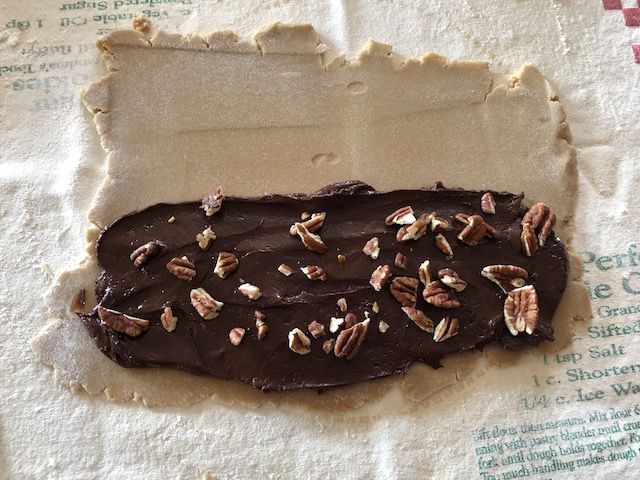
Filling The Dough

Put a quarter of the filling along the bottom (the long way), about a third of the way down, close to the “lip” of the dough.  Spread it evenly over that third and sprinkle with nuts. Lightly press the nuts onto the chocolate and roll tightly using your pastry cloth.   Transfer to a parchment-lined cookie sheet with the seam on the bottom and pinch the ends under. Score into 16-18 pieces.

Hot Out Of The Oven

I use two rolls per cook. Bake for 30-35 minutes.  When they are slightly golden, carefully slide the parchment and rolls off of the tray.  Cut with an electric knife into 16-17 slices, wiping the chocolate off the knife every few cuts.

Cool entirely.  These stay at room temperature for five days or freeze for up the three months.  Seriously – beyond great.

Share
Posted in Dessert | Tagged | 8 Comments

Basic Bolognese (Take Two)

This was originally posted in March of 2012! I’m reposting this recipe for Bolognese because it’s one of my tried and true.  Plus I wanted to share a tip: lately, I have been making it with ground lamb!  Often I find this is fattier, so I brown the lamb first, take it out of the pan with a slotted spoon, remove the extra fat then start with the vegetables. You can try this new version or stick with the original.Buon appetito!

*~*~*~*~*~*~*~*~*~*~*~*

Click here to view recipe.

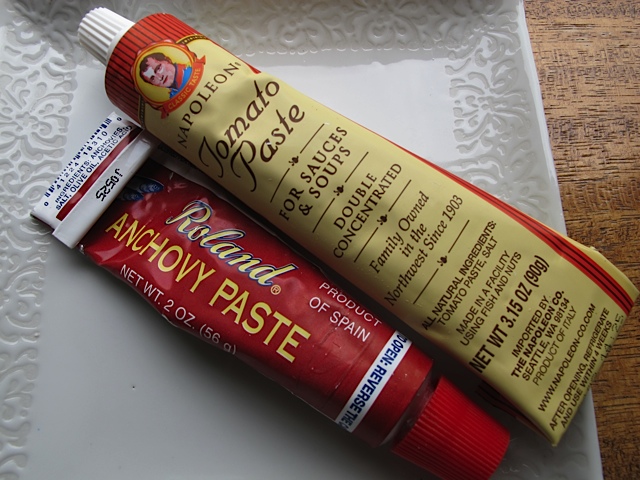
Tomato & Anchovy Paste

It’s the first Wednesday of the month again. So it’s time to keep things simple. And what could be easier than food in a tube? I know … surprising words coming from me – especially considering my penchant for fresh ingredients. However, I have come to rely on these two kitchen staples: tomato paste and anchovy paste. I am so grateful that I learned about these nifty tubes. Prior to this discovery I was forever opening cans of tomato paste only to have it spoil before I could use the entire amount. Ditto the tins of anchovies, which I use only infrequently in Caesar salad dressing or other recipes in need of a hit of salty flavor. So stocking tubes of tomato and anchovy paste is, for me, a no-brainer.

One of my most treasured recipes featuring tomato paste is Bolognese sauce. This is one of my favorite things to make in March, when the wind kicks up and it’s cold outside. Plus, in keeping with the simplistic theme, this recipe is very, very basic. The ingredients can be found almost anywhere – I’ve even made this in foreign locales when I have access to a kitchen. It’s a slow cooked meat sauce that can be used to top any kind of pasta (my favorite is fresh pappardelle from Delaurenti in Pike Place Market in Seattle… but you can use any kind you like). And, best of all, the house smells heavenly when it’s cooking away on the stovetop.

Bolognese Sauce

Serves 4-5

pf-icon2

Ingredients:
  • 1 brown onion, peeled and diced ¼ inch
  • 2 cloves garlic, finely minced
  • 1 large carrot, peeled and diced ¼ inch
  • 2 celery stalks, diced the same size as the carrots
  • 2 medium roma tomatoes, seeded and diced small
  • 3 Tbsp olive oil
  • 1 lb lean ground chuck or lamb
  • 1 tbsp. tomato paste
  • 8 oz beef stock or vegetable stock (I have even used chicken stock in a pinch)
  • Salt and pepper to taste
Instructions:

Heat a large straight-sided pan (at least 8 inches in diameter with deep sides) over medium-high heat.

Add the oil until it is hot, then add in the diced vegetables.

When they have browned a bit, add the meat. Keep stirring and breaking up the meat with a wood spoon. When it is no longer pink and lightly browned, add the tomato paste, stock, salt and pepper – stirring well to combine.

It should cook on low heat for at least one hour, with the lid on, and should be stirred from time to time. Taste and adjust seasonings.

This recipe can easily be doubled or tripled, and it freezes well for up to 4 months.

Share
Posted in Meat | Tagged | Leave a comment

Peanut Chicken

Click here to view recipe.

Perfect Peanut Chicken

After Thanksgiving, our daughter Rachel invited us for dinner at her very busy, very chaotic home.  In addition to being a wonderful daughter and mother and wife and acupuncturist, she is an excellent cook.  She manages to feed her family of five mostly homemade, nutritious meals and snacks. I know I am biased, but to say she is impressive is an understatement.

So….I wasn’t surprised that our dinner was (A) something I’d never had and (B) something so tasty I couldn’t stop thinking about it.  When I mentioned to her that I liked it, she looked kind of embarrassed. I pressed her for the recipe for this peanut chicken and she apologetically sent it to me.

Let me back up a bit here.   Almost three years ago, my youngest sister Kay came to Seattle after Rachel’s third baby was born.  Kay’s mission was to help make and freeze a lot of food, to drive Rachel’s two older boys around to lessons and such, and to help the baby sleep through the night.

Katie (AKA Kay) drove the minivan absolutely everywhere and said it reminded her of when her twenty and thirty-something boys were young.  She got the baby to sleep 12 hours at a POP, I kid you not. And she made so many challahs and pots of soup and main dishes that the freezer was bursting.  

Evidently, this chicken dish was one of the things Kay made for Rachel.  She told Rachel at the time that the written recipe looked disgusting but the chicken was simple as well as loved by kids and adults.  

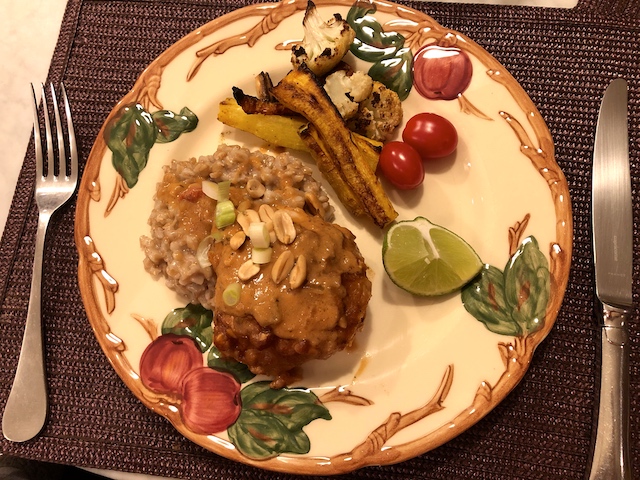
The original recipe was one meal Kay made that came, of blessed memory, from Betty Crocker!  Changing the original recipe, I made this with only chicken thighs and I added a generous squeeze of lime at the end while serving because lime helps everything taste fresh.  I thought I had cilantro but I did not and I did miss the green on the plate. Also, I served my chicken with farro risotto, but even while or brown rice would be good to sop up the peanut sauce. Sadly, I didn’t get a photo of the plate complete with sliced cucumbers, radishes, and shredded carrots – which all helped to jazz it up a bit.  

Don’t forget the accoutrements!

Don’t judge.  It is so rare that I use anything out of jars, but this is a good dish to have on a cold winter day when you want a warm meal with little trouble.  I’ll admit it – it sounds absolutely gross, but fortunately, I didn’t know what the ingredients in the dish were until I ate it and oohed and ahhed. Every now and then, when you find yourself having one of those days with little time and many mouths to feed, something comes along that is dead simple to make. I think most kids would absolutely love this meal!  Just consider serving it with some type of easy salad. We all need a little civility, don’t we?

Peanut Chicken Thighs

Serves 6

pf-icon2


Ingredients
  • 8 chicken thighs, bone in and skin on
  • 1 ½ cup salsa (old El Paso thick and chunky salsa is suggested but I used a different brand)
  • ½ cup peanut butter
  • ¼ cup lime juice
  • 2 tablespoons soy sauce
  • 2 teaspoons grated fresh peeled ginger root
  • ¼ cup chopped salted peanuts
  • ¼ cup chopped fresh cilantro
  • ¼ c sliced green onion
  • 1 lime, cut into wedges
Instructions

Preheat oven to 375°F.

Oil a rectangular or oval pan, 13x9x2 inches, with cooking spray. Place chicken, skin side down, in a single layer in pan.

Mix salsa, peanut butter, lime juice, soy sauce, and ginger root; spoon over chicken.

Cover with foil and bake 30 minutes. Turn chicken pieces and spoon pan sauces over chicken. Bake uncovered 30 minutes longer or until juice of chicken is no longer pink when centers of thickest pieces are cut. Sprinkle with peanuts and cilantro and serve each person a nice slice of lime to squeeze at the last minute. Enjoy!

Share
Posted in Poultry | Tagged | 1 Comment

Lemony Red Lentil Soup

Click here to view recipe.

Luscious Lemony Red Lentil Soup

In February, I returned to Seattle after spending a month in Guatemala.  36 hours later, I flew to meet my sisters in the Northern Territory of Canada to see the Aurora Borealis, then returned home five days later to cold, snowy winter weather.  

I live on a very long, steep hill which for days has been used as a ski slope!  Snow is a rare occurrence in Seattle, and everyone gets very amped up about winter weather–at least initially.  We don’t have a lot of snow plows or salt to melt the ice, so aside from the streets with bus routes, the majority of our roads are filled with snow.

Snowy Seattle Streets

Me?  I don’t love the snow or cold so much.  That said – I know how to maneuver. I grew up in Iowa and experienced my share of snowy winters, so I am perfectly capable of driving and surviving the cold.  Even so, I find most Seattleites aren’t such terrific drivers on snow and ice, and it worries me to attempt to drive most places. But even had I wanted to try to get behind the wheel, I awoke to find my hill blocked off.  Of course I considered walking, but even schlepping around with yak tracks on my shoes on my steep hill was challenging. Meanwhile, my condo neighbor was outside shoveling every few hours, taking care that we would all be safe.  He skied down our hill and then dropped off a bag of oranges for me.

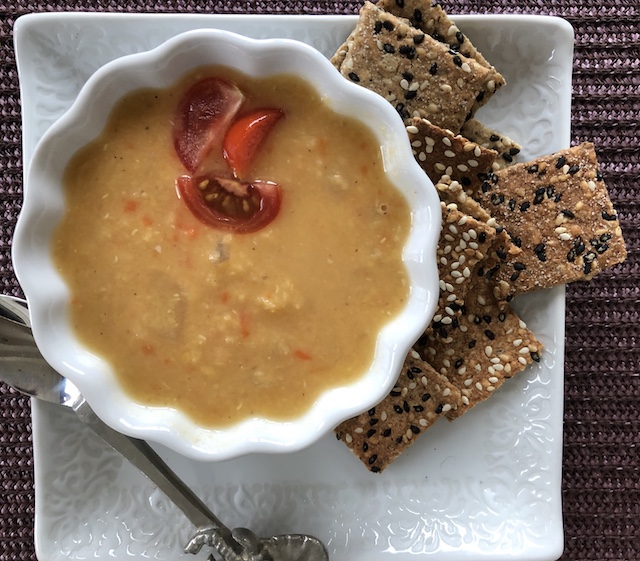
I figured I had enough food and provisions to get by until it warmed up and, after foraging through my cupboards and fridge,  I decided to make a pot of lemony red lentil soup. The ingredients are all things I keep around my kitchen. All I lacked was stuff for the garnish (cilantro, avocado, tomato) which is why my photo doesn’t look so pretty.  Use your imagination – it would look nice with some green and red on top.

And of course, I shared some of this delicious soup, along with my homemade seeded crackers, with my kind neighbor to show my appreciation for his hard work.  


Lemony Red Lentil Soup

Serves 4-5

pf-icon2


Ingredients
  • 3 tablespoons olive oil
  • 1 large brown skin onion, peeled and chopped ¼ inch
  • 3 garlic cloves, peeled and coarsely minced by hand
  • 1 tablespoon tomato paste  (remember the tube?)
  • 1 teaspoon ground cumin
  • ¼ teaspoon sea salt
  • ¼ teaspoon freshly ground black pepper
  • Pinch of ground chili powder
  • 1 quart chicken broth-I had some homemade stock in the freezer but Better than Bouillion is fine too
  • 2 cups water

  • 1 ⅓ cup red lentils

  • 2 large peeled carrots, diced  ¼ inch
  • Juice of 1 lemon (about 3-4 tablespoons)
  • 3 tablespoons chopped fresh cilantro to garnish
Instructions

In a large soup pot, heat three tablespoons oil over high heat until it shimmers.   Add onion and garlic, and sauté until golden, about four minutes.

Stir in tomato paste, cumin, salt, black pepper, and chili powder and keep on the heat, stirring, for two minutes more.

Add broth, two cups water, lentils, and carrots. Bring to a simmer, then partially cover pot and turn heat to medium-low. Simmer until lentils are soft, about 30 minutes. Taste and add salt if necessary.

Turn off the heat.  Use an immersion blender right in the soup pot and pulse the soup so that some smoothes out and the rest remains chunky so you have a little texture.

Add in lemon juice first and taste to see if it needs more salt.  Have some garnishes on the side: diced avocado, halved cherry tomatoes, chopped cilantro, sour cream or Greek yogurt…use your imagination.   You can drizzle a little olive oil at the end as well. Serve with a nice salad and some bread or crackers. MMMMMMMMMMMM

Share
Posted in Soups | Tagged | 2 Comments

Kitchen Sink Vegetable Quinoa Bean Stew

Click here to view recipe.

Satisfying & Sumptuous Stew

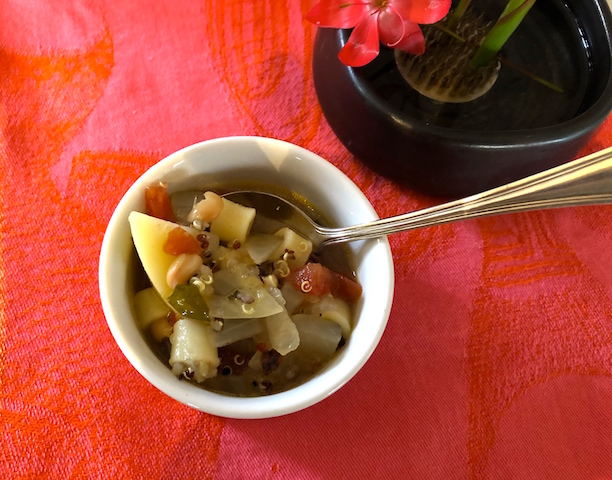
This is a filling yet fresh and light soup I made spur of the moment after our eating marathon Thanksgiving weekend.  I mean, after Thanksgiving food, a huge family Friday night meal complete with more fish, more turkey, potatoes, mac and cheese with squash,  pies (SO many pies), cookies (countless kinds)…to say I was full is an understatement. Then, after driving home from Kal’s Cabin, we unpacked leftover food and clothing.  

I was really too tired to go to the grocery store on Sunday and imagined it would be packed with people just like me who needed to get stocked up for the next week. So instead, I did a quick search in my cupboards and freezer and files and resurrected this soup recipe from The New York Times. To spice things up a bit, I added some leftover fresh frozen green beans, small ditalini pasta, and a few potatoes and a squeeze of lime juice.  I had every single item needed in my cupboards, fridge, and freezer! NO GROCERY STORE SHOPPING WAS NEEDED!

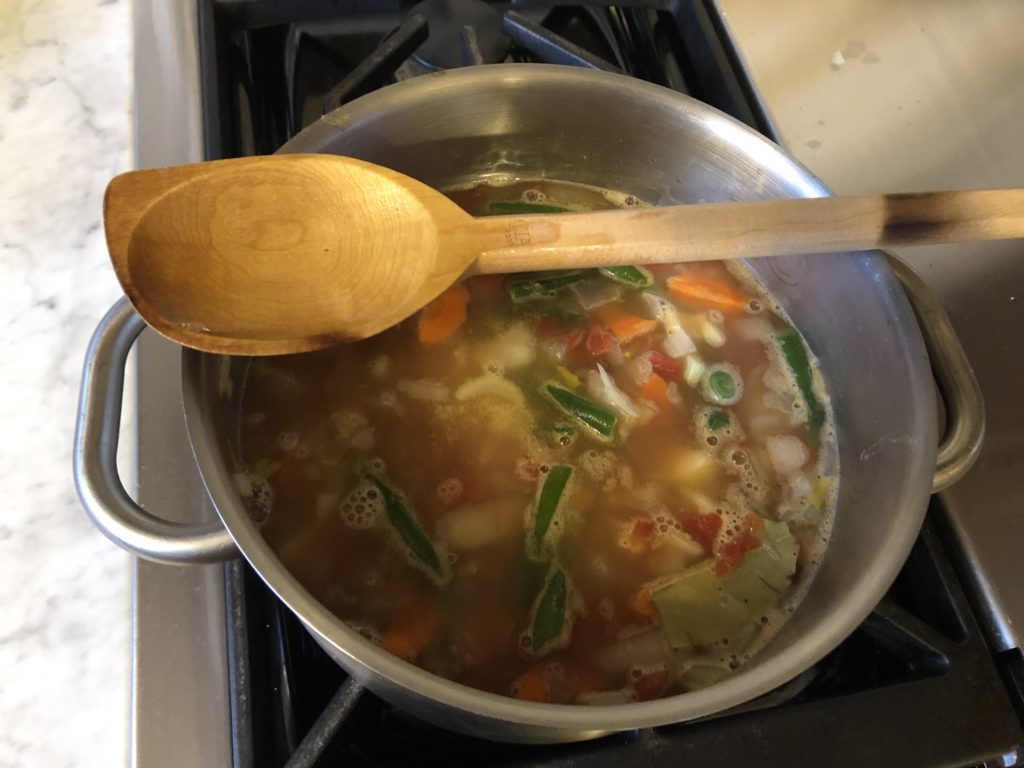
One Pot Wonder!

The result was a filling but fresh tasting soup.  I liked it enough that I made it again mid-week because I had freshly cooked pinto beans and wanted to see how that would work   It turned out the broth I saved from cooking the beans made even better soup stock.

Quinoa Bean Vegetable Soup

Adapted from The New York Times

Serves 6-8 easily

pf-icon2


Ingredients
  • 3 Tbsp  olive oil
  • 2 medium yellow onions, chopped ¼ inch
  • 3 large carrots, peeled and chopped ¼ inch
  • 2 stalks celery, trimmed and finely sliced ¼ inch
  • 2  very small, peeled new potatoes (1 inch in diameter), peeled and cut into 6 pieces each
  • 1 can (14 1/2 ounces) cannellini or other white beans, drained OR 1½ cups drained beans that you have freshly made (pinto or garbanzo beans worked great)
  • 3 cloves garlic, finely chopped by hand
  • 1 can (14 1/2 ounces) chopped tomatoes, with their juices
  • ¾ cup ditalini pasta or orzo pasta, uncooked
  • 8 cups vegetable stock (I use bean juice + water to = 8 cups, or you could add a little Better Than Bouillion to the water if you want more flavor
  • ½   cup raw quinoa, rinsed first
  • ⅓ cup chopped fresh parsley
  • ½ cup cut green beans (1-inch pieces) or corn kernels (fresh or frozen)
  • 2 bay leaves
  • Sea salt and ground black pepper
  • Juice of ½ medium sized lime (if desired)
Instructions

Heat oil in a large, heavy-bottomed saucepan over medium heat. Add onions, carrots, and celery, and sauté until barely tender, about 5 minutes. Add beans and garlic and stir for 2 minutes.

Stir in tomatoes and their juices, and vegetable stock. Simmer for 20 minutes.

Add quinoa, parsley, frozen or fresh green beans, any other herbs you love, and bay leaf. Cover and simmer until quinoa is cooked, 12 to 15 minutes. When 9 minutes remain of your cooking time, add the dry ditalini or orzo.  

Season with salt and pepper to taste. Remove bay leaves, taste and add the lime juice if you want to brighten the flavor and serve.

The stew gets much thicker if you make it the day before, which I like better.  Serve with a simple butter lettuce salad and some rustic, grainy bread and you have yourself a meal!  If you don’t want such a thick soup, boil the ditalini pasta separately and add it right before reheating.  You could also substitute cooked brown rice for the cooked pasta.

Share
Posted in Soups | Tagged | 2 Comments