Yael’s Super Caesar Salad

I end up making this in the summer when I am in the mood for something salty and tangy. Now I sub grapeseed oil for canola (healthier) and I renamed it “Yael’s Super Caesar Salad.”  When my family visited last week, I made Caesar Salad (and threw in some leftover fish) and my son didn’t think the kids would eat this for dinner.  To my gleeful surprise, they both ate multiple helpings and Yael, who is seven, wanted me to name this after her since her brother Levi now has “Levi’s Luscious Hot Fudge Sauce.”  A food for every grandchild, I guess.

***************************

Hail Caesar!

Click here to view recipe.

Caesar Salad - Simple & Satisfying

Caesar Salad – Simple & Satisfying

I’ve been on a Caesar Salad binge for about a month now…crispy heads of Romaine, salty homemade croutons, and creamy dressing: what could be bad about this?  I have all the fixins prepared ahead of time, and most days I indulge shamelessly and consume a nice amount of Caesar.  Lettuce counts as a vegetable in my eyes.

From what I can remember, Caesar salad has been around as long as I’ve been an adult – in other words for a long, long time.  Other salad trends come and go, but Caesar is a staple and beloved by so many young and old.  And it seems like everyone has a favorite Caesar salad recipe.  Many cooks love the drama and flash involved with making this tableside with a wood bowl, a whisk and elbow grease.  But me?  I’ve never been a showman, I should say show-woman.  All I care about is that the final creation I make brings joy to me and to those I am feeding

This is one of my recipes I made by the gallon back in my catering life.  Everyone asked about our Caesar, and ironically I landed a few jobs just because of this simple salad.  While I was a business person, I never dared divulge my tried and true catering recipes.  And now?  If you ask me for a recipe, I’ll gladly share with you!

I simplified my catering recipe even further since I now own a Nutribullet – although a blender works just dandy too.  I don’t even bother to grate the parmesan cheese, but weight out what I need and let the blender do all the work.  And everything goes in at once, making this a breeze. The version I’m sharing has anchovy paste because I love the salty flavor, but if this doesn’t float your boat just skip the anchovy and add Worcestershire sauce.

It's all about the dressing...

It’s all about the dressing…

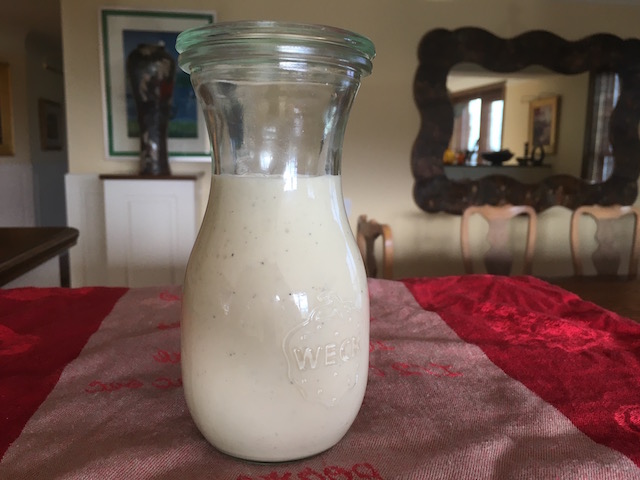
Blender Caesar Dressing

Makes 1 ¼ cups dressing

pf-icon2


Ingredients
  • 1 whole egg (supposed to be coddled for a minute – I used a pasteurized egg instead but you can read how to do this here: https://en.wikipedia.org/wiki/Coddled_egg)
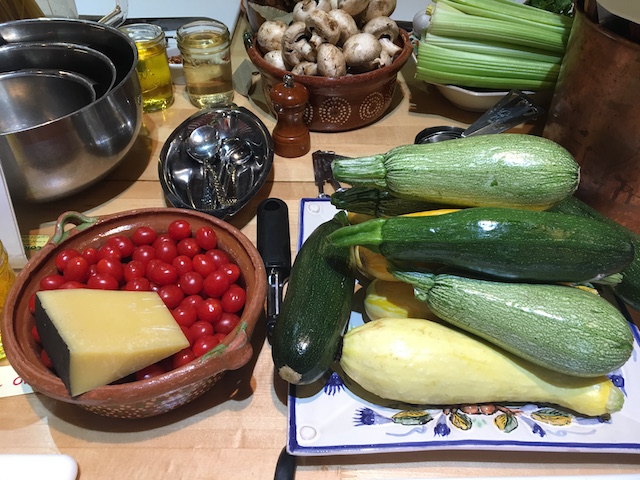
  • ½ cup high quality grated Italian Parmesan/Reggiano cheese-eyeball it or if you have a kitchen scale,r simply weigh out a  2 ounce chunk of cheese
  • ¼ cup fresh lemon juice (1 large lemon + add unseasoned rice vinegar if you don’t have quite enough juice from one large lemon)
  • ½ teaspoon anchovy paste (If you don’t like anchovy, use one teaspoon Worcestershire sauce)
  • 2 whole cloves garlic
  • ½ tsp fresh black pepper ground
  • ½ tsp sea salt
  • ½ cup salad oil (not olive oil – I use canola oil)
Instructions

To begin with – HAVE EVERYTHING (eggs, lemon, cheese and anchovy paste)  AT ROOM TEMPERATURE!  If the ingredients aren’t at room temp, you’ll have to slowly drizzle in the oil at the end.

Add all the ingredients including the oil to a Nutribullet or whirl using a blender, run the motor until everything is smooth.  This takes me about 20 seconds.

Pour into a glass container and refrigerate at least an hour or up to a week.  Let stand at room temp 15 minutes before serving.

To compose the salad, use chopped or whole leaves of Romaine lettuce and fresh croutons too.

Cook’s notes:  

Be sure to make homemade croutons! Just cube up a denser (usually leftover) baguette bread into ¾ inch pieces (I use a small loaf from Macrina bakery from my beloved neighborhood Metropolitan Market called “Giusseppe Roll”).  Coat the cubes with half a tablespoon of olive oil and sprinkle with salt, then bake 325 for ten minutes – or until the cubes are brown.  Cool and store at room temperature.  I usually make a bunch of these for the week and briefly pop them in the toaster oven at 300 degrees for a few minutes to freshen them up before I toss my salad. I’ve also made the salad a bit unique by using leftover rye bread for croutons.  It’s surprisingly great.

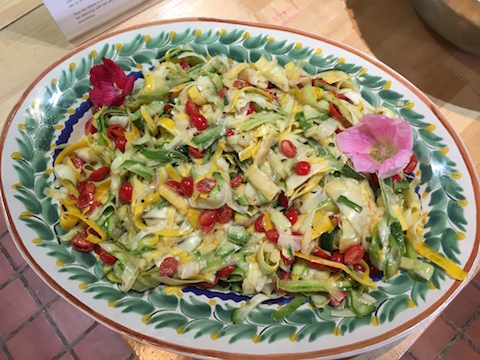
It’s not traditional, but I often add halved cherry tomatoes and avocado to my Caesar.  Or I add cherry tomatoes along with fresh mint and oregano.  I”m shameless.

And finally, if you aren’t into cheese, you can make this eliminating the parmesan — you’ll end up with a creamy, garlicy lemony dressing that is mighty fine.

Share
Posted in Salads & Dressings | Tagged | Leave a comment

Zucchini Ribbon Salad

Click here to view recipe.

Super Colorful Zucchini Salad

I know, I know.  Zucchini doesn’t sound too exciting as a salad, but hear me out.  In early summer there are mounds of fresh, inexpensive zucchini at farmers markets and grocery stores throughout the country.  And if you have a plant or two in your yard – you know of which I speak. Zucchini for weeks and weeks.

Personally, I am not a huge fan of cooked zucchini because I find it watery in texture and not that flavorful.  HOWEVER, I made this salad while in a class taught by visiting chef, Joe Yonan, food editor of The Washington Post.  It was an interactive, hands-on class with about seven dishes to prepare, and we were able to choose which recipe we wanted to cook.  I was feeling fairly lazy so I decided to try making something that was quick and which did not involve the stove (it was a hot afternoon, after all).  I was paired with two women from San Diego and we whipped this up in no time flat.

And you know what?  This absolutely will be THE salad that I will bring to various potlucks this summer.  I have been preparing another previously published raw zucchini dish for a while now, and this is just as refreshing and as easy to make.  Plus, this one is pretty, colorful and tastes like summer.

A GREAT COOKBOOK indeed!

The recipe is from America the Great Cookbook (with a few of my own twists and turns, of course). What I love about this cookbook is that it supports Share Our Strength’s incredible No Kid Hungry initiative. In case you’re not familiar with the cause – here’s their Mission Statement:

“NO CHILD SHOULD GROW UP HUNGRY IN AMERICA. But 1 in 6 children struggles with hunger. Share Our Strength’s No Kid Hungry campaign is ending childhood hunger in America by connecting kids in need with nutritious food and teaching families how to cook healthy, affordable meals. You can help surround kids with healthy food where they live, learn and play.”

Zucchini Ribbon Salad

Serves 6

pf-icon2


Ingredients:
  • 3 green zucchini
  • 2 cups small grape or cherry tomatoes, cut in half
  • 3 yellow squash
  • ¼ cup sherry wine vinegar
  • ¼ cup extra virgin olive oil
  • Grated zest of 1 lemon
  • Fine sea salt and fresh ground black pepper
  • ¼ cup good quality grated Parmigiano-Reggiano cheese
  • ¼ cup loosely packed fresh mint leaves.  (I will try fresh dill leaves next time just for a change)

Such Simple Ingredients

Instructions:

Make the dressing: combine the vinegar and olive oil.  Add the tomatoes and season with the salt and pepper, and let this marinate while you make the squash ribbons.

Using a sharp vegetable peeler, cut the zucchini into lengthwise ribbons.  Peel off several ribbons from one side, then turn the zucchini and peel off more ribbons.  Continue turing and peeling until you get to the seed part at the core of the zucchini. You can also do this with a spiralizer or mandoline, although the veggie peeler method went fast. Repeat for the yellow squash

Right before you are ready to serve the salad, place the ribbons in a serving bowl with the tomatoes and dressing, add the cheese and gently toss.  Taste and add more salt and pepper–remember that Zucchini is bland and might need more salt than you initially anticipated. Finally, add the mint and toss to coat.  Serve immediately.

Share
Posted in Salads & Dressings | Tagged | Leave a comment

Simple Summer Rhubarb Strawberry Bars

Click here to view recipe.

Super Simple Rhubarb Strawberry Bars

This recipe came to me in 2018 on Fathers Day…we had a family shindig for the dads (and uncles who have been fill-in dads) and for the moms who enabled their men to become dads.  Anyway, I kind of organized this mid-afternoon swim party/early dinner and signed up for bringing barbequed chicken, beans and slaw. Others were assigned beverages and paper goods and my daughter said she’d make these bars.  

If I had seen the recipe published, I’m not sure I would have headed immediately to the store to get the ingredients or that I would have swooned over the idea of these bars.  HOWEVER, I tasted them and I was hooked from the first bite. They originate from One Bowl Baking, although I made many changes in amounts, method, ingredients, baking time — even the way to ensure they are gorgeous when cut…so I can almost call them my own.

The same week as father’s day, I made these EVERY DAY. Arguably, some went to a family with a new baby, a few went into the freezer but the majority of these little bars are in my stomach (and my husband’s stomach too).  I became obsessed with making them perfect (I do love things to taste great AND look appealing) and I tried lots of tweaks.

Ready for the oven!

Below is what I decided is the perfect bar.  Now I plan to try this with different fruit (blackberry/cranberry?  Apricot/blueberry? The sky’s the limit. I cut mine into beautiful little rectangles and store them in the freezer long term and in the fridge short term.

Rhubarb Strawberry Bars

Makes 12 nice sized servings (if you only eat one)

pf-icon2


Filling Ingredients
  • 1 cup rhubarb, diced into ¼ inch cubes
  • 1 cup seasonal strawberries, stems removed and cut into ¼ inch cubes
  • 1 Tbsp orange juice
  • 1 tsp cornstarch
  • Grated zest of 1 orange
Crust and Topping Ingredients
  • 1 cup old-fashioned rolled oats
  • 1 cup minus 2 Tbsp all-purpose flour
  • ½ cup packed dark brown sugar
  • ¼ tsp fine sea salt
  • 6 Tbsp melted salted butter
Instructions

Preheat oven to 375 degrees with rack in the middle of the oven.  

Line an 8 x 8 metal brownie pan with parchment paper (cut to about 8 x 12?) – leaving some of the paper extending over the sides in one direction and put a second sheet of parchment going the other way with paper extending up the sides as well.  I take my fingernail to be sure the bottom edges and corners of the paper won’t slide about and I spray the paper with Pam.

Dice up fruit, stir in orange juice, zest and cornstarch and mix well.  Let it remain on the counter while you make the bottom crust and top crumble. Stir it again when you walk by.

Mix together the oats, flour, brown sugar, and salt and dribble in the butter, mixing everything together with your hands.  (This is a great job for little people too). Remove a little less than ½ cup of this crumble.

Press the remaining flour/oat mixture for the crust into the bottom of your brownie pan.  I make sure everything is even steven, then I press it down firmly using an offset spatula.   or bench scraper.  Top with the fruit mixture and make sure this layer is even.  Top with crumbs of the crust-making sure it doesn’t stick together in clumps.  I then lightly press down on the topping with my hands.

Put into the preheated oven and bake for 42 minutes (look at 35 minutes-it should be browning). Remove from the oven when it is brown and smells delish, and let the pan cool on a rack for a half hour or so.  Put the entire pan, when cool to the touch, in the refrigerator for at least an hour or even overnight.

Remove the bars gently from the brownie pan, using the parchment paper.  Peel the paper away and put the mass of uncut cookies on a cutting board.  Cut into 12 nice pieces (4 rows down and 3 across) with a sharp, long knife.  

Keep these stored in the fridge for up to 5 days or in the freezer for up to 3 months. Repeat as long as you can get tender, fresh rhubarb, and nice strawberries.

Share
Posted in Dessert | Tagged | 1 Comment

Simple Summer Strawberry Shortcake

Click here to view recipe.

Celebratory Shortcake!

If you ask me what my very favorite type of summer fruit, there is no contest.  I LOVE BERRIES!! Raspberries take first place followed closely by strawberries, but I only like berries that are fresh off the vine, preferably eaten within a day or two of picking.  In June and July, I become obsessed with making sweet and savory dishes using berries.

Imagine my delight when I took part in a recent hands-on class taught by Joe Yonan.  This particular strawberry shortcake wasn’t something I prepared in the class, but it was made by a few students and served to all twenty of us that evening.  I thought it was a genius move to make the shortcake in a large disk, then cut it into wedges to serve rather than to bake individual shortcakes. I loved the taste of the not-too-sweet dessert and knew it was going into my summer berry recipes rotation.  

Two weeks later, serendipitously, I was invited to accompany my in-town grandkids for two days close to the Cascade mountains.  My grandson Asher celebrated his birthday during this time! It has become my daughter’s tradition to let the birthday kid (or adult) select the menu for their birthday …so Asher and I had quite a discussion about what he wanted to eat for his birthday dinner.  He settled on baked salmon, a sliced veggie platter with raw carrots, tomatoes and cucumber spears (and yes, everyone ate a huge amount of the vegetables). He also requested spaghetti with homemade red sauce and parmesan, and strawberry shortcake for dessert. My now 7-year old grandboy has a very sophisticated palate.

Asher & Grandma

The best part of all is that Asher made most of his birthday “cake.”   I measured out the dry ingredients at home and brought everything in a container along with whipping cream, and he destemmed all four cups of tiny fresh strawberries, then made the shortcake, patted it into a circle, painted it with butter and turbinado sugar and finally helped me hand-whisk whip cream for the top.  

The Chef

Wowza!  It was good… really really good in fact.  If you still have strawberries in your neck of the woods (or if you have strawberries later in the season) this is super easy and wonderful to take to a picnic or 4th of July celebration.  We served seven eaters and refrigerated the remaining five slices of shortcake. For breakfast the next day, we put a piece of cake on a plate and heated it for 10 seconds in the microwave, then topped it with berries and cream.  Asher’s crazy grandfather (Zadie Wayne) put his shortcake in a bowl with berries and cream then made a moat of milk. Not my thing, but he loves soggy stuff like that.

Strawberry Shortcake

(from America the Great Cookbook with my changes, of course)

Serves 8-12

pf-icon2


Ingredients – Berry Topping
  • 4 cups (2 pints) of small ripe strawberries, stems removed.  If your berries are larger, cut them into ½ inch pieces
  • 2 Tbsp turbinado sugar
Ingredients – Shortcake Biscuit
  • 1 cup all-purpose flour
  • 1 cup cake flour
  • 1 Tbsp baking powder
  • 2 tsp sugar
  • 1 tsp table salt
  • 1 ½ cups chilled whipping cream
  • 1 Tbsp melted butter + 2 tsp turbinado sugar
Ingredients – To serve:
  • 1 Tbsp soft butter to brush on the biscuit while it is still warm)
  • ½ cup heavy whipping cream, hand whipped to soft peaks
Instructions:

For the berries: in a bowl, toss the cut berries with the sugar and mash them slightly with a fork (if they are tiny and soft) or a potato masher.  Set aside for 45 minutes and stir occasionally while you are making the shortcake

Preheat the oven to 425 degrees.  

Mix together the flours, baking powder, sugar, and salt. Add the cream and mix with your hands until the dough holds together slightly.  Knead a few times (don’t overdo or the dough will be tough) then pat the dough into an 8 inch by a ½ inch tall circle on a parchment lined cookie sheet. The dough is quite soft and felt like bread dough.   Brush with one tablespoon melted butter and sprinkle with two teaspoons of turbinado sugar.

Bake for 15 minutes, then lower the oven temperature to 325 and continue baking another 10 minutes.  Remove the cookie sheet from the oven and brush the shortcake with one tablespoon of melted butter while it is still warm.  It can stay on the counter for an hour or so.

To serve, cut the shortcake into wedges, top each piece with about ½ cup of berries and their juice, and top with a dollop of whipping cream.  Eat and repeat.

PS: I am actually going to try this with diced peaches (aka peach shortcake) too … just because.   

Share
Posted in Dessert | Tagged | Leave a comment

Lemony Fettucine 2.0

Earlier in the week, I had a lot of fresh asparagus and some previously served salmon along with fresh dill.  I went to the farmers market to buy fresh spinach fettucini, and made my Spring pasta, adding in leftover chunks of salmon and fresh dill.  Even better than the original below (which I originally posted way back in 2013). My-oh-my!

***************************

Click here to view recipe.

Fabulous Fettuccine

This spring, I experienced what it is like (again) to parent a four year old – or as my grandson would say, a “4 and a third year old.”

My husband and I happened to be in Iowa for the Passover holiday, and offered to bring our oldest grandson home to Seattle for almost two weeks. It was an uber-busy time for our daughter – moving and setting up her new office, single parenting for the entire time while her husband was out of town interviewing for the next phase of life, on and on. When we offered to fly back with Zay, she initially refused but shortly warmed to the idea. Being at home for almost two weeks with only her 21-month old turned out to be pretty appealing. Zay was pretty excited too. Especially when he learned that he’d have his very own room for two weeks – plus lots of friends and family to visit and daily outings with grandma and grandpa.

Zay at Ballard Farmer’s Market

So what was it like? Well, I don’t remember being as tired in my thirties as I am in my sixties. I feel I am more patient now and don’t sweat the small stuff – like waking up too early and going to bed too late. And boy, was it fun to see the world through the eyes of a four-year-old.

All in all, it was delightful for Zay, but even more so for us. The only drawback – and it was, unfortunately, a nightmare – ended up being the airlines and the flights we chose. Snow in April? Yes. Canceled flights? Yes. Overnights in Denver? Yes. Everything that could have gone wrong with our airline tickets went wrong.

It was still worth it. Our daughter had a more relaxing time with her younger son and he had much more time to be the center of attention. And I’ve decided that I want to make this a tradition for each grandchild – to be here by themselves in Seattle with their grandparents for a good stretch of time.

Zay ended up being really flexible and understanding. I loved cooking for him, taking him to farmers markets, and explaining the sites and sounds of Seattle. Since asparagus turned up everywhere, we concocted this dish following a trip to the Pike Street Market where we purchased fresh fettuccine noodles. My husband deemed it the best pasta I had ever made! If you knew him, you’d realize this is a huge compliment. And Zay didn’t leave one noodle in his dish!

Simple Ingredients

If you live near an Italian market that has sheets of egg noodles, this is a slam dunk. I suppose it would be good with dried noodles as well, but there is really no contest.

Lemon Fettuccine with Asparagus

Serves 6

pf-icon2

Ingredients
  • 8 ounces fresh egg pasta – cut for fettuccine
  • 2 Tbsp salted butter
  • ¼ cup of fresh basil, julienned
  • 3 Tbsp fresh squeezed lemon juice
  • 1 ½ Tbsp grated lemon rind (I did mine on the microplane grater)
  • 1 cup heavy cream
  • ½ cup grated Parmesan cheese
  • ½ tsp fine sea salt
  • Fresh ground black pepper to taste
  • 1 lb fresh asparagus
Instructions

Snap off the ends opposite the tips of the asparagus. Unless the stalks are the pencil thin, I peel the stems with a veggie peeler (if thin, you can omit peeling), put in large deep sauté pan with an inch of water. (My sauté pan is 11 inches in diameter.) Bring to a boil, and lower to medium heat for 2-3 minutes until the asparagus is bright green and barely tender when pierced with a fork. Remove the stalks of asparagus and put into ice water and let sit for 5 minutes. This stops the cooking and quickly cools the vegetable. After the asparagus is cooled and dried, cut it into 1-inch pieces.

In a large nonstick soup pot, bring water to a boil. Add two teaspoons of salt.

Meanwhile, in a medium saucepan, melt the butter over medium heat for 2 minutes. Add the basil and cook another 2 minutes. Stir in the lemon juice and lemon rind, and continue to cook 2 more minutes. Reduce the heat to low and add the cream. Slowly cook the cream until a thick sauce forms. Stir in the pepper and the grated Parmesan and set aside.

When the pot of water comes to a boil, drop in the fresh pasta and cook without covering until it is al dente. The timing will be determined by whether you use fresh or dried pasta. Since mine was fresh this only took about 3 minutes.

Drain the pasta noodles into a colander then add the sauce and pasta to your pasta water pot. (Note: this is why you want it nonstick. If it is a regular stainless steel pan, clean up is a lot more involved.) Stir until the pasta is thoroughly coated. Add in blanched asparagus and stir well.

Serve with extra grated cheese and a simple green salad.

This was so lemony and good that I’ll make it a couple more times while asparagus is in season. And keep in mind that the fresh egg noodles freeze beautifully if you buy extra!

Share
Posted in Pasta | Leave a comment

Addictive Crispy Chocolate Chunk Cookies

Click here to view recipe.

I Just Couldn’t Help Myself!

OK people. In the past, I posted a recipe for salted chocolate chunk cookies that are firm on the edges with a soft interior.  They are the bomb.

But these?  These are, as my husband says, “ the best cookies I’ve had in 69 ½ years.”  And I wholeheartedly agree, even though I am a year younger and a much more sophisticated cookie taster.

These are a cross between toffee, shortbread, and chocolate chippers.  They are really crispy through and through, not too sweet (I even decreased the sugar suggested in the original recipe) and they have a deep, interesting, nutty flavor.  Again, I think this is in part due to the Lyle’s golden syrup I subbed for the original recipe’s light corn syrup. Lyle’s is my favorite “golden” syrup and I love the flavor when added to batters and doughs.  (The original recipe came from Amanda Hesser of the New York Times.)

Addictive Crispy Chocolate Chunk Cookies

Makes ~32 cookies

pf-icon2


Ingredients
  • 1 ¾ cups all-purpose flour
  • ¾ teaspoon baking soda
  • 1 tsp fine sea salt
  • 14 tablespoons (1 ¾ sticks) salted butter, melted
  • ½ cup packed dark brown sugar
  • ⅓ cup granulated sugar
  • 2 tablespoons Lyle’s golden syrup
  • 1 tsp pure vanilla extract
  • 2 tablespoons milk
  • 1 ½ cups chopped bittersweet chocolate (pea-size pieces and shavings)I started with Ghirardelli bittersweet chunks and ran a knife through them until they were smaller
  • 2 cups chopped toasted pecans (optional) – chopped the same size as the chocolate
Instructions

Preheat the oven to 300 convection degrees. Line two baking sheets with parchment. Sift together the flour, baking soda, and salt.

In a mixer fitted with a paddle, mix the butter, sugars and corn syrup for about three minutes. Stir in the vanilla, then the milk. Add the flour mixture all at once and blend just until a dough forms. Fold in the chocolate and walnuts. Chill the dough for at least an hour.

Roll 1 ½ tablespoon lumps of dough into balls, then place on the baking sheet and flatten to 1/4 inch-thick disks spaced two inches apart. Chill the dough between batches. Bake until the edges are dark golden brown, 17 minutes. Let cool slightly on the baking sheet, then transfer to a baking rack.

I do one cookie sheet, mid-oven at a time.


Share
Posted in Cookies | Tagged | Leave a comment

Cast Iron Chicken & Orzo

Click here to view recipe.

Chicken & Orzo – So Simple!

This spring, I have been obsessed with both my pressure cookers (I own two) and my cast iron skillet.  I have come to realize that I truly could live forever with just these pots and pans and be able to make delicious food with little fuss or bother.

I have also been a recent convert to chicken thighs.  I used to love white meat, bone-in chicken or turkey breast meat, yet recently I have settled on dark meat for it’s higher fat content (read flavor) – plus it gives me a little more wiggle room while cooking.  I just find it tastier and more adaptable to the dishes I like to make.

Enter this recipe I spotted for a “one pot chicken thighs with orzo” dish on Epicurious.  I had chicken thighs with bone in and skin on in the freezer AND I had both a fennel bulb and a large leek from the farmers market so it seemed to be calling my name.  I did not have white wine or the usual vermouth that I keep in the fridge for times like this, but I did have rum. Why not? It’s a little sweet but I didn’t feel like making a special trip to the grocery store.  

Cast Iron Chicken Thighs with Orzo* 

pf-icon2


Serves 4-6

Ingredients
  • 6 skin-on, bone-in chicken thighs (about 2 pounds total), patted dry
  • ½ tsp sea salt (fine)
  • ½ tsp ground black pepper
  • 1 tablespoon salted butter or oil
  • 1 fennel bulb, chopped, (reserve and chop the fronds to sprinkle on top of the finished dish)
  • 1 leek, white and pale green parts only, chopped
  • 8 ounces uncooked orzo pasta
  • ⅓ cup dry white wine or vermouth (or rum!)
  • 2 ½ cups chicken broth (I cheated and used Better Than Bouillion)
  • Juice of one lime
  • Grated lime zest from a whole lime
  • 1 Tbsp butter if desired after the chicken is cooked
Instructions

Preheat oven to 400°.

Press salt and pepper onto the skin side of the chicken thighs.

Heat 1 Tbsp butter (or olive oil if you prefer in a preheated (medium-high) cast iron skillet. Nestle chicken, skin side down, in skillet in a single layer with no gaps. Cook until the meat is opaque around the edges and skin is deep golden brown, 6–8 minutes. Turn chicken skin side up and transfer the cast iron skillet to the preheated oven; bake, uncovered, until chicken is cooked through, (~15  minutes). Transfer chicken to a plate.

Set the same skillet over medium heat; combine chopped fennel bulb and sliced leek in skillet and sprinkle in some salt and pepper. Cook, tossing occasionally until the leek is looking golden around the edges, about 5 minutes. Be careful of the very hot panhandle!

Add orzo and cook until pasta is darkened (it will take on a brown hue) to a nice nutty brown in spots and toasty smelling, about 3 minutes. Pour in wine (or rum!) and cook, stirring, until liquid is evaporated, about 1 minute. Add broth ½ cup at a time, stirring constantly and letting broth absorb before adding more until orzo is tender and broth is mostly absorbed but the pan is not dry, 10–15 minutes. You might not need all the broth.

Remove skillet from heat, taste and add more salt and pepper to your liking; mix in lemon juice and remaining 1 Tbsp. butter, then chopped fennel fronds. Pile chicken on top and finish with lemon zest. I pick something colorful to garnish this dish since it is pretty brown!

*Recipe adapted from Epicurious

Share
Posted in Poultry | Tagged | Leave a comment

Rhubarb Custard Dessert Reminder

I really should have titled this “Rhubarb Crack”.  I mean seriously people – it is addictingly delicious. I can’t believe it’s been THREE YEARS since I posted it. I know I’ve dreamt of it countless times and as soon as I spotted bright pink stalks of rhubarb at the farmer’s market earlier this month – I knew exactly what I was making. Try it. You won’t be sorry!

***************************

Rhubarb Custard Dessert

Click here to view recipe.

Rhubarb Custard Dessert ... or "Rhubarb Crack" as it's lovingly known in our family

Rhubarb Custard Dessert … or “Rhubarb Crack” as it’s lovingly known in our family

I love living in my condominium … no huge yard to tend to but just the right amount of room in my planter boxes for herbs and tomatoes.  That said … every spring when I pass by yards featuring huge, wild patches of rhubarb – it gives me pause. And I have to admit – I get a little jealous.  When my daughter and her family lived in Iowa, her office had a massive clump of wild rhubarb growing outside that we would harvest for days on end, creating countless desserts and sauces and salsas.  Those were the days…

From all this rhubarb madness, I became most enamored of today’s recipe – it’s my all time rhubarb dessert prizewinner. I saved a typed copy of this recipe a while ago and cannot for the life of me remember the origin. But I’ve made it several times since, tweaking it here and there (surprise, surprise).  I do know that it originated back in the day before anyone worried about consuming too many eggs and too much butter and such.

Rhubarb Custard Dessert

Serves 10-12

pf-icon2


Crust Ingredients
  • 2 cups whole wheat pastry flour (not plain whole wheat, but whole wheat pastry flour.  It makes a difference)
  • 2/3 cup cold salted butter, cut into ½  inch pieces
  • 1 egg
Rhubarb Filling Ingredients
  • 8 cups rhubarb, cut into 1 inch slices
  • 6 large eggs, room temperature
  • 2 cups granulated sugar
Topping Ingredients
  • 1 cup whole wheat pastry flour
  • 1/2 cup cold salted butter, sliced into 1/2 inch bits
  • 1/2 cup granulated sugar  (add a bit more if you like pretty sweet desserts – I do not and this amount is perfect for my tastebuds)
Instructions

Use an 11-inch springform pan or a 9 x 12 cake pan.  I like the looks of pieces cut from the springform pan.

Preheat the oven to 350 with a rack in the middle of the oven.  Grease and flour the bottom and sides of the springform pan. I line the bottom with a round piece of parchment paper to fit, then re-grease and flour the paper.

In a food processor pulse together the two cups flour, and ⅔ cup butter until it looks like sand. Stir in the egg.  Dump all of this into the bottom of your pan and firmly press it on the bottom (and up the sides if you are using the springform.  It doesn’t have to be perfect!)

Put the rhubarb on top of the crust.  It will be pretty full, which is OK since the rhubarb cooks down.

Mix together the remaining six eggs and two cups sugar and pour over the rhubarb.

Pulse the topping ingredients (flour, butter and sugar) in the food processor until crumbly and sprinkle over the rhubarb and custard layer.

Bake mid oven for 70-80 minutes or until topping is browned.  Let it cool completely on the counter then put in the fridge and let it get cold before removing the ring of the springform pan.

This is wonderful if you sneak a nibble right out of the oven, or when barely warm or even cold.  I store this in the refrigerator and it stays nice for a week.  I eat it for breakfast straight up, but if using it as a dessert I always serve this with a scoop of good quality vanilla ice cream or even slightly sweetened whipped cream.

Now go harvest that rhubarb!!

Share
Posted in Dessert | Tagged | 2 Comments

Spinach Salad in Seattle

Click here to view recipe.

Sensational Spinach Salad

To me, cooking is like fashion.  Things come and go. What is hot and what is not often depends on the season. Heavier stews and hearty soups in winter and light salads or chilled vegetable dishes in the heat of summer.  Ingredients also come in and out of favor. Pomegranate molasses, chilies in adobo, edamame beans, and heirloom tomatoes aren’t ingredients you will find in older cookbooks. I remember that in my early twenties “salad greens” translated to either romaine or iceberg lettuce; wild greens and frisee weren’t even on my radar!  I expect that we will continue to see ongoing trends. Who knows what will be hot this year … Instapot beans? Turmeric in everything?

ANYWAY, I was invited to a dinner a few nights ago with other Baby Boomers.  Everyone was asked to contribute a dish and I volunteered to bring a salad for ten. I knew that a couple of those present were not “adventurous” in their tastes and some didn’t eat cheese. I began to look through my salad files on my computer, which translates into over 400 salad recipes – and this doesn’t even include my salad dressing recipes.  (One of the items on my “to do list” is to further divide these into main dish salads, lettuce-based salads, grainy salads and vegetable salads).

As I perused my list of salads, I noticed a spinach curry salad that was an OLD recipe.  I believe the last time I made it for company was about 30 years ago, no kidding. It sort of fit the bill for the weather as I love spinach salad right before spring and it was seasonal because apples are one of the only types of fruit you can buy at farmers markets in Seattle during the late winter/early spring (before rhubarb makes an appearance).  No other ingredients were too exotic or difficult to find – in fact, I had every other item in my pantry or refrigerator. I also have a beautiful large porcelain salad bowl and no matter what goes in there, it always looks impressive.

My self-made rule of thumb, when invited to a potluck, is to have everything pre-chopped and mixed so that I don’t have to use a lot of dishes or hunt for measuring spoons.  I brought the prepared spinach (organic baby spinach that I rewashed and de-stemmed) and had individual foil packs with the sliced apples coated with a little lemon juice (so they wouldn’t turn brown), peanuts, raisins, toasted sesame seeds and sliced onions.  I tossed all of this with the spinach right before serving and it was a wonderful first course that was followed by salmon and orzo-vegetable salad.

PS: I sent this recipe to my children and Jake wrote back and remarked: “I surprisingly can’t imagine what the dish tastes like but it sounds good.”   To elaborate on his remark, the salad contains an assertive curry flavor that combines with the sweetness of apples and raisins and is nicely tempered by the onions and crunchy peanuts.

And so I present Curried Spinach Salad adapted from a decades-old local collection of recipes, The Art of Salad.  This original recipe was credited to Judi Frank. And you know me … I changed the recipe quite a bit from the original copy!

Oldie But Goodie Spinach Salad with Curry Dressing

Serves 8-12

pf-icon2

Salad Ingredients
  • 1 lb. fresh baby spinach, washed and stems removed
  • 2 pink lady or gala apples, cored and sliced thin (leave the peels on)
  • ⅔ c dry roasted salted Spanish peanuts with skins
  • ½ c dark Thompson raisins
  • 1 bunch thinly sliced green onion, white and light green parts only
  • 3 T toasted sesame seeds for garnish
Curry Dressing Ingredients
  • ⅓ c unseasoned rice vinegar
  • ⅔ c canola oil or neutral oil-I believe olive oil would be good here too
  • 1 T finely chopped  mango chutney
  • 1 tsp. curry powder
  • 1 tsp salt
  • ½ tsp dry mustard
  • A couple dashes of hot sauce

Instructions

To make the dressing, I dump everything together in a large jar and mix it with a Nutribullet or immersion blender to make it creamier.

Wash,  dry and de-stem spinach and place in a large salad bowl.  Prepare the other ingredients. Soak the sliced green onions in cold water for a minute, then rinse and dry them.  This takes out the “bite” and aftertaste!

Mix apple slices (reserve about ¼ of them), peanuts, raisins and onions and place on top of the spinach. Mix with a bit of the dressing, toss and sprinkle sesame seeds on top.   I often garnish the very top with extra slices of apple.

Do not overdress the salad. You will need less than half of the dressing recipe.  The remaining salad dressing will keep for a long time in the fridge (about two weeks) and is good in grainy, room temperature salads too.

Share
Posted in Salads & Dressings | Tagged | Leave a comment

Shrimp & Grapefruit Salad

Click here to view recipe.

Sunny Shrimp & Gorgeous Grapefruit

I love this quick to prepare, fresh tasting and protein-laden salad.  During winter when citrus fruits are fresh and plentiful, this is the kind of salad I often crave. That said, now that winter is, hopefully, in our rearview- it’s also delightful to eat al fresco!

So…when my very pregnant daughter-in-law said she felt like a hearty salad with protein, I immediately thought of this Vietnamese-inspired salad.  It would be equally wonderful with sauteed tofu or shredded chicken in lieu of shrimp if that sounds better to you.

Shrimp & Grapefruit Salad


pf-icon2


4-6 servings

Ingredients
  • 1 ½ pounds shrimp, peeled and deveined
  • Salt to sprinkle on the shrimp as they cook – about ¼ tsp
  • 1 Tbsp extra virgin olive oil
  • 2 Tbsp fish sauce (I use Red Boat)
  • 1 Tbsp tamari sauce
  • 2 Tbsp water
  • 1 tablespoon granulated sugar
  • Juice of 2 average size limes
  • 6 cups mixed arugula and mixed greens, washed and dried
  • 3 pink grapefruit, peeled and sectioned, tough white pith removed, each section cut in half
  • ⅓ cup chopped mint leaves
  • ⅓ cup chopped cilantro (leaves and stems are fine)
  • ½ cup chopped dry-roasted peanuts
Instructions:

Grill or saute shrimp (or tofu or chicken breast pieces) in a little oil briefly, sprinkling with a little salt.  When cool, cut the shrimp in half widthwise.

Combine fish sauce and tamari with water, sugar and lime juice, and whisk until smooth. Taste and adjust.

Arrange the lettuce on 4 plates; top each portion with a few grapefruit pieces, some shrimp, and the mint and cilantro; drizzle with the dressing, then sprinkle with chopped peanuts.

Cook’s Notes:

Minced chilies or dried red pepper flakes are good to sprinkle on top if you are serving spice lovers.

FYI, I keep the parts of this salad in separate containers so you can have it two or three days in a row.

Source: The New York Times

Share
Posted in Fish & Seafood, Salads & Dressings | Tagged | Leave a comment