Cranberry Orange Nut Bread

Click here to view recipe.

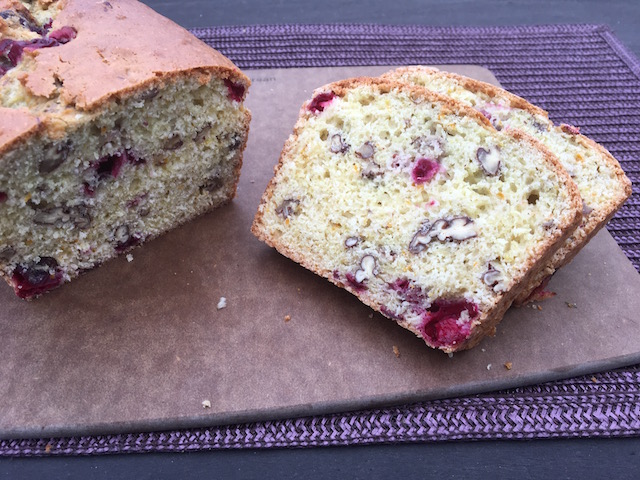
Simple & Delicious Cranberry Orange Nut Bread

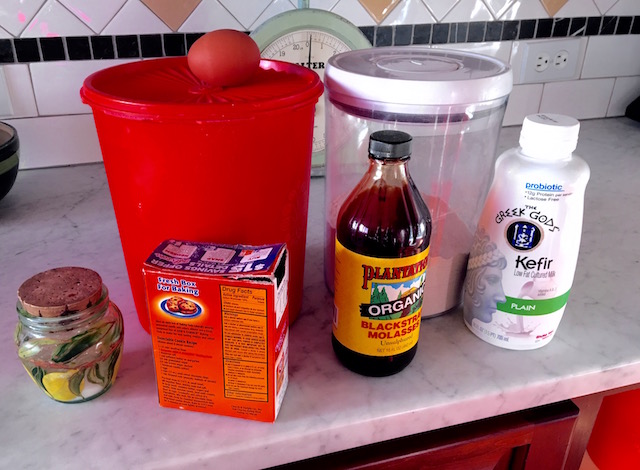
Honestly, I thought I posted this fruit bread recipe long ago, but when I searched my own website I was surprised to see that I’ve been holding back.  I’ve been making this cranberry bread since back in the day when everyone thought fat or oil was the devil, and so the fact that this has just two  tablespoons of oil meant it was healthful.  Never mind that the recipe contains white flour, white sugar…and fast forward to 2018.  Obviously, this isn’t the healthiest quick bread in town, but it is still good, easy and a hit with most everyone.  I tend to make a few loaves of this during the winter months – November through February when fresh cranberries are easy to find in every grocery store (and in my freezer).  

Try it, you’ll have no trouble making this and you’ll make it more than once.  I promise.  And speaking of once, why not double the recipe and make two loaves at a time!? A mixing bowl, a spatula to stir everything together…no electronics needed here folks.  You can do this.  

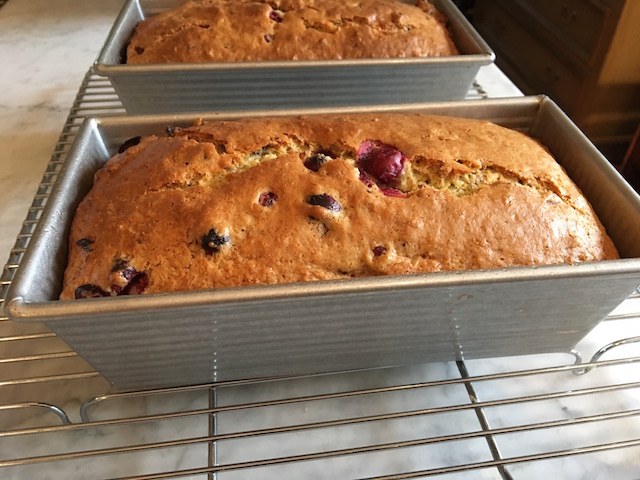
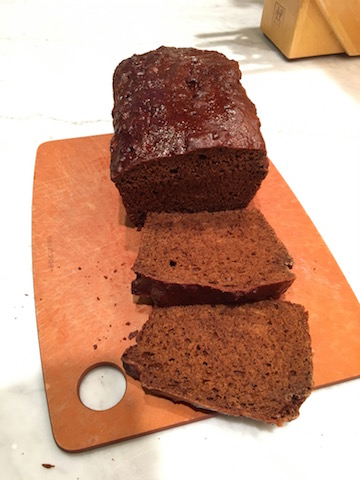
Fresh out of the oven!

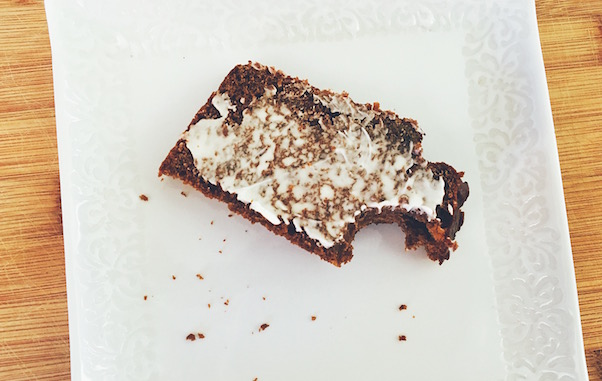
At risk of sounding boastful, I must tell you that I came up with a genius way to freeze this bread – and really any other quick bread (think banana bread, lemon bread, pumpkin bread).  With just two of us in the house, an entire loaf of anything gets a bit stale if I keep it around until it is gone.  So now, I make little squares of parchment paper.  I then slice the bread and put a square of parchment in between every slice of fruit bread.  That way I can take one or two slices out of the freezer at a time.  As my late mother would say, “smart girl.”

Go forth and bake!  

Cranberry Orange Nut Bread

pf-icon2


Makes 1 Loaf

Ingredients
  • 2 cups all-purpose flour
  • 1 cup sugar
  • 1 ½ tsp. baking powder
  • 1 tsp. fine sea salt
  • ½ tsp. baking soda
  • 2 T sunflower or any neutral oil
  • ¾ c orange juice
  • 1 large egg, beaten
  • 1 cup coarsely chopped fresh cranberries (if frozen, defrost them first)
  • ½ cup coarsely chopped nuts (I use either pecans or walnuts)
  • Grated peel of one orange
Instructions

Grease a 9 x 5 x 3” bread pan.  Preheat oven to 350.  

Combine dry ingredients with wet (juice, oil, and egg), stir in cranberry/nut/orange rind mixture at the end.  

Scrape into the bread pan and even out the top.  

Bake 45-55 minutes until a toothpick comes out clean, and cool on a rack for 15 minutes then remove from pan.  Cool completely.  Wrap and store for up to three days, or freeze for up to four months.

Cook’s notes:

  • This is a great accompaniment to salty or savory main dishes such as a frittata or eggy dishes.  Much easier than individual scones or muffins!
  • Quick breads are so forgiving that I am pretty sure you could substitute a third of the white flour with white whole wheat flour.  
Share
Posted in Breads | Tagged | Leave a comment

Canal House Lentils

Click here to view recipe.

My New Favorite Meal!

Winter and lentils go together in my world, as long as winter is in a cold-ish location because I feel that winter doesn’t count if you are in a tropical place. So since I’m in Seattle as I type this – as opposed to basking in the glorious sunshine in Central America- and it’s cold and blustery outside and already dark at 4:45 pm, I am craving wintery foods.

And what I hankered for earlier this morning was lentils.  (Now you know how strange I am!) I figured I could make a batch and have them topped with poached egg and avocado for breakfast or as a side dish with along with oven roasted root vegetables to accompany fish.  

So began my search.  I looked at many blogs and online recipes and settled on “Canal House Lentils.”  Bon Appetit and Epicurious both published this recipe, and they were fairly identical.  Mine?  Much is more or less the same but I editorialized a lot more.

Just so you know, French Green Lentils or Puy lentils (I get them in bulk at my supermarket) as they are also called, take the longest to cook stovetop but stay firmer when all is said and done.  Mine took 45 minutes to cook and the lentils are soft, a little soupy and oh-so-good.  I think they are best slightly warm; a lot of the liquid reabsorbs if you leave them in the pot without a lid once the cooking finishes.  My chief clean up person and food critic (aka husband) remarked how these tasted so meaty!

Canal House Lentils A La Marilyn

Serves 6 (the original recipe said serves 8, but that would never fly over here.  I’ll be lucky to get 4 servings, given my affinity for lentils.)

pf-icon2


Ingredients
  • 2 tablespoons extra virgin olive oil
  • 1 medium leek, white and pale-green parts only, cleaned and finely chopped
  • 1 clove garlic, thinly sliced
  • 1 tablespoon tomato paste (remember the tube?)
  • 1 cup French green lentils
  • 2 tablespoons tamari
  • Freshly ground black pepper to finish (The original recipe said Kosher salt to taste also, but I found them salty enough without, and I’m a salt lover)
  • Thinly sliced scallions (optional; for serving)
Instructions

Heat oil in a medium saucepan over medium heat. Add leek, garlic, and tomato paste and cook, stirring often, until fragrant and tomato paste begins to darken, about 4 minutes.

Add lentils and 2 ½ cups water. Bring to a boil; reduce heat, cover, and simmer, stirring occasionally, until lentils are tender, 45–55 minutes.

Remove from the heat and keep them covered for 10 minutes; add tamari and season with pepper.

After the lentils sit for 10 minutes off the heat, and after I added the tamari and pepper,  I removed the lid and let them breathe for another 15 minutes to absorb some of the liquid.  And I definitely recommend the scallions on top for a little brightness.

Cook’s notes

  • You can make these up to five days ahead – just cover them tightly and leave in the fridge.
  • I am thinking of making these a little middle eastern by crumbling the top with some feta cheese (very little) and possibly some preserved chopped lemon.  Just a thought to make these less brown. If I actually do this, I’ll cut down on the tamari.
Share
Posted in Side Dish | Tagged | Leave a comment

Chickpea Lentil Stew

Click here to view recipe.

Sumptuous Garbanzo Lentil Stew

OK, listen up.  I should call this “garbage soup” because I made it primarily to use my home cooked garbanzo beans that have been sitting in my freezer for a while along with a few things I found in my fridge: some extra recently made chicken broth, a few dried lentils, some sprigs of cilantro, an almost dead lemon, and some not-so-fresh celery.  

It was one of those days, a day to pencil out my meals for next week and clean out the fridge, and suddenly I decided to do a riff on a vegetarian Moroccan soup we had the night before Thanksgiving.  At that time my sisters made a humongous pot of soup so I pared it down a lot, added a lot more stuff (i.e. green beans, cumin, cinnamon, capellini pasta) …you get my drift.  My final recipe here barely resembles the soup they made. But I must say, it is delicious.

Along the way I tried, really I did, to document how much of each ingredient I used.  This “recipe” is pretty close to what I made but you’ll have to taste and add this or that if you want it perfect for your taste buds.

I am so happy with this that I immediately scarfed down a large bowl midway through the afternoon.  I’m satisfied and full, and I’ll make this again.  It kind of screams blustery winter and takes just one pot and about 45 minutes, start to finish.  Most of that time is hands-off, too.

Chickpea Lentil Stew

Serves 5-6

pf-icon2


Ingredients
  • ½ large brown onion, diced ¼ inch
  • 1 celery rib, chopped  into ½ inch pieces
  • 1 teaspoon  ground cumin
  • 2 dashes of ground cinnamon
  • About 10 grinds of fresh black pepper
  • 4 cups vegetable broth or chicken broth, preferably homemade
  • 14.5 ounce can diced tomatoes in juice (I use Muir Glen Organic)
  • 1 ½ c cooked garbanzo beans (equal to about 1 can if you don’t have fresh). If you use canned beans, rinse and drain them.  If you make a batch of chickpeas, I used about ½ cup of the liquid from cooking them.  It tastes so good!
  • ½ cup dried brown lentils
  • ¼ cup chopped cilantro, leaves, and stems
  • ⅓ cup capellini noodles, broken into 1-inch pieces
  • About ½  cup fresh green beans, trimmed and cut into 1-inch pieces
  • Juice of ½-1 lemon
  • Parsley or more chopped cilantro to garnish
Instructions

Over medium heat, warm the oil in a large saucepan, saute the onion and celery gently for 10 minutes, stirring frequently.

Add the cumin, cinnamon, and pepper and stir into the mixture for another minute.

Turn up the heat, then add four cups of stock, tomatoes, garbanzo beans and lentils

Simmer for about a half hour until the lentils are soft.

Throw in green beans, capellini bits and lemon juice, cook for a further two minutes.

Remove from the heat and let it stand for at least ten minutes to finish cooking the green beans and noodles.  The stew is quite thick so add more water or broth if you prefer it thinner.

Season to taste with additional salt, pepper or lemon juice, then top with chopped parsley or cilantro to serve.

Serve with pita bread or crackers.

Share
Posted in Soups | Tagged | Leave a comment

Hamentashen – Four Years Later!

I’m already baking up a batch of Hamentashen for Purim – one of my favorite Jewish holidays which is coming up in a week on February 28! I made three versions, filling one with mixed fruit (like the recipe below, one with poppy seeds and one with plain chopped prunes (just substituted the prunes for the apricots and used a touch more jam).

I hope you’ll try these whether or not you’re celebrating Purim. IMHO, they’re easily one of the best cookies I make!

***************************

Originally posted March 12, 2014

Click here to view recipe.

Ready for the Oven

Ready for the Oven

A beloved (but lesser known to the outside world) and joyous Jewish holiday is Purim – and this year the holiday begins at sunset on Saturday, March 15, and ends on Sunday evening, March 16. Purim recalls a time when Jews living in Persia were saved from extermination.

It is one time where Jews whose background, especially those of Eastern European or Mediterranean (Ashkenazic and Sephardic) descent, observe the date with lots of partying and drinking. And there is one food that is found at nearly every celebration – or one filled cookie I should say. Hamentashen (plural) ! Pronounced HAH-men tash en, these triangle-shaped, filled cookies remind us of Haman (the villain’s) three cornered hat.

In my case, these cookies remind me of my Aunt Tillie aka Teensy and my Aunt Esther, my mother’s older sisters. They made the very best hamentashen and I love, love, love these little delicacies. While my three kids were in college, I used to send boxes of these adorable cookies for them to enjoy in their dorm rooms and to share with friends.

The oil dough is so easy to work with and the filling isn’t too sweet. Best of all, they freeze for up to three months and travel well – no crumbling or fragility here. I like these so much I make a few times during the year – not only for Purim!

Heavenly Hamentashen

Heavenly Hamentashen

Aunt Tilly’s and Aunt Esther’s Fruit Hamentashen

Makes approximately 30-40 cookies

pf-icon2


PASTRY DOUGH:

Ingredients

  • 3 eggs
  • 1 cup granulated sugar
  • ½ cup canola oil
  • 1 Tbsp fresh orange juice
  • ½ tsp. pure vanilla extract
  • Rind of one medium orange, grated
  • dash of salt
  • 3 1/4 cups all purpose flour
  • 1 tsp. non aluminum baking powder

Instructions

NOTE: I know I talk about playing with recipes from time to time… but FOLLOW THESE INSTRUCTIONS for good results!

Combine flour with baking powder, salt and orange rind. Using a food processor or heavy mixer, mix eggs, oil, orange juice, sugar and vanilla. Gradually add dry ingredients. The dough will be soft. Scrape it into an oiled bowl and cover with saran; refrigerate the dough overnight so it firms up.

FILLING:

Ingredients

  • 12 ounces dried California apricots, dice in food processor or by hand
  • 12 ounce pitted prunes, dice in food processor or by hand
  • 1 tsp. cinnamon
  • 1/3 cup apricot or other flavor jam (don’t use sugar free)

Instructions
Dice prunes and apricots, stir in jam and cinnamon to combine. This fruit filling will be thick.

A Dollop of Fruit Filling

A Dollop of Fruit Filling

ASSEMBLY:

Line cookie sheets with parchment paper or lightly oil them. Preheat oven to 375 degrees and adjust so the cookie sheets fit on the middle racks.

Divide dough into 4 pieces and keep it refrigerated except for the piece you’re rolling. Roll each quarter of dough on a lightly floured board or pastry cloth into a 1/8” thickness. Using the top of a 4” glass dipped in flour, cut out circles.

Put a heaping teaspoon (walnut size) of the fruit filling in the center of each cookie, and pinch the dough around it so it forms a triangular shape. You can recombine the scraps of dough and roll them again to form additional circles. Bake 15-20 minutes until nicely brown. Cool on rack. These can be frozen between layers of waxed paper for up to three months.

Notes: I have a really cute circular ruffled cookie cutter that I used for these cookies – it makes them look a little fancy when I am in that kind of mood. And from time to time, I fill the hamentashen with a nice thick poppyseed filling…next year I might share that recipe too!!  At times I have rolled the dough much tinned which yielded many more cookies, but thicker dough seems to hold the cookies better-otherwise they seem to “flop” over and they aren’t so pretty.

Share
Posted in Cookies | Leave a comment

New Beginnings

My “Pantry”

2018!  At the beginning of most calendar years, I take stock of my kitchen and everything contained therein.  This year, with strong encouragement from my daughter and sister, I rearranged my cupboards – slightly.  I moved my saucepans and fry pans closer to the stovetop, the island where my silverware lives now has my serving platters and salad bowls that I use every day, rags and towels are closer to the sink.  Not big changes, but it feels good.  

I also compulsively go through each cupboard and drawer, take everything out, wipe it down, then nicely rearrange the contents. (Truth is, I do this more than once a year!)    Not hard with dishes and glasses, but this takes a while in my baking cupboard and my lazy susan that has less frequently used spices, grains, etc. 

Then I tackle my makeshift “pantry”, which is really an old TV cupboard I found.  It is small but it’s ample for me.  Grains and beans on top,  paper goods arranged on the bottom shelf and other miscellaneous items – the ones I use all the time – nestled in between.  It’s never overflowing so I can see everything and I really do know exactly what’s is in there – and when I need to replenish it.

And I haven’t even mentioned my refrigerator because that gets cleaned out at least every two weeks – you never know what’s lurking in there!

I love my kitchen equipment, I really do.  I can’t see buying another pot or pan or small appliance, ever.  Instapots and sous vide machines are all the rage at the moment, but I have two great pressure cookers that I use several times a week, I own a slow cooker that barely sees the light of day, and I never use a rice maker.   I have really good quality, reliable cookware and I always tell my kids that if I suddenly die, the only thing I own that is worth saving would be kitchen stuff.

Along the way this year, I decided to replace a few things that are weathered, unable to be sharpened, or just plain worn out.  My inexpensive wood cutting boards that I put in the dishwasher are etched and shabby looking.  My potato peeler is no longer sharp, and even my microplane grater has seen it’s better days.  Oh, some of my dish towels were holey.  I love good dish towels.

My new toys!

So, I replaced three cutting boards, my peeler, my microplane graters, a manual can opener and some dish towels.  Grand total was way less than $100 and  I’ll need to replace all of this again in less than two more years. But considering all this beginning-of-the-year work and the cost of replacing some of my must trusty tools – I would rather have a tidy, well organized, well-equipped kitchen to whip up my favorite dishes than go out for a restaurant meal any old day.

Go through your kitchen!  Gift anything you no longer want or use or need, and make a list of anything that is worn out and needs replacing.  Call me crazy, but it’s therapeutic and, dare I say it, fun!

Share
Posted in uncategorized | Tagged | Leave a comment

Overnight Brunch French Toast

Click here to view recipe.

Fabulous French Toast Casserole

My favorite meal, should you ask me, is brunch.  I am not a morning person and am rarely hungry at 6:00 am when I get up to start my day.  I need COFFEE once my feet hit the ground but it takes me a while to work up an appetite.  By 10 or 11 in the morning, once I’ve gotten a few things off my checklist and exercised a bit, I crave good food.  Frittata, blintz loaf, waffles…and now – French Toast Casserole.

My daughter often makes this for company when she hosts brunch at her house, and her family occasionally enjoys this for their “breakfast dinner” every Thursday night — translate that into some type of protein-laden breakfast food and chicken sausage or smoked fish.  She had been raving about this casserole so I finally decided to try it.  I had leftover challah and had to figure out something to feed my grandsons while they stayed at my house… so why not? The result?  It’s a 10! I hope you think so too.  And she claims this was a recipe I gave her, which could be true.  I just do not remember.

Overnight French Toast Casserole

8-10 generous servings

pf-icon2


Ingredients:
  • 1 loaf brioche or challah bread (1-1 ¼ lb)
  • 5 eggs
  • 2 ½ cups milk
  • 1 tsp pure vanilla extract
  • ¼ tsp ground cinnamon
  • 1 ½ cups sliced bananas, frozen berries, frozen chopped peaches or fresh stone fruit
  • ½ stick salted butter, melted
  • 4 tsp turbinado sugar
Instructions:

Cube bread into 1” pieces.  (I used leftover challah but weighed it.  Rachel always buys cheap-o challah from the supermarket.  shhhhhhhh…) Arrange cubes of bread in a 9 x 13 casserole dish.

Mix eggs, milk, vanilla, and cinnamon and pour mixture over the bread and squish it around with your hands.  Cover the pan with Saran Wrap.  After about ½ hour, turn the cubes around so they are all moistened.  Keep covered in the fridge overnight.  

In the morning, about an hour before you’re ready to serve, remove the Saran and let it warm up a bit.  Preheat the oven to 375 degrees,  mix in fruit, and even out the top with your hands.  Drizzle the melted butter on top and sprinkle evenly with turbinado sugar.

Bake uncovered at 375 for 40-45 minutes until bubbly and brown.  Cut and serve like a bread pudding.  Top with a swish of fresh maple syrup or fruit syrup if that sounds good to you.

Because this is barely sweet, I would consider calling this a Fruited Bread pudding DESSERT and serving it with a trail of caramel or butterscotch sauce on top. Here is an old but good formula should you want to make a sweet sweet caramel sauce:

Caramel Sauce

Ingredients:
  • 1 stick butter
  • ½ cup white sugar
  • ½ cup brown sugar
  • ½ cup water
  • 1 heaping Tbs. flour
  • 1 ½ tsp vanilla
Instructions:

Combine all ingredients except vanilla and bring to a boil.  Cook for three minutes until thick.  Add vanilla and stir.  Pour over warm pudding.  Keeps one month in the fridge.

PS:  I think this would look 100 times more appealing if I baked it in an oval enamel casserole dish or even if I made muffin tin sized servings.  Just thinking ahead.

Share
Posted in Breakfast | Tagged | Leave a comment

Chocoholic’s Swirly Banana Bread

Click here to view recipe.

Chocolate + Banana = Yum!

As evidenced by a post from two years ago, I enjoy good banana bread … I really do.  And back then I referred to the posted recipe as “the best banana bread ever.” Well, I might have to amend that statement due to my addiction to, I mean love of, chocolate.

Combining chocolate with banana bread is an idea that speaks to me.  I spotted this recipe on the Smitten Kitchen website in September. Just the picture alone made me think of my mom’s “marble” cake. And when I read that it was a combo of chocolate and banana – I thought it looked so delish that I put it in my “to make” file.  Yes, I actually have a file of recipes I intend to make at some point in time.

Per usual, I changed the original recipe (shocker) and reduced the amount of brown sugar (the original recipe calls for light brown sugar but I only had dark brown, so whatever). I used salted butter and omitted the additional salt and put in bittersweet chocolate in place of semisweet.  Duh.  I added baking soda in with the flour as I always do rather than putting it with the brown sugar.

Being a big shot (you know, a fancy “paid professional”), I always tell friends and family to READ THE RECIPE CAREFULLY BEFORE BEGINNING and to prep ahead of time and get everything measured and ready to go before you start baking, even with things you make often.  Great counsel, right? I did prep and measure everything, but sadly, I didn’t listen to my own advice and accidentally omitted the part about adding the ¼ cup of the flour and cinnamon to the original batter, not the chocolate batter. I wondered why the chocolate half had so much more volume and heaviness and then reread the recipe.  So be forewarned.  Fortunately, the bread came out just fine.

Fresh Out of the Oven

Another note here.  I have a small scale that weighs in grams or ounces  I purchased this scale way back when I was trying a lot of whole grain bread recipes because I found it easier and more precise to weigh ingredients than to use my cups, teaspoons and tablespoons.  It made me feel like I was in Chemistry class all over again, and I love Chemistry (except for the Bunson burners…I am afraid of fire and matches)).  My point here is that I often use the weight measurements but if you don’t have a scale, the cup measurements are just dandy.

The result?  LOVE.  Love more than chocolate “bread”, and love more than traditional banana bread.  This one goes in my “Things I Love” file.  And yes, I do have a file by that name too.

Chocoholic’s Swirly Banana Bread

Makes One Loaf

pf-icon2


Ingredients
  • 3 large very ripe bananas (about 1 ½ c puree)
  • ½ cup (115 grams) salted butter, cut into ⅛’s and melt in microwave for sixty seconds, stirring halfway through until it is melted
  • 115 grams dark brown sugar (a little over ½ cup)
  • 1 large egg
  • 1 teaspoon pure vanilla extract
  • 1 teaspoon baking soda
  • 1 cup (130 grams) all-purpose flour
  • Additional all-purpose flour 1/4 cup (35 grams)
  • ¼ cup (about 20 grams) dark cocoa powder (I use Scharfenberger but any kind should work) sifted if lumpy (which mine always is)
  • ¾ cup (130 grams) dark (bittersweet) chocolate chunks (again, I use Scharfenberger) chopped a bit more so it is more like chocolate chip size.  No need to get carried away here.
Instructions

Preheat oven to 350°F and put the baking rack in the center.  Coat a 9×5-inch loaf pan with nonstick baking spray and set aside.

In a large glass bowl, melt the butter in the microwave. Mash the bananas right into it until mostly smooth. Whisk in brown sugar, egg and vanilla until thoroughly combined. Add the one cup flour mixed with soda, stirring just until it disappears.

Pour about half of batter into a second medium sized bowl (you can guesstimate, this isn’t rocket science).   Into one bowl, stir the remaining ¼ cup of flour . Into the other bowl, stir in the cocoa powder and chocolate chips.

Dollop chocolate and plain batters in large alternating spoonfuls into the bottom of prepared loaf pan. Attempt to “checkerboard” the rest in, roughly meaning that you’ll drop a chocolate batter dollop on top of a chocolate-free one and vice-versa until both batters are used up. Use a butter knife or small offset spatula to make a few figure-8s through the batters, marbling them together — but just a little, say, 2 to 3 figure-8s. Any more and the swirls may not look distinct when you cut the cake.

Bake 50 to 60 minutes (mine took 50 minutes, but the original recipe said 55-65 minutes so I guess it depends on your oven), until a tester or toothpick inserted into the center of the cake comes out batter-free. (A melted chocolate chip smear is expected, however.) Cool in pan for ten minutes, then gently shake the pan to loosen the perimeter and invert the bread out onto a cooling rack. Cool with the bottom side down on the cooling rack.

Serve warm or at room temperature.

Cook’s notes: The banana bread will keep, wrapped in foil, for up to 4 days at room temperature. I wrapped mine well and froze it — where I imagine it will be defrosted and and taste terrific after the next month or two, not that I won’t dig in before that time.

Share
Posted in Breads, Dessert | Tagged | Leave a comment

Glazed Maple-Pecan Scones

Click here to view recipe.

A Spectacular Scone

“Oh no, not another scone recipe!”  This is what I’m imagining many of you thought when you saw the title of this post. Alas, I can’t help myself…

When I get the urge to bake, though, I tend to make whatever I am in the mood to eat.  And the other day, I wanted these oatmeal pecan glazed scones.  Truthfully, they hit the spot in a big way.  It turns out Starbucks had the same idea when they introduced their new Maple Pecan latte which they say is “inspired by classic fall flavors and the changing leaves of the season.”  Most likely they copied me.

This recipe originally came from an issue of Cook’s Illustrated long ago, and I subtly changed it.  Since the beginning, it’s been in my breakfast sweet stuff rotation and each time I make it in the fall, I am smitten by the savory nuts, the sweet maple, the soft crumb. I could go on, but you get it.

Glazed Maple-Pecan Oatmeal Scones

Makes 8 pretty good sized scones

pf-icon2


Ingredients
  • 1 ½ cups old-fashioned rolled oats (4 1/2 ounces)
  • ½ cup coarsely chopped pecans
  • ¼ cup whole milk
  • ¼ cup heavy cream  (or you can use ½ cup half and half in lieu of whole milk + heavy cream)
  • ¼ cup pure maple syrup
  • 1 large egg
  • 1 ½ cups unbleached flour (7 1/2 ounces)
  • 2 teaspoons non-aluminum baking powder
  • ¼  teaspoon table salt
  • 10 tablespoons cold salted butter, cut up into ½ inch pieces
Glaze Ingredients
  • 3 tablespoons pure maple syrup
  • ½ cup powdered sugar
  • To top the scones before baking: About 1 tablespoon Turbinado sugar (raw cane sugar)
Instructions

Adjust oven rack to middle position; heat oven to 375 degrees.

Spread oats and pecans evenly on baking sheet and toast in oven until fragrant and lightly browned, 6-8 minutes; cool on wire rack.  (Truthfully I do this in my workhorse toaster oven)

Increase oven temperature to 450 degrees. Line second baking sheet with parchment paper. When oats are cooled, measure out 2 tablespoons and set aside.

Whisk milk, cream, ¼ cup maple syrup, and egg in large measuring cup until incorporated; remove 1 tablespoon to small bowl and reserve for glazing.

Pulse flour, baking powder, and salt in food processor until combined, about four 1-second pulses. Scatter cold butter evenly over dry ingredients and pulse until mixture resembles coarse cornmeal, twelve to fourteen 1-second pulses.

Transfer mixture to medium bowl; stir in cooled oats. Using a rubber spatula, fold in liquid ingredients until large clumps form. Mix dough by hand in bowl until dough forms a cohesive mass.

My silicone mat makes this step SO easy!

Dust work surface with half of reserved oats, turn dough out onto a work surface, and dust top with remaining oats. Gently pat into 7-inch circle about 1 inch thick. Using a bench scraper or chef’s knife, cut dough into 8 wedges and set on parchment-lined baking sheet, spacing them about 2 inches apart. Brush surfaces with reserved egg mixture and sprinkle with 1 tablespoon turbinado sugar.

Bake until golden brown, 12 to 14 minutes; cool scones on baking sheet on wire rack 5 minutes, then remove scones to cooling rack and cool to room temperature, about 30 minutes.

When scones are cooled, whisk maple syrup and confectioner’s sugar until combined; drizzle glaze over scones.  Once the glaze sets, you can freeze any scones and pull them out of the freezer one at a time.  They keep for up to 3 months as long as they are tightly wrapped

Share
Posted in Breads | Tagged | Leave a comment

Glazed Pumpkin Bread

Click here to view recipe.

Gorgeously Glazed Pumpkin Bread

It is big time fall leaning toward winter in Seattle, and it’s been very windy, rainy and damp.  This is the time of year when I get into my baking mode.  This year, on the week before Thanksgiving I made a few loaves of this Pumpkin Bread for the freezer, and when my California kids came on the Tuesday prior to Turkey Day, I whipped this out, much to their delight! But it’s not just for Thanksgiving time … this bread is delightful throughout the cold winter months.

This fits my list of requirements:  It’s one bowl, easy, not fussy if you don’t happen to perfectly measure the flour or pumpkin.  The most important part is that it tastes fantastic!  I previously made pumpkin cookies and pumpkin scones, and although this is the simplest of the pumpkin recipes I’ve tried, it’s my family’s favorite, heads and shoulders above anything similar in the case of your coffee shop.

So get cracking and keep this in your fall to winter rotation.  I highly recommend a strong latte or cup of tea on the side.

Glazed Pumpkin Bread

Makes one loaf

pf-icon2


Bread Ingredients
  • 2 large eggs
  • 1 cup pumpkin puree (freeze or refrigerate the rest for scones or cookies or to told into Mac and Cheese)
  • ½  cup vegetable oil
  • 1 tsp pure vanilla extract
  • ¾ cup granulated sugar
  • 1 tsp fresh ground nutmeg
  • 1 tsp ground cinnamon
  • 1 ½ cups all-purpose flour
  • ½ tsp fine sea salt
  • 1 tsp baking soda
Topping Ingredients
  • ¾ cup powdered sugar sifted
  • 2 tbsp pure maple syrup (more or less)
  • Dash pure vanilla extract

Instructions

Preheat oven to 350F

Spray a non-stick standard loaf pan (8 or 9 inch) with cooking spray.

Whisk the eggs in a large mixing bowl. Whisk in the pumpkin, oil, sugar, and vanilla.

Stir in the flour, baking soda, cinnamon, nutmeg and salt and mix until combined.  

Scrape the batter into the sprayed pan and even out the top with an offset spatula or knife

Bake until a toothpick comes out dry, about 50 minutes.

Let the loaf cool 10 minutes, then remove from the bread pan and cool to room temperature before glazing.

To make the glaze, whisk together the sugar with enough maple syrup to make a thick, spreadable glaze. Whisk in the dash of vanilla extract  Spread this thick frosting onto the cooled bread with a knife.  I refrigerate the bread at this point until the frosting hardens.

Cook’s Notes:
  • This doubles really well and freezes nicely too.
  • The original recipe included ginger and cloves, but I like pretty simple spices in lieu of 3 or 4 flavors so I pared it down to nutmeg and cinnamon.  I also reduced the sugar by a fourth and it is still plenty sweet for me, especially with the glaze which I also cut in half.  I’m just not a fan of ooey gooey sugary sweet things.  Some readers might like to fold in chocolate chips and/or nuts, but again I am a Plain Jane with regard to desserts.
Share
Posted in Breads | Tagged | 2 Comments

Copycat Molasses Bread

Click here to view recipe.

Marvelous Molasses Bread

There is a backstory to this recipe, which is that for YEARS and YEARS and YEARS, if anyone we knew traveled to the Oregon Coast, we begged them to bring back ten loaves of Molasses Bread from the Otis Cafe.   Even with phone calls and questions, the bakery would have no part in releasing the recipe to me or anyone else for that matter.  

Rachel’s friend Hayley, in particular, was the currier of this bread, and several years ago I started a massive Google search to find a recipe that would approximate this bread.  Most had whole wheat flour, sourdough starter, yeast, wheat flour….it was a process, and not knowing a thing about what was really in there or how much I needed to have a sourdough starter, I wasn’t that motivated to start from scratch to create this brown bread.

I would freeze the purchased loaves and guard them with my life, removing them from the freezer one by one for very special occasions.  I hoarded this bread because it was perfect in my eyes…molassey, not too sweet, just wonderful and very, very different.

It’s Just That Good

AND THEN, Rachel’s husband brought home a Sunset Magazine.  There it was, a recipe in “The West’s Best Food Trips.”  And it looked “right” to me. (Of course, I made a few tweaks.)  And easy.  And I had every single ingredient here already, so it was meant to be.

Simple Ingredients

Now I won’t have to reserve half my freezer for the ten loaves! I can’t urge you strongly enough to try this. You’re welcome.

Otis Molasses Bread

Makes one 2-pound loaf

pf-icon2


Ingredients
  • Oil or butter for the bread pan
  • 2 cups all-purpose flour
  • 1 cup white whole wheat flour
  • 1 tsp fine sea salt
  • 1 tsp baking soda
  • 1 ⅔ cups buttermilk or kefir
  • 1 large egg, lightly beaten
  • ½ cup blackstrap molasses
  • About ½ tsp soft butter to brush on the top after it comes out of the oven
Instructions

Preheat oven to 325 F, and grease a 4 x 8 or 5 x 9 inch bread pan

In a large bowl, mix together the dry ingredients.

In a glass bowl or large four cup pyrex measuring cup, whisk together buttermilk or kefir, egg and molasses.  I did some research, and kefir is a perfect substitute for buttermilk.

Pour the liquid into the dry ingredients and stir together with a spatula just until combined.  It’s very thick, sticky and a bit difficult to stir.  Do not overbeat.  The batter is really really thick and hard to mix…Scoop into the prepared bread pan, even out the top with an oiled knife.

Bake about 55-60 min (mine just took 55 minutes) until the center tests done with a toothpick.  Cool on a rack five minutes, then turn out onto a rack to cool.  Excellent warm, room temperature or toasted.  With butter, of course.

Cooks Notes:

I used kefir since this was spontaneous decision to bake – Rachel found the recipe and texted it to me and the loaf was in the oven less than an hour later.  Fortunately, I had all the ingredients on hand.

I did brush the top of the loaf after it cooled for 15 minutes with about a half a teaspoon of soft butter so it would be shinier.  The original recipe said to run an offset spatula around the perimeter of the loaf before removing it from the pan, but my newish bread pan released the loaf no problem. (Use a pan for a one pound loaf.  It is anodized steel and I bought two after making Babka with Kal)

My verdict: excellent recipe, very close to the original, just not as dark in color.  Maybe they use more molasses?  Burned sugar?  The truth is that this tasted so great I hate to mess around with the recipe, so I’ll leave it as is.  It might not be an exact replica, but it’s close enough for me.  

WOWZA this tasted great.  We cut into it after cooling for just 20 minutes   Five slices later… well, you get the picture.

AND finally, I can just hear some of you saying “I am not a baker.”  OK, but this is a seven-ingredient, quick bread that you stir together by hand  You can do this!


Share
Posted in Breads | Tagged | 17 Comments