One Pan Seafood Fajitas

I feel like I was way ahead of today’s “one-pot meal” movement.  Since the beginning of time, I have made my version of one pot meals or sheet pan dinners and did so as part of “batch cooking.”  If only I’d capitalized on this huge trend…

Although this recipe is for fajitas, I usually serve this seafood fajita style one night, then repurpose the leftovers as a topping for brown rice or even a hearty cabbage/kale/romaine salad.  The spice mix also works for chicken if you want to make chicken tacos or fajitas later on! So double or triple the mix for later use! The fajita filling is so good but 1 ½ pounds of seafood is just too much for two (old) adults.  If you are cooking for a family, you could double the filling ingredients for planned leftovers.  Or invite friends and family and have a party!

FYI – this was one of the dinners I made for my grandkids in California while filling in for their parents in March.  The kids (16 months, 5 and 7) loved this and loved the leftovers too.

Sheet Pan Fajitas

Ingredients for Spice Mix-you can make more and have this on hand for furture use too.
  • 2 teaspoons ground chili powder
  • 1 teaspoon ground cumin
  • 1 teaspoon smoked paprika
  • ½ teaspoon sea salt
  • ½ teaspoon freshly ground black pepper
Ingredients for Fajitas
  • 3 medium bell peppers, seeded and thinly sliced (I used green, yellow and red)
  • 1 medium red onion, peeled and thinly sliced
  • 1 tablespoon fresh peeled and minced garlic-I do this by hand
  • 3 tablespoons olive oil, divided 2 Tbsp and 1 Tbsp
  • 1-½  pounds medium shrimp, peeled and deveined OR 1 ½ lbs of raw firm fish – cut into 1-inch squares.  (I have used salmon, halibut or cod)
Ingredients for Serving
  • Juice from 1 lime (about 2 tablespoons)
  • Fresh chopped cilantro, for garnish
  • 4-6 large flour tortillas
  • Your favorite toppings (Choose what you love: sour cream, shredded spicy cheese, avocado, diced tomato, shredded cabbage, hot sauce, etc.)
Instructions

Preheat the oven to 400 degrees F. Lightly spray a large rimmed baking sheet with cooking spray or lightly brush with oil.  Even without parchment, it’s not hard to clean.

Prepare the seasoning by stirring the chili powder, cumin, paprika, salt and pepper in a small bowl until well combined.

In a large bowl, toss together the peppers, onions and garlic. Drizzle with two tablespoons of the olive oil and toss to coat evenly. Sprinkle with about half of the spice mixture and toss again to coat evenly.

Spread the seasoned vegetables evenly on the baking sheet and bake uncovered in the middle of the oven for 13 minutes.

Meanwhile, place the shrimp or cubed fish in the same large bowl in which you tossed the vegetables. Drizzle the remaining tablespoon of olive oil over the fish or shrimp and toss to coat evenly. Sprinkle the remaining spice mixture over the seafood or shrimp and toss again to season.

After 13 minutes, remove vegetables from oven and evenly add pieces of seafood or shrimp to the roasted vegetables. Return to the oven.

Place tortillas (I dampen them a bit) wrapped in aluminum foil on the top rack of the oven. Bake an additional 7-8 minutes, or until shrimp or fish is cooked.

Before serving, drizzle the entire sheet pan contents evenly with lime juice and sprinkle with the desired amount of chopped cilantro.Scoop into heated tortillas with your favorite toppings.

Share
Posted in Fish & Seafood | Tagged , , | Leave a comment

Daniel’s Oatmeal Raisin Cookies

Click here to view recipe.

Reuben-Approved Oatmeal Raisin Cookies

As I type this, I wonder … does it seem boring to post a recipe for a common cookie like Oatmeal Raisin?  Perhaps. However, these are anything but boring for those who love this old “standard”.  Late this winter, when I was in California taking care of my three grandkids for a week, I cooked my brains out and wanted to leave food behind so everyone would miss me after I returned home.  My son Daniel always has loved these cookies that I often made for catered events; after all, they are a non-chocolate option (as you may recall, Daniel – unlike me – is not a huge chocolate fan. Go figure…).  

Levi & Yael give them the thumb’s up too

The original recipe started with Gayle’s Bakery near Santa Cruz, California where Sister Sue lives.  I adore Gayle’s — I love their bakery and every item on their menu. In fact, everything I have ever made that was inspired by what I’ve devoured at Gayle’s has been perfect.  From the original recipe I did cut the sugar down and find them still plenty sweet!

For this recipe, soaking the raisins and adding some cinnamon, then changing proportions a bit makes these the best recipe ever.  They remain chewy and soft, And for your information, I did leave about 30 dough balls in my son’s freezer, ready for when they have an urge for freshly baked cookies. Yes, they love me. And so I present:

Fresh out of the oven!

Daniel’s (Really, modified Gayles) Oatmeal Raisin Cookies

Makes about around 35 large cookies or 60 smaller ones
pf-icon2


Ingredients
  • 1 C (2 sticks) salted butter at room temperature
  • 1/2 C granulated sugar
  • ¾ cup + 2 Tbsp brown sugar, packed (I use dark brown sugar but light brown is fine too)
  • 2 whole large eggs
  • 1 egg  yolk
  • 1 tsp. pure vanilla extract
  • ¾ tsp. ground cinnamon
  • 1 tsp. baking soda
  • 2 C unbleached white flour
  • ¼ tsp table salt
  • 3 ½ C raw old fashioned oatmeal
  • 1 ¼ C brown raisins (soaked in hot water for 10 minutes, then drained well)
Instructions

Preheat oven to 350. Line baking sheets with parchment.

Cream butter & sugars. Add eggs, one at a time; mix in vanilla

In a separate bowl combine cinnamon, flour, salt & baking soda.  Add to creamed mixture just until incorporated.

Add oats and raisins and mix until just combined

Refrigerate the dough in the same bowl for a ½ hour, then spray or oil a 1/4 cup ice cream scoop and scoop the dough into cookies balls, two inches apart.  Smash down the balls into disks about three inches in diameter for large cookies  If you prefer smaller cookies, use a 2 Tbsp scoop but still smash them flatter than balls.   Place the cookie sheet on the center rack for 12-14 minutes or until golden and still soft in the center. Cool on wire racks

Cook’s Notes:

You can substitute chocolate chips (regular or bittersweet)  in lieu of the raisins for oatmeal chocolate chip cookies.  I don’t do this but I’ve had them, and they are good.  

I have made these with tart dried cherries, adding some grated orange zest rather than using raisins.  This is my preferred combination since I am not a raisin lover, but my kids like the original raisin variety.

I also pre-scoop balls of dough, flash freeze them and then put the dough balls into a container in the freezer.  If you get the urge for a cookie at night, simply defrost the cookie dough ball for about a half hour, smash it down with the heel of your hand into a circle and bake in a preheated toaster oven (on a small sheet lined with parchment) for about 10-12 minutes.  For me, I prefer to “bake as I go” so I rarely bake a huge batch of cookies at one time. 

My California grandkids dipped the warm cookies in milk.  I am not a dipper but my kids and husband love to do this.  

Cookies or dough can be frozen for up to six months.

Share
Posted in Cookies | Tagged | Leave a comment

Early Spring Nutty Citrus Miso Dressing

Click here to view recipe.

Colorful, Healthful Salad – My Favorite!

I am obsessed with all the fresh kale and greens this spring, so every day for the past two weeks I’ve been playing around with different salad dressings and ingredients.

My favorite so far?  A hearty green salad filled with nutritious nuts, seeds, avocado, mango, etc., etc. — the ingredients and combinations are endless! One day I used previously served, shredded halibut and blood oranges instead of chicken and mango.  A few days ago, my daughter stopped by on her way home from work so I made her this salad for lunch, sans the mango since she does not care for chicken and fruit in a salad together.  The citrus dressing was OK for her too.  Incidentally, this combination is now one of my favorites.

I hope you try this soon — particularly while the little Manila mangos are still available.  They are so yummy we have been eating two mangos per day (for two adults, not bad).  And remember that this is a perfect salad to pack for work or on the go.

Nutty Citrus Miso Dressing (can be doubled or tripled)

pf-icon2


Dressing Ingredients
  • ¼ cup fresh squeezed orange juice
  • ¼ cup fresh squeezed lime juice
  • 1 tbsp white miso paste
  • ½ inch piece fresh ginger, peeled and roughly chopped
  • 1 Tbsp peanut butter or almond butter
Dressing Instructions

Place all ingredients in a  blender or Nutri bullet and blend thoroughly.   Store in a sealed jar in the fridge.  I use about three tablespoons per serving so this amount will make 4-5 salads

Salad Ingredients (for each salad)
  • ½ large just-ripe avocado, peel and slice thin
  • Approximately 1 cup of cubed chicken breast (see note below on how I do this)
  • ½ mango, finely sliced -optional
  • 1 celery stalk, finely sliced
  • ¼ yellow or red pepper, finely sliced
  • Approximately 2 cups of fresh arugula or romaine or napa cabbage a combination of these greens.  I usually do a combo.
  • 2 Tbsp fresh mint leaves, coarsely chopped
  • 2 Tbsp toasted, coarsely chopped walnuts
  • 1 Tbsp roasted unsalted  sunflower seeds
  • About 3 Tbsp of salad dressing
Salad Instructions

Layer all of the ingredients above in any way you wish: I always put the lettuce on the bottom of a jar or glass pyrex dish then add groupings of the ingredients.  Pour about 3 Tbsp of dressing into a small container alongside the salad.

When ready to eat, coat the salad with the dressing and mix well.  
Note: If I plan to add chicken to salads or pasta during the week, I take chicken breast halves on the bone with their skin  Blot off any moisture with paper towels, then place the chicken on a square of foil, season the skin liberally with salt, pepper and smoked paprika and seal the foil tightly.  Bake on a tray in the toaster oven (preheated to 425) for 40 minutes.  Cool, remove skin and bones and shred or cube.  I keep the bones in the freezer for chicken stock.    

Share
Posted in Salads & Dressings, uncategorized | Tagged , , , | Leave a comment

Late Winter Apple Muffins

Click here to view recipe.

Hearty Apple Muffins

Right before Passover, I spotted this muffin recipe on the King Arthur Flour website.  Since I love King Arthur flours, particularly the white whole wheat variety, I decided to try these breakfast apple muffins.

I cut the sugar way, way back and still find these pleasantly sweet for me and for the rest of my extended family too.  I added some grated lemon zest because, in my humble opinion (or IMHO as the kids say), lemon makes everything taste better. And I added crunchy turbinado sugar, just a bit, for the topping in lieu of more brown sugar for texture.

Right out of the oven!

Apple Whole Wheat Muffins

Yield: 12 nice sized muffins

pf-icon2


Ingredients
  • 1 cup (120 grams) white whole wheat flour
  • 1 cup (130 grams) all-purpose flour
  • 1 tsp baking powder
  • 1 tsp baking soda
  • ¼ teaspoon salt
  • 1 Tbsp cinnamon
  • 1 Tbsp lemon zest, grate on microplane
  • 1 stick of  salted butter, at room temperature
  • ⅓ cup (100 grams) granulated sugar
  • ¼ cup (95 grams) dark brown sugar, packed
  • 1 large egg, lightly beaten
  • 1 cup kefir or buttermilk (I used kefir since that is what I have in the fridge always)
  • 2 large apples (I used Pink Lady), peeled, cored, and coarsely chopped into pieces about ⅓ inch by ⅓ inch
  • 3 Tbsp turbinado sugar for the topping
Instructions

Preheat the oven to 450°F. Spray 12 muffin cups and set aside.

Mix together the flours, baking powder, baking soda, salt, zest and cinnamon, and set aside. In a separate bowl, cream the butter and add the granulated sugar and the dark brown sugar. Beat until fluffy. Add the egg and mix well; stop once to scrape the sides and bottom of the bowl. Mix in the kefir gently. Stir in the dry ingredients and fold in the apple chunks.

Divide the batter evenly among the prepared muffin cups, they will reach the top of the cup or be slightly over.  Even out the thick batter with a knife that you spray with oil and sprinkle the three tablespoons of turbinado sugar on top.

Bake for ten minutes mid oven, turn the heat down to 400°F and bake for an additional five minutes, or until a toothpick inserted into the center of a muffin comes out clean. Cool the muffins for five minutes in the tin, then turn them out onto a wire rack to cool completely.

Transfer to a tightly covered container.  These stay fresh for at least five days at room temperature, if you can stop yourself from indulging.  I love these slightly warmed with whipped cream cheese.

Share
Posted in Breads, Breakfast | Tagged | Leave a comment

Anytime Vegetarian Stovetop Farro

Click here to view recipe.

Flavorful Farro

Call me weird, but I adore whole grains.  Brown rice, barley, quinoa, oats, barley, farro, millet — I love love love these things.  Of course, I attribute my good health and well being a lot to the food I eat.

This dish highlights farro, (also called Emmer) a hulled wheat that is popular in a lot of Mediterranean countries.   It’s texture is chewy and when I eat farro, it actually tastes like it is healthful – as if my body is being healed – if that is possible.  And it truly contains a lot of protein, fiber, iron and minerals. You can find farro in most supermarkets today and obviously online as well.  Look for the kind that says “semi pearled” or that it cooks in 30 minutes (not the fast cooking 15 minute type or longer cooking variety).

This is one of the most flavorful, easy dishes I’ve made in recent weeks.  I could eat it as a stand alone main dish accompanied by greens or a hearty salad.  As a side dish to simple fish or poultry, it is nothing less than perfect   And silly me, who loves savory things, I have eaten this early in the day for breakfast.  Now you know for certain that I am a little crazy in the head.

Stovetop farro is one-pot cooking at it’s best.  Measure out the water and farro, and while you are slicing onion and cherry tomato and garlic, the farro gets a quick soak.  Thirty minutes later, you are done and the farro is complete.  I usually top my farro with a chiffonade of fresh basil and a bit of high quality, fresh grated Parmesan cheese but it is also good as is.  This farro dish almost tastes like risotto – it is so creamy and flavorful, and the onion and tomato makes a creamy stock. . It reheats beautifully and keeps for a few days in the fridge.

Don’t forget the cheese!

I cannot wait to make this in the summer when I have an abundance of homegrown cherry tomatoes and fresh basil!

Anytime Vegetarian Stovetop Farro

Serves: 6 – adapted from Smitten Kitchen

pf-icon2


Ingredients
  • 2 cups water
  • 1 cup semi-pearled farro (Bob’s Red Mill is one of my favorites)
  • 1 Tbsp extra virgin olive oil
  • ½ pound cherry tomatoes, cut in half
  • ½ large white onion, peeled
  • 2 cloves garlic, sliced thin
  • 1 ¼ teaspoons sea salt
  • 1 pinch of red pepper flakes (you can add more or less to taste depending on the level of spiciness you desire)
  • 2 Tbsp basil leaves, cut into chiffonade for serving
  • ¼ cup fresh grated parmesan cheese, for serving
Instructions

Place water and farro in a medium saucepan to pre-soak while you are cutting up the tomato and onion.  Add olive oil to the pot.

Wash and cut the tomatoes in half and add to the pot.

Take the peeled half onion, cut the onion in half again, and very thinly slice it into quarter-moons. Thinly slice the garlic.  Add both of these to the pot.

Such simple ingredients

Add the salt and red pepper flakes (to taste) to the saucepan.  Cook all the way UNcovered for 30 minutes by bringing the pot to a boil, then turning the heat down to simmer.  Gently stir the farro every 10 minutes.  In 30 minutes, taste the farro – it should be chewy but tender and most of the liquid should be absorbed. I usually take the pot off the heat and leave it alone for 5-10 minutes or so while the rest of the liquid absorbs.

I put the farro into a pretty bowl, top with sliced basil and dust with parmesan.  Serve. Reheat leftovers tomorrow! I usually make a double-batch because it disappears quickly.
PS: I am thinking of adding some tiny cubes of oven-roasted butternut squash right before serving just to make it pretty and because I have often have some on hand in the winter.

Share
Posted in Side Dish | Tagged , , , | Leave a comment

Famous Mint Brownies

Click here to view recipe.

Magical Mint Brownies

Magical Mint Brownies

OK, my people, this is one of the most, if not THE most popular type of cookie I make.  Well, perhaps not a “cookie” precisely. Those in the midwest might call it a “bar.” But I digress… Mint brownies have been part of my repertoire for at least 40 years, no joke.  When I contracted for catering jobs we would make sheet pans full of these brownies and no matter how many I made, there were seldom mint brownies remaining.  

To this day, I keep a slab of these chocolaty treats in my freezer and when my children or special friends come to visit, I often find them rummaging through my freezer on the hunt for frozen chocolate mint brownies, regardless of the time of day.  When in doubt for what to prepare for dessert, this is my go to bar cookie.

The proliferation of designer bittersweet chocolate in the marketplace is a godsend to me, a rabid chocoholic.  I do use ordinary Bakers chocolate for the brownie itself.  But it’s nothing but the best for the ganache top layer – my favorite Scharffen Berger bittersweet chocolate.

My original recipe made a smaller, 8 x 8 brownie pan-full.  But really, as long as you are getting ingredients together and following all the steps, you might just as well go all in and make a 9 x 13 pan-full.  It isn’t hard but it does require paying attention to timing: time to cool the brownies, time to harden the buttercream and time to set up the chocolate topping.  In other words, it’s more than one step and a good project to do if you are home at night, watching a movie or reading a book with no time crunch.  

Just consider making these a zen experience.  Go for the end result, the prize: a dense chocolate almost candy-like square with more chocolate and mint.  It’s worth it.

Dense, Chewy Chocolaty Mint Brownies

Makes at least 50

pf-icon2


Brownie Ingredients (Layer #1)
  • 8 oz unsweetened chocolate (I use Bakers)
  • 1 cup (2 sticks) unsalted butter
  • 4 eggs
  • 2 cups granulated sugar
  • 1 tsp. pure vanilla extract
  • 1 cup all purpose flour
  • ½ tsp. sea salt
Mint Buttercream Ingredients (Layer #2)
  • 3 cups powdered sugar, sifted
  • 5 Tbs soft salted butter
  • ¼ c milk (2%)
  • A few drops green food coloring
  • ½ tsp. peppermint extract
Chocolate Topping Ingredients (Layer #3)
  • 5 oz bittersweet chocolate (I use Scharffen Berger bittersweet)
  • 2 tsp. butter
Brownie Instructions:

Preheat oven to 325 degrees with the rack in the center.

Grease and flour a 9 x 13 cake pan on the bottom and sides.  

The brownie layer can be made without an electric mixer.  In a small saucepan over low heat, melt chocolate and butter until the chocolate is just melted.  Cool for 10 minutes off the heat, and add eggs, vanilla and sugar and beat well, then add the flour and salt and stir until combined.

Pour into the prepared cake pan, even the surface with a knife or spatula and bake for 30 minutes until done.  Then place the brownie pan on a rack to cool for at least an hour.  Note: you can stop here and top with powdered sugar OR chocolate icing or with plain vanilla buttercream.

Mint Buttercream Instructions:

With an electric mixer, cream the butter well, add the powdered sugar a cup at a time and finally add the milk, food coloring and peppermint extract.  If it gets too thick while adding the powdered sugar, add some of the milk halfway.

Spread this mixture evenly on top of the cooled brownies and chill in the refrigerator for 30 minutes.  After 30 minutes is up, remove from the fridge and let the pan of brownies topped with buttercream sit on top of the counter for 5 minutes while you melt the chocolate for the next layer.  

Chocolate Topping Instructions:

Melt chocolate with butter over low heat, stirring often. I take it off the heat when the chocolate is nearly all melted, and it continues to melt off the heat.   Cool for 5 minutes off the stovetop before spreading or you will melt the green mint layer!

Pour this chocolate mixture on top of the green buttercream layer and tilt the pan to cover all the green frosting. (Lick the chocolate remaining in the melting pan!).  The chocolate will look “shiny”.

Refrigerate the three layer brownie for 20 minutes then remove from the refrigerator.  I score them right away , dragging the knife through the chocolate layer.  I remove ¼ of the brownies from the pan and cut them into 1-inch square pieces – any bigger is too much even for me!  Continue cutting the brownies into squares and wipe the knife with a warm clean cloth between cuts.  I then place the individual brownies to a tupperware container, putting waxed paper between layers.

These keep in the refrigerator, covered, for five days and freeze really well for up to three months.
Eat them cold or frozen!

Share
Posted in Cookies, Dessert | Tagged | 4 Comments

Chocolate Babka!

Click here to view recipe.

Beautiful Babka!

Beautiful Babka!

Oh yes, I wrote that with an exclamation mark!  I should use several !!!s, really.  My brother Kal called me before 7am on a Saturday in January and asked if (A) I was home (obviously) and (B) if I wanted to make Babka with him that very day.  (even more obviously….yes). How could I not bake with Kal, my brother from the same mother?  We both cook and bake a lot and similarly we are fast, tidy and don’t feel the need to measure every little thing such as vanilla and salt.  We just don’t.  And we never hold back with any type of food!  We eat exactly what we feel like at the moment.

We chatted back and forth about what time would work, (2:30 pm) whose kitchen would we use (mine), and then he sent the recipe he had made before with my daughter in their quest for the perfect Babka.  They agreed that they liked the dough from an Epicurious article and the filling from Smitten Kitchen/Jerusalem cookbook.  I offered to step it up a notch by using my good, bittersweet bulk chocolate and Scharffenberger cocoa.  I happily reported that I had everything except enough butter.  He was all over it.

The two of us each made a batch of Babka, or two loaves for each of us.  I stood at the mixer, he brought me what I needed in the order it was required and in no time we had two large bowls of dough proofing in the oven.  This first part was done and we had at least an  1 ½ hour hiatus.  Kal went to his downtown dental office to do some work.  I read my book and did two loads of laundry, and in between I measured out the filling ingredients.

When he returned, we combined the chocolate filling then rolled out the dough and filled it with chocolate.  Even though I am a yeast goddess, Kal is at least on par if not better than me with baking.  Naturally we used my silicone pastry mat, which I highly recommend for this recipe.  Into the freezer for a half hour went the rolls, and when it was time he gave me a demo of how to cut and form the loaves.  

At this point he left for home, unbaked loaves in hand.  I covered my pans with a damp tea towel for two hours and was surprised the Babka didn’t rise like bread but whatever.  Into the oven they went to bake and let me tell you, my building smelled fantastic. After taking the loaves out of the oven, I immediately brushed them with the simple syrup I made.  It seemed like a lot but a couple authors kept saying to use up all the syrup, so I did  And it turned out to be just what was needed. One of the condo owners came by to sniff around, literally.  Kal, meanwhile, was doing the same thing at his house.  I sent pictures of mine, he sent pictures of his and they look like Babka relatives.

Kal's Babka (note cookie - which he baked at the same time, of course!)

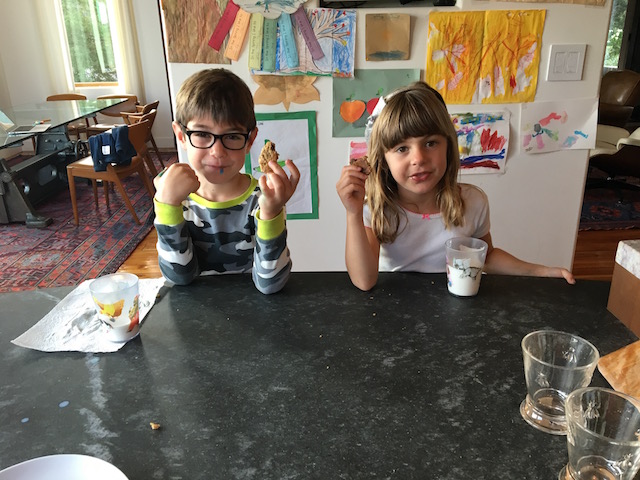
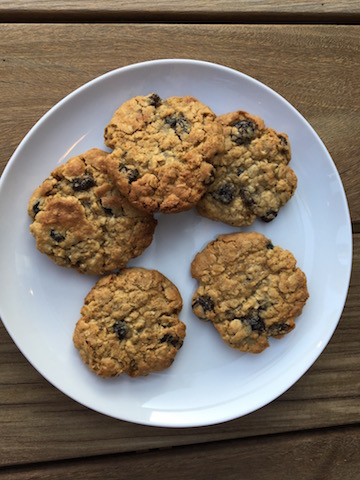
Kal’s Babka (note cookie – which he baked at the same time, of course!)

I’m saving a loaf for when my cousins from California stay with us  The other Babka will be enjoyed and eaten pronto.

Start to finish, it’s not a lot of prep time but obviously there is a lot of down time, so make this on a day you have several hours.  We started making dough at 2:30 and I wrapped the Babka for the freezer at around 9 pm.  Yet during the first rising I went on a long walk, during the second two hours I kept busy and now I am “kvelling” over my baking prowess.

Along the way, I coveted Kal’s heavy metal bread pans, decided I did not love my cheapo aluminum ones and ordered myself two spanking new bread pans.

It is the most complicated recipe I’ve made in a while.  And yes, it took most of a day. But I was lucky enough to do it with someone I love – the time flew by. And all I can say is Oh Em Gee.  MAKE THIS.

Chocolate Babka

Makes 2 loaves

pf-icon2


Ingredients for Dough (from Epicurious)
  • ¾ cup lukewarm whole or 2% milk (105–115°F)
  • 2 tsp sugar
  • 1 Tbsp active dry yeast
  • 3 ¼ cups all-purpose flour plus additional for dusting – divided
  • 2 whole large eggs
  • 1 large egg yolk
  • 1 tsp pure vanilla extract
  • ¾  tsp salt
  • 1 ¼ sticks (10 Tbsp) unsalted butter, cut into pieces and softened
Dough Instructions

Stir together warm milk and 2 teaspoons sugar in the bowl of a stand mixer. Sprinkle yeast over mixture and let stand until foamy, about 5 minutes. (If yeast doesn’t foam, discard and start over with new yeast.)

Add 1/2 cup flour to yeast mixture and beat at medium speed until combined. Add whole eggs, yolk, vanilla, salt, and remaining 1/2 cup sugar and beat until combined. Reduce speed to low, then mix in remaining 2 3/4 cups flour, about 1/2 cup at a time. Increase speed to medium, then beat in butter, a few pieces at a time, and continue to beat until dough is shiny and forms strands from paddle to bowl, about 4 minutes. (Dough will be very soft and sticky.)

Scrape dough into a lightly oiled bowl and cover bowl with plastic wrap.  Let dough rise in a draft-free place at warm room temperature until doubled in bulk, 1 1/2 to 2 hours.

Babka Filling Ingredients (From Smitten Kitchen and Ottolenghi’s Jerusalem Cookbook)
  • 4 ½ ounces (130 grams) bittersweet chocolate (or approximately ¾ cup bittersweet chocolate chips
  • 1 stick (120 grams) unsalted butter, cold is fine
  • Scant ½  cup (50 grams) powdered sugar
  • ⅓ cup (30 grams) cocoa powder
  • ¼ teaspoon cinnamon
  • ⅓ cup water (for topping)
  • ⅓ cup granulated sugar (for topping)
Filling Instructions

Melt butter and chocolate together until smooth. Stir in powdered sugar and cocoa; add cinnamon, if desired.  This forms a paste that is easy to spread with an offset spatula.

Assembly Instructions from Jerusalem Cookbook

Coat two 9-by-4-inch loaf pans with oil or butter, and cut parchment paper to line the bottom of each pan. Respray the top of this parchment once it is in the pan.  Take half of dough from fridge (leave the other half chilled). Roll out on a well-floured counter or pastry silicone mat to about a 14-inch width (the side closest to you) and 10 inch length.  I was generous with flour since the loaves were sticky, but the dough is great to work with and it doesn’t break or crumble at all.

Spread half of chocolate mixture evenly over the dough with an offset spatula, leaving a tiny ½-inch border.  Brush one of the long edges with water, and roll the dough up with the filling into a long, tight cigar. The water brushed side can now be pinched shut a bit.   I found that transferring each log to a lightly floured baking tray in the freezer for 30 minutes made it much easier to cut cleanly in half later on. Repeat with second dough, transfer to the baking tray also for 30 minutes in the freezer.

To form the Babkas, remove the sheet containing the rolls from the freezer and transfer the parchment paper with the cold babka logs to the floured counter or mat and cut the last ½-inch off each end of log. Gently cut the log in half lengthwise and lay the two next to each other on the floured counter, cut sides up. Pinch the top ends gently together. Gently and loosely lift one side over the next, forming a twist and trying to keep the cut sides facing up.   Then transfer the twisted log gently into the prepared loaf pan. It doesn’t matter if the loaf is “squigly”.  You can place the trimmed ends of the log in the opening spaces available.  No worries, the dough will fill in these gaps.  Repeat this process with the next loaf.

This is how it's done!

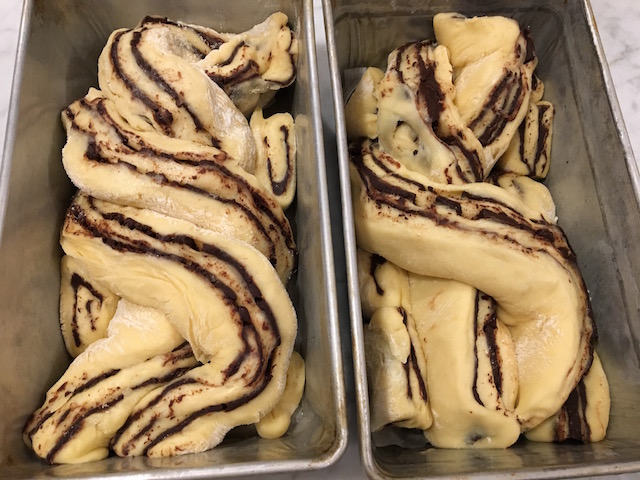
This is how it’s done!

Cover both pans with a damp tea towel and leave to rise another two hours at room temperature.

Baking and Finishing Instructions

Preheat the oven to 375°F with the baking rack mid oven about 15 minutes before the two hours is up. At the end of two hours, remove damp towels covering the loaves and place both pans on the middle rack of your oven. Bake for 25-30 minutes.  Mine cooked 27 minutes and might have been done in 25 min, but who knows?  When ready to take from the oven, a toothpick will slide in easily and come out clean. If your babka needs more time, put it back, five minutes at a time then re-test.

Ten minutes before the loaves are finished baking, make the sugar syrup: Bring sugar and water to a simmer until sugar totally dissolves. Remove from heat and set aside to cool somewhat. As soon as the Babkas are done, brush the syrup all over the top of each loaf.

Use all the syrup.  It will seem like excessive sugar syrup but will taste just right — glossy and moist. After ten minutes, shake the pans gently to be sure the sides are not sticking to the pan surface.  Let cool 30 minutes in the pans – this is important because the yeast dough is springy and soft and fragile but not bad to handle after 30 minutes, then transfer to a cooling rack to cool the rest of the way before eating . 

Do ahead: Babkas keep for a few days at room temperature. Or you can cool them absolutely completely, wrap in saran and heavy foil and freeze them for up to two months.


Share
Posted in Breads | Leave a comment

Vegetable Cheddar Soup

Click here to view recipe.

Velvety Vegetable Cheddar Soup

Velvety Vegetable Cheddar Soup

Have you ever been in a non-cooking mood when it is winter and dark outside?  I have, and this soup not only fits the bill on a cold night, but it is something that comes together in about 20 minutes.  Kid friendly, adult friendly, vegetarian friendly…what more can one ask for?  I have no idea where this recipe originated, but it’s been in my files for at least 10 years. And it’s a keeper!  Double all the ingredients for a crowd.

Vegetable Cheddar Soup

Serves 5

pf-icon2


Ingredients
  • ½ cup diced celery
  • ½ cup diced carrots
  • 1 cup cubed potatoes (½ inch pieces)
  • 1 cup cauliflowerettes, chopped into ½ inch pieces
  • ½ cup fresh or frozen corn kernels
  • ¼ onion, diced
  • 1 cup water
  • ¼ cup (½ stick) butter
  • ¼ cup all-purpose flour
  • 3 cups (2 %) milk (heated in microwave 2 ½ minutes)
  • 4 ounces shredded Cheddar cheese
  • Salt to taste (I added very, very little)
  • Ground white pepper to taste (Black pepper works too but the flecks will show against the white background of the soup)
Instructions

In a large 4-quart saucepan, boil celery, carrots, potatoes, cauliflower, corn and onion in one cup of water, covered, 5-10 minutes or until vegetables are tender. Set aside, do not drain but pour everything into a bowl.

Melt butter in the same saucepan that is now empty from steaming the vegetables.   Slowly whisk in flour, cooking for one to two minutes. Remove from heat and slowly stir in the preheated milk. Put back on medium heat and cook until it thickens and add the cheddar cheese.  Stir until melted.

Return the vegetable/water mix to this pot (with the heated milk/butter/flour) and cook very briefly.   Add  salt and pepper to taste to this mixture.  

Serve with a crusty bread and a salad. Enjoy!

NOTE: This would be good with chunks of leftover salmon or halibut added  to make a seafood chowder of sorts.

I’ve made it a tradition to double the amounts and gift a little of this to my neighbors.

Share
Posted in Soups | Tagged , , | Leave a comment

Asher’s Pumpkin Muffins

Click here to view recipe.

The Perfect Pumpkin Muffin

The Perfect Pumpkin Muffin

I’ve been on a baking binge this winter.  It’s unseasonably cold, snowy at times, rainy at others, dark…so to occupy myself indoors I’ve been baking up a storm.  Each week I glance at many different food sites on the internet, saving recipes that sound appealing.  These muffins began as such: a fairly straightforward pumpkin muffin, jazzed up with warming spices and sweetened with brown sugar and honey.  

These muffins made me think of Asher, my 5 ½ year old grandson who is picky picky.  He detests eggs and won’t even walk into the room if he smells them cooking.  He does not like certain textures – ie mashed potatoes.  Since I don’t have to feed him every day, I find this all a bit amusing.  And I have a sixth sense about what will please him.  Chicken soup with matzo balls?  Yes.  Ricotta Lemon cookies?  Uh huh.  Tofu? Certainly.  Noodles of any kind?  You know it.  Sushi and pho? Always.  And I will bet the farm that he will love these pumpkin muffins too.

Asher!

Asher!

This time I read a few reviews from readers who actually made the original recipe that was posted in the New York Times. Some thought they might be a bit bland, others found them too sweet, some said the batter made more like 18 muffins than a dozen. After reading all of this – I devised a game plan.  I used half the amount of brown sugar and switched to dark brown sugar since that is what I had on had. I used half the amount of maple syrup, added in kefir to replace liquid and give them a little tang  (actually I had no buttermilk but I did have kefir), I didn’t use turmeric because I didn’t have any on hand. I ended up making 12 large, overflowing muffins but I’d do that all again.  And I added the zest of a lemon along with a drizzle of lemon glaze after they cooled.  One thing I love is that I made these using just a whisk and spatula, not an electric mixer of any kind!

I am 100% happy with the outcome.  My hubby had some with his morning coffee and ooooed and ahhhhed, something he doesn’t always do (he’s spoiled).  And because pumpkin and squash remind me of fall, I’m thinking ahead to Thanksgiving with the family and planning to bring these for breakfast or just for snacks. That is, if Asher approves!

Asher’s Pumpkin Muffins

Makes 12 muffins

pf-icon2


Ingredients
  • 1 stick of salted butter
  • 1 cup all-purpose flour
  • 1 cup white whole-wheat flour (I use King Arthur)
  • 2 teaspoons baking powder
  • 1 teaspoon baking soda
  • 1 teaspoon sea salt
  • 1 teaspoon ground cinnamon
  • 1 teaspoon ground ginger
  • ¼ teaspoon ground nutmeg
  • 15 oz can cooked organic pumpkin or pureed butternut squash, about 1 ½ cups
  • 3 large eggs
  • ½ cup dark brown sugar
  • ⅓ cup pure maple syrup
  • ⅓ cup kefir or buttermilk
  • Grated zest of one lemon
Drizzle Ingredients if you wish
  • ⅓ cup powdered sugar
  • 1 tbsp lemon juice
Instructions

Heat oven to 350 degrees with the rack in the center.

Spray muffin tin (12 muffins) with nonstick spray or line them with paper liners.

Brown the butter by heating it in a small metal saucepan over medium heat. Cook, swirling occasionally, until the butter has melted, foamed and started to brown, about five minutes. Remove from heat and set aside.

In a medium bowl, whisk together each type of flour, baking powder, baking soda, salt, and spices.

In a larger bowl, whisk together canned pumpkin or butternut squash, eggs, dark brown sugar, maple syrup, kefir and lemon zest until totally smooth. Stir in dry ingredients, then add the melted brown butter.

Divide evenly among 12 prepared muffin molds (very very full to top or even a little beyond the top). Bake until the tops are puffed and spring back slightly when pressed, about 25 minutes. Test with a toothpick then remove from the oven.  After about 10 minutes, gently loosen each muffin and place it back in the tin but on it’s side.

Cooling on their sides.

Cooling on their sides.

IF YOU WANT TO DO A GLAZE: Once totally cooled, re-center the muffins the same as how you baked them. Whisk together the powdered sugar and lemon juice until the consistency of glue.  Drizzle about a teaspoon on top of each muffin and let harden.

These keep a couple of days covered at room temperature, or frozen for up to three months.

I am thinking if you aren’t into glazes, it might be nice to sprinkle a bit of turbinado sugar on top of each muffin instead.

Share
Posted in Breakfast | Tagged | Leave a comment

Oven Blasted Cauliflower with Lime, Capers and Garlic

Click here to view recipe.

Roasted Cauliflower ... Yes AGAIN!

Roasted Cauliflower … Yes AGAIN!

As I type this out I wonder if you’re thinking I’ve lost my mind. Perhaps you’re asking yourself, “What? Again?? Why is this lunatic posting yet another cauliflower recipe?  Is it not enough to have whole roasted cauliflower, cauliflower pomegranate salad, and four other posts to date?”  

The answer, in short, is no.  I will never have enough ways to prepare cauliflower.  I love the recipes already posted as well as just plain old oven blasted cauliflower, but I kicked it up a notch this summer while in Central America.  This recipe has what I need in super hot weather: salt from capers, tang from lime, and a good mouth feel. Something to keep on hand for when the sun comes out again, or even in winter if you get tired of the same old, same old.

Hot Out of the Oven

Hot Out of the Oven

Oven Blasted Cauliflower with Lime, Capers and Garlic

Serves 4

pf-icon2


Ingredients
  • 1 whole head of cauliflower (approximately 5 cups or 1 pound of cauliflower flowerettes)
  • 2 Tbsp olive oil
  • ¼ tsp. each sea salt and pepper
  • Zest of 1 whole lime
  • Juice of 1 whole lime
  • 3 cloves garlic, peeled then cut each clove into 4 pieces
  • 1 ½ Tbsp whole  parsley leaves or cilantro leaves
  • 1 Tbsp capers (rinsed)
Instructions

Preheat oven (or toaster oven if you are me) to 450.   

Toss cauliflower that you have broken or cut into approximately 1 x 1 inch pieces with olive oil, salt and pepper and place it on a foil or parchment lined  rimmed cookie sheet.

Roast 20 minutes and watch it along the way. (I used my toaster oven, so if you are using a conventional oven keep checking-it could take longer).   If it is pretty brown after 20 minutes, remove from oven and stir and then add in slivered garlic and continue roasting another five minutes until tender and golden brown.  Take it out of the oven, scrape the cauliflower into a serving bowl and combine with the lime juice and zest, capers, and parsley or cilantro leaves.

Serve warm or room temperature.  It should make enough to feed four people but PSSSSST….  I have been known to eat this entire batch single handedly.  Don’t judge.  I love this.

Share
Posted in Vegetables | Tagged , , | Leave a comment