Overnight Grab and Go Oatmeal Bowls

Click here to view recipe.

Easy Peasy Overnight Oatmeal!

Because I’m typically up by 6:30 in the morning, I often forego a proper breakfast.  After my house-made coffee drink, I am ready to tackle the day until maybe 10 am.  So make-ahead breakfast items or snacks really speak to me for the days when I am really hungry mid-morning – or even in the afternoon and don’t have the time or energy to start cooking. 

There are lots of combinations out there for make-ahead oats, and the following is my favorite which, you won’t likely be surprised to learn, evolved from trial and error.  Turns out my grandkids love this as well, and the jars are easy to pull out of the fridge – and perfect before virtual school on the mornings I supervise Zoom classes.  I enjoy preparing a hot breakfast, but when the kids would rather sleep a little later but have to eat before classes start, this is a winner. And they make great, filling afternoon snacks too!

Overnight Grab and Go Oatmeal Bowls

Ingredients 

pf-icon2


(Per pint jar – I usually make four at a time)

  • ½ cup milk (I use unsweetened coconut milk but any dairy or nut milk will work) 
  • ⅓ cup old fashioned rolled oats (not quick oats) 
  • ⅓ cup plain unsweetened yogurt or if you prefer to use flavored yogurt OMIT the sweetener
  • 2 teaspoons ground flax seeds or chia seeds
  • A dash of  ground cinnamon
  • ¼ tart apple with skin on – core and dice or grate
  • 1 tablespoon chopped toasted nuts
  • 1 tablespoon unsweetened coconut 
  • 2 tablespoon fresh blueberries or raspberries or other fruit of your choice. 
  • 1 teaspoon pure maple syrup when serving (if desired)
Instructions

I usually line up my jars and begin with the coconut milk, measuring ½ cup into each of the jars.  Next, add oats, then yogurt, flax seeds, cinnamon, and apples.  Stir together.  Top each jar with coconut then chopped toasted nuts.  Do not stir.  Put the lids on and place in the refrigerator for a few hours or overnight (I actually have eaten mine three days later and the oats are still good!). 

When ready to eat, add in some berries or other fruit of your choice such as diced peaches or plums.

Share
Posted in Breakfast | Tagged | Leave a comment

Chili – Perfect for Cold Nights and Remembering Family

So this post was originally published way back in 2011. And I actually re-posted it again in 2015. Which should tell you how much I adore this recipe. But what really had me thinking about this post – aside from craving a hot bowl of deliciousness during these dark, cold days – is my sisters. I’m sure so many of you can relate … craving family connections is simply a part of life these days. So it’s my hope that this nourishing recipe brings you some warmth – or inspires you to look into your own recipe collection to find something that strengthens your connections to potentially distant family.

~ ~ ~ ~ ~ ~ ~ ~ ~ ~ ~ ~ ~ ~ ~ ~ ~ ~ ~ ~ ~ ~ ~ ~ ~ ~ ~ ~ ~ ~ ~ ~ ~ ~ ~ ~ ~ ~ ~ ~ ~ ~ ~ ~

three sisters

I grew up in a family of five children – two boys and three girls. I am the oldest of the sisters and the only grandmother so far.    Our mother taught us all basic culinary skills and we are constantly emailing recipes and new ideas back and forth.  When we get together – the kitchen is inevitably the place where we congregate, cook and catch up.

When I turned 40 my two sisters Susan and Kay decided to celebrate by taking me on a trip to San Francisco.  That first year we allowed Kay’s youngest son “Baby Joel” to accompany us and it’s hard to believe that he is soon going to be 21 years old. Every year since that first trip we’ve maintained this tradition. It has become sacred time for us, and we do not allow anyone other than blood sisters to come.  We haven’t missed a year – not once.

Throughout the years we have traveled  to places like Sedona, New York, Aspen, Baltimore and Virginia, to name a few. I have no doubt that the coming years will bring us to many new and exciting locales. Ironically, it was a vacation I was least enthusiastic about that remains one of my fondest memories.  In both 2008 and 2009 I was coerced into going to a knitting convention in Baltimore. I had in mind a gaggle of gray haired ladies, clicking away with their needles and gabbing ad nauseum about knitting and purling.  I was pleasantly surprised to find how entertaining and inspiring these women were. Many were young, some were older but the beautiful garments they created inspired me to focus again on knitting.

After the convention we drove to Virginia to a place called The Meander Inn and Plantation. Susan, Kay and I looked out the car windows at verdant, rolling hills and arrived at this magical place, feeling immediately transported to the old South. We stayed three nights, enjoying the historical feel of the town and the relaxing pace of life. We even experienced an indulgent wine maker’s dinner featuring wines from the region.

Susan, Kay & Marilyn in front of the Inn

For me, the highlight of the visit was the cooking school where we learned how to make “sophisticated, Southern cuisine.” There were two full days of classes led by their chef and Suzie Blanchard, executive chef and owner of the Inn. We learned how to prepare apple pie, stuffed butternut squash, English muffins, focaccia, apple cinnamon cheesecake, and a honey and pine nut tart.  Surprisingly, one of my favorite things we made was chili.  Chili is chili, you might think.  I quickly learned that this is not the case. The Meander Inn recipe has quite a kick.  It has lots of warm spices and yields a huge pot of satisfying, perfectly seasoned chili.

As with most dishes, I altered the chili recipe to make it my own. I decreased the cayenne and red pepper flake quantities for my family, and added black beans in addition to the red kidney beans; I use fresh cooked beans. This recipe makes an enormous amount which can seem overwhelming. However it freezes beautifully and is the perfect dish to defrost and reheat on cold winter days.

And now, here comes the chili!!

Chili Meander

Chili Meander

Serves 10-12

Ingredients
  • 2 Tbsp vegetable oil
  • 2 medium yellow onions, finely chopped
  • 1 red bell pepper, cut into ½ inch cubes
  • 6 medium garlic cloves, minced
  • ¼ cup chili powder
  • 1 Tbsp ground cumin
  • 2 tsp ground coriander
  • ½ tsp red pepper flakes (Use more if you like a lot of kick)
  • 1 tsp dried oregano
  • ¼  tsp cayenne pepper
  • 2 lb lean ground beef
  • 1-15 oz can rinsed black beans, or 2 cups fresh cooked
  • 1-15 oz can rinsed red kidney beans, or 2 cups fresh cooked
  • 1-28 oz can diced tomatoes with juice
  • 1-28 oz can tomato puree
  • Salt to taste
Instructions

Heat oil in very large dutch oven (or non stick large pot) over medium heat until shimmering. Add onions, bell pepper, garlic, chili powder, cumin, coriander, pepper flakes, oregano and cayenne and cook until vegetables are soft and beginning to brown, about 10 minutes.

Increase heat to medium high and add half of the beef and cook, breaking up pieces with a wooden spoon until no longer pink and just beginning to brown – about 3-4 minutes.  Add the rest of beef and cook, breaking up with a spoon until no longer pink, another 3-4 minutes.

Add beans, tomatoes, tomato puree, and bring to a boil, then change the heat to low and simmer, covered, for 1 hour, stirring occasionally.  Remove cover and simmer 1 more hour, stirring occasionally,   If it gets too dry, add a bit of water.  Adjust seasoning with salt.

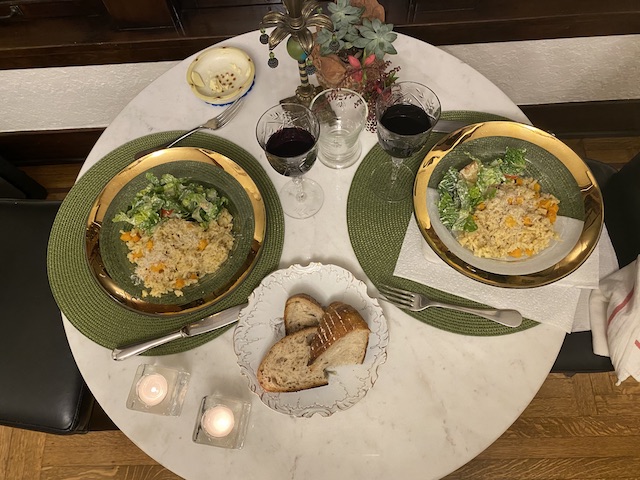
This chili is especially delicious served with corn bread and a crisp salad!!

Share
Posted in Soups | Tagged | 2 Comments

Stir Together Cinnamon Tea Bread 

Click here to view recipe.

Simply Scrumptious Stir Together Cinnamon Tea Bread

If you are looking for a “no mixer needed” quick bread that uses oil instead of butter and can be sliced to have with your morning coffee or tea, or used as a dessert for last-minute distanced gatherings, search no more.  Most of you will have all of these ingredients in your kitchen, so this can be assembled in about ten minutes, baked another 50 minutes, then voila! No mixer needed – another bonus for me. And this isn’t over-the-top sweet. Win-Win-Win … too many to count.

Yum!

Stir Together Cinnamon Tea Bread 

Makes one loaf or about 12 slices

pf-icon2


Ingredients
  • ⅓ cup dark brown sugar 
  • 2 teaspoons ground cinnamon
  • 2 cups all-purpose flour
  • 1 tablespoon baking powder
  • ½ teaspoon fine sea salt
  • ¾  cup white sugar 
  • 1 egg, beaten
  • 1 cup 2 % milk
  • ⅓ cup vegetable oil (I used grapeseed oil because that is what I had in my kitchen at that moment
Instructions

Preheat the oven to 350 degrees with a rack in the middle and spray a 9×5 inch loaf pan with Pam, making sure the corners are well coated   In a small bowl, mix together ⅓ cup brown sugar and 2 teaspoons cinnamon; set aside.

In a large bowl combine flour, baking powder, salt, and ¾ cup white sugar. Combine egg, milk, and oil and add to the flour mixture. Stir until just moistened.

Pour a third of the batter into the pan and spread it evenly.  Sprinkle with half of the reserved cinnamon/brown sugar mixture. Repeat with the next third of the batter and top with the other half of the cinnamon/brown sugar mixture.  Use the final third of the batter to top the bread.  Draw a knife (like waves) through the batter to marbleize it a little. 

Bake in the preheated oven for 45 to 50 minutes, or until a toothpick inserted into the center of the loaf comes out clean. Let it cool in the pan for ten minutes before removing to a wire rack to cool completely. Wrap in foil and let the bread sit overnight before slicing.

Cooks note: I think a couple of teaspoons of grated orange rind would be a nice addition.

Share
Posted in Breads | Tagged | 5 Comments

Warming Breakfast Loaf

Click here to view recipe.

Wonderfully Warming Breakfast Loaf

This is a simple, easy to stir together breakfast loaf cake that includes fruit and vegetables: carrot, zucchini, banana…so that is healthful, right?  Maybe not so much, but this sure hits the spot smeared with butter! And don’t we all need a little extra warmth and comfort these days?

I believe I initially found this recipe in a magazine, and then the Seattle Times printed it with a few minor changes.

Get out your box grater, a big bowl and a spatula and go for it.

Warming Breakfast Loaf

Makes a 9 x 5 loaf cake, enough for 10 nice slices

pf-icon2


Ingredients
  • 1 cup granulated sugar
  • ½ cup avocado oil (canola works too, but I avoid it)
  • 2 large eggs
  • 1 teaspoon pure vanilla extract
  • ½ teaspoon ground cinnamon
  • ½ teaspoon fine sea salt
  • ½ teaspoon baking soda
  • ¼ teaspoon baking powder
  • 1 ½ cups all-purpose flour
  • ½ cup grated zucchini
  • ¼ cup grated carrot
  • ¼ cup mashed banana
  • ½ cup pecans, chopped
Instructions

Preheat the oven to 375 degrees with an oven rack in the center of the oven.

Spray a 9 x 5 bread pan with nonstick spray.  I always put a piece of parchment paper that fits the bottom in there, and then spray the parchment again. 

In a large bowl combine the sugar, oil, eggs, vanilla, cinnamon and salt, until the mixture is smooth.

Stir in the flour mixed with baking soda and baking powder. Then stir in the zucchini, carrots, banana and walnuts until mixed.

Scrape the batter into your prepared loaf pan.

Bake for 50 to 60 minutes or until a toothpick inserted into the center comes out clean.

Place the bread pan on a cooling rack for ten minutes and then gently turn the pan over to remove the loaf.   Serve warm with salted butter.  Leftovers are great toasted the next day.

Enjoy!

Share
Posted in Breads | Tagged | Leave a comment

Pressure Cooker Butternut Squash Risotto

Click here to view recipe.

Beautiful Butternut Squash Risotto

Years ago, so many many years ago that now it seems like a lifetime, my sister Susan and I went to Tuscany together. Our kids were all still young and living at home, but we managed to spend a little over a glorious week there.  On four of the days, we toured around in the morning and then returned to a villa at 4pm for a cooking class.

Most of the food we prepared at Tutti a Tavola was not fancy or difficult to make.  We made lasagne using dried noodles, pepperonata, tiramisu, limoncello, bollito misto and risotto.

The risotto recipe contained fresh pumpkin and required at least a half hour of standing at the stovetop stirring constantly.  For me, that is a non-starter and so I took the basic recipe and adapted it for my stovetop pressure cooker, subbing peeled and diced butternut squash for the pumpkin. This is a seven minute preparation that requires no stirring and comes out better than ever!

One thing I learned in Italy was to use liberal amounts of good olive oil when cooking.  Do not hold back – this imparts a marvelous flavor and a glorious silky smooth texture.  

I still order a case of Extra Virgin Olive Oil from Italy and use it for most everything and then give a few bottles to relatives who cook and who appreciate the gift. Mine is from my teacher Mimma’s vineyard – the Muricciaglia winery in Tuscany. It is so beautifully green and really earthy tasting – Olio d’Oliva delizioso!

The BEST EVOO

This January, I made this on a Sunday night for my husband and me.  Because we always dine at home, I try to create a nice atmosphere with flowers, napkins, beautiful food and theme music-here. For this dinner I found “Romantic Italian” on a playlist.  Somehow it makes eating a lot more fun and elevates whatever I make to restaurant quality.

Risotto con la Zucca (AKA Risotto with Pumpkin)

Serves 6-8

pf-icon2


Ingredients
  • ½ – ¾ of a large butternut squash, peeled and seeded, dice into ⅓-inch cubes
  • 3 Tbsp good olive oil for the squash
  • 2 cups of Arborio Rice (can be substituted with “Short Grain White Pearl” rice)
  • Another 2 Tbsp good olive oil for sauteing onion/rice
  • 4 cups (or 1L) of chicken or vegetable broth (lazy me, I use Better than Bouillon and boiling water)
  • 1 onion (or 1 cup, diced) or ¾ cup diced shallots 
  • 1 swig of white wine or dry vermouth (about 1 ½ Tbsp)
  • ¼ cup Extra Virgin Olive Oil 
  • 1 cup grated parmesan cheese to finish
  • 2 Tbsp butter
  • Salt and pepper to taste
Instructions 

First, mix the diced squash and 3 tablespoons olive oil with some salt and pepper, and bake at 425 for 15-20 minutes – until softened but not overly done.

Meanwhile, in the pre-heated pressure cooker on medium heat add the two tablespoons oil and onion or shallot. Sauté the onion or shallot on low until it becomes translucent (about 5-10 minutes).

Add the rice and lightly toast it to release the starch. When you add the Arborio rice to the onions/shallots, the rice will turn from solid white to translucent as it absorbs the oil and onion juice, then in about a minute back to white. Wait until just a couple of grains look golden and your rice is toasted! 

Add a swig of white wine and un-stick any grains from the bottom of the cooker and stir the rice until the wine has fully evaporated.

Add the broth to the onions/shallots, mix and close the top immediately.

Close and lock the lid of the pressure cooker.  For stove top pressure cookers: Turn the heat up to high and when the cooker indicates it has reached high pressure, lower the heat to maintain it and begin counting seven minutes pressure cooking time.

When time is up, open the cooker by releasing the pressure

The risotto should appear just slightly too wet. Stir, and the rice will continue to absorb the extra liquid in about 30 seconds. If the rice is still very wet, put the open pressure cooker back on a medium flame, without the lid, and finish cooking it this way – stirring often – until it reaches the right consistency. For a classic finish, melt two tablespoons of butter and grated cheese and stir in right before serving. Adjust for salt and pepper 

I add the cooked tiny cubed cooked butternut squash right at the end too.  By the way, this works with diced broccoli as well or a combo of broccoli and squash.

Leftovers reheat beautifully or you could add some egg and breadcrumbs, coat with panko and saute for a different meal.

Share
Posted in Side Dish | Tagged | Leave a comment

Brown Rice with Black Beans & Cheese 

Click here to view recipe.

Hearty & Delicious!

The Winter Solstice…  It is the shortest, darkest day of the year and a day when I inevitably breathe a sigh of relief because from that point on, the days begin to get a little lighter.  Seattle is pretty far North, rainy and grey during December, so the sunrise happens close to 7 am and by 4 pm it is nearly dark.  In these days of isolation and staying at home, this is not good. Thankfully – I nearly always find solace in my kitchen.

Yesterday I pulled out a bunch of saved recipes I wanted to try at some point and stumbled upon “Cheesy Rice and Beans” from Kate McDermott’s blog tucked away in my stash.   I got right to work. I decided to use brown rice since I like the nutty flavor and I used black beans – although next time around I will try freshly made pinto beans.  I grated all the cheese by hand.  My two older Seattle grandsons, who are in my bubble, helped me make a double batch of this so that they could take a casserole dish home.   We donated some to Jakey boy and family and still had some left for the two of us here.  

My daughter called me after a harrowing day of work, and said it smelled so good she wanted to get rid of her kids, put on a bathrobe, crack a beer and eat the entire thing!  This dish is surprisingly good and filling.  All you need is a little fruit and a green salad or roasted vegetables.  It reheats beautifully and I see no reason why it wouldn’t do well in the freezer.  My entire bubble gave it a thumbs up.

Brown Rice with Black Beans & Cheese 

6-8 servings

pf-icon2


Ingredients
  • 2 ½  cups already cooked brown rice  (I do mine in the pressure cooker)
  • 2 tablespoon good olive oil
  • 2 brown-skinned onions peeled, cut in half, and thinly sliced
  • 2 cloves garlic, minced
  • 2 eggs
  • 1 ½ cups 2 % milk
  • 2 teaspoons dry mustard
  • ⅛ teaspoon  of freshly grated nutmeg
  • 1 teaspoon sea salt
  • 1 cup grated sharp cheddar cheese
  • 1 cup grated Gruyère or Swiss cheese
  • 1 cup grated Parmigiano-Reggiano cheese
  • 1 15-ounce can black beans rinsed and drained or 2 cups home-cooked black beans, drained.  You could use pinto or kidney beans as well. 
Instructions

In a large skillet, add olive oil to the pan over medium heat. Sauté onions and garlic, stirring occasionally, until onions are barely browned. 

In a large bowl, whisk eggs. Stir in milk. Add dry mustard, nutmeg, salt. Mix the cheeses together but save ½ cup to sprinkle on top of the casserole.

Add cheese, onions, rice, and beans to the liquids and mix together.

Grease a 9×9 casserole pan with olive oil. Turn the rice, cheese, and bean mixture into the pan. Sprinkle ½ cup of cheese on top.

Bake at 375F for 40 minutes. Let it cool for about 10 minutes before cutting into squares and serving.

Cook’s note:  As long as you are messing up the kitchen, I think it is good to make a double batch of this!  The original recipe says to use whatever cheese you have on hand. Colby, Monterey Jack, Fontina, Mild Cheddar, Pepper Jack are all fine.

Share
Posted in Odds & Ends | Tagged | Leave a comment

Banana Chocolate Scones

Click here to view recipe.

Seriously Delish Banana Chocolate Scones

This morning, I noticed a few bananas on the counter that were overly ripe.  A smoothie seemed too cold for December, I was over banana bread and banana pancakes and banana cake…so I did a search for banana scones.  This is my version, a combo of several recipes I found on various blogs and websites.  What did we ever do before the world wide web?  

These came out just like I wanted them.  I am only mad that I baked all eight rather than freezing a few for next week. Per my notes below – you can freeze the dough and bake it right out of the freezer — fresh scones in just a few minutes! Alas, I am now obligated to eat them all!!

Banana Chocolate Scones

Makes 8 Scones

pf-icon2


Ingredients 
  • ½ cup or 1 large ripe banana, mashed 
  •  ⅓ cup heavy cream
  • 1 large egg, lightly beaten
  • 1 teaspoon pure vanilla extract
  • 2 cups all-purpose flour
  •  ⅓ cup packed dark brown sugar
  •  2 ½ teaspoons baking powder
  • ¼ teaspoon sea salt
  • 1 stick cold salted butter, cut into half-inch chunks
  • 3 ounces bittersweet chocolate chips, coarsely chopped 
  • 1 Tbsp turbinado (raw) sugar to sprinkle at the end before baking
Instructions

Heat the oven with the rack in the center to 425°F and line a cookie sheet with parchment.

In a small bowl, whisk together the mashed banana, cream, egg, and vanilla. In a large bowl, whisk together the flour, brown sugar, baking powder, and salt. Cut in the butter with a pastry blender until the mixture is crumbly with even pieces. Add the chopped chocolate chips and stir. Scrape the banana mixture into the butter/flour mix and stir with a rubber spatula until the mixture is barely combined.  

Place the dough onto a silicone mat or a piece of parchment on the counter – pat it into an 8 -inch circle. Using a sharp knife, cut the circle like a pie into eight equal triangles. (At this point, you could freeze the triangles well-wrapped on their sheet for another day. Bake them from frozen.) Spread the triangles at least an inch apart and sprinkle with the raw sugar.  Lightly press the raw sugar into the dough. 

Bake until the scones are golden brown and set – about 16-20 minutes. These turn pretty dark brown compared with other scones I have made but inside they were moist as can be.  Transfer the parchment paper/scones to a wire rack to cool slightly. Serve warm or room temperature.  If they last more than a day, reheat them gently at 300 degrees for five minutes!

Note: if you aren’t planning to eat all eight scones the day they are made, the raw triangles can be wrapped and frozen  When you are ready, bake them directly from the freezer!  I made another batch to try this and I baked three today from the freezer.  What a wonderful way to have fresh scones each day.

Share
Posted in Breads | Tagged | 1 Comment

Toasted Israeli Couscous with Spicy Eggplant

Click here to view recipe.

Insanely Good Israeli Couscous & Spicy Eggplant

I recently found this recipe by Adeena Sussman and decided to try my hand with it since I had a large eggplant sitting in my kitchen – just waiting for a home.  The original recipe was supposed to be a meatless main dish, but I wanted to make a bigger quantity and have this as a side dish to serve along with fish, and then have some yummy leftovers for lunch. 

The original directions contained more couscous than eggplant, but you know me – I’m a veggie girl so I switched things up, resulting in a higher eggplant to couscous ratio. I didn’t include cumin because I didn’t have this spice on hand, but it turns out the combination of smoked paprika and cinnamon was enough flavor for me.  I boosted the deliciousness by adding a little chicken bouillon and a handful of diced garden-fresh cherry tomatoes as well.

We celebrated my son’s 41st birthday and I brought this leftover eggplant couscous. Everyone there (all family bubbled together) wanted the recipe.  I guess that means it was a hit for the entire bubble!

Toasted Israeli Couscous with Spicy Eggplant

Serves 10

pf-icon2


Ingredients
  • 2 teaspoon ground cinnamon
  • ½ teaspoon ground cayenne (more or less depending on your love of “picante”)
  • Kosher salt and ground black pepper
  • 2 cups Israeli couscous 
  • ⅓ tablespoon extra-virgin olive oil
  • 5-6 cups cubed eggplant with skin (about 1 large eggplant)
  • 1 large brown-skinned onion, diced ⅓ inch
  • 5 garlic cloves, minced
  • 2 tablespoons tomato paste
  • 1  15 oz can diced tomatoes with juice
  • ½ cup fresh cherry tomatoes cut in half
  • 2 cups hot water mixed with 1 tsp “better than bouillon” chicken flavor
  • ½ teaspoon smoked paprika
  • ¼ cup freshly chopped parsley to garnish 
  • Optional:  Yogurt with lemon zest and lemon juice mixed in to taste, for serving
Instructions

Slice eggplant into ½ by 2-inch strips.  Place in a strainer and mix with two teaspoons of sea salt. Let it stand over a bowl for an hour, shaking intermittently.  After an hour, rinse eggplant well and shake off the water then roll in a cloth towel to dry.  Set aside.

In a small bowl, combine cinnamon, cayenne, and one teaspoon sea salt and set this spice mixture aside.

Heat a heavy saute pan  (2 to 3 quarts) over medium heat until it is hot. Add couscous and stir every 20 seconds for about three minutes total until the grains are golden. Transfer toasted couscous to a bowl.

Add oil to the pot and increase heat to medium-high. When it shimmers, add drained eggplant, chopped onion, ½ teaspoon salt, and ¼ teaspoon pepper and cook, stirring often, until onions are softened and golden and the eggplant is browned and slightly shrunken, 6-8 minutes. Add garlic and stir for 30 seconds.

Add tomato paste and the spice mixture and cook, stirring, for one minute. Stir in toasted couscous, canned and fresh tomatoes and two cups of water/bouillon mix, cover, reduce the heat to low, and simmer until the couscous has absorbed all the liquid, 8 to 12 minutes. Turn off the heat and let this rest for two minutes. Uncover, stir in smoked paprika and parsley, then taste and adjust the seasoning with salt. Serve immediately and dollop with yogurt mixture, if desired.


Share
Posted in Side Dish | Tagged | 1 Comment

Cinnamon Apple Scones

Click here to view recipe.

Cinnamon Apple Scones – So Delicious!

Please forgive me for posting another scone recipe.  If you can believe it – this is my EIGHTH scone recipe! I simply couldn’t help it. I do live in the land of apples after all. And, it turns out these are just different enough from the other scone recipes on this website so perhaps I don’t really need to apologize.  PLUS – see previous notes about COVID baking. It’s a thing.

I have used King Arthur Flour for many years, and I swear by their flours – whether it’s unbleached, white whole wheat or bread flour.  So, when they advertised “cinnamon sweet bits” I had to see what that was all about.  This was my maiden voyage with these tiny bits. And now I am going to be using these cinnamon sweet bits in cookies, breads, and muffins.  PS – in addition to offering the most amazing products – King Arthur also has some lovely recipes … including the one I used as the basis for these scones.

I also decided to make these because the yield is 12 nice scones, not a huge or overwhelming proposition.  The coarse sugar/cinnamon lid makes them crunch when you bite into the scone.  I am going to wrap a few of these to give to my daughter in law who just gave birth to twin baby boys, and a few to my daughter whose three kids absolutely inhale everything I bake.  

I did weigh most of the ingredients so I could feel like a professional, but I am including cup measurements as well.  I would suggest that you get on the “baking by weight” bandwagon as soon as you can.  It’s way easier and more consistent. 

Put this in your pile of “I want to try these soon” recipes.  They will not disappoint.  

Cinnamon Apple Scones

Makes 12 small scones


pf-icon2


Ingredients 
  • 2 ¾ cups (326 grams) unbleached all-purpose flour
  • ⅓ cup (67 grams) granulated sugar
  • ½ cup fine sea salt
  • 1 Tbsp baking powder, sift after measuring
  • 1 tsp ground cinnamon
  • 1 stick salted butter, cold and cut into small pieces
  • ½ large apple, unpeeled and cored and cut into ½ inch pieces (I used a Pink Lady apple)
  • ½  cup cinnamon sweet bits (order from King Arthur and tell them Queen Marilyn sent you) 
  • 2 large eggs
  • 1 tsp pure vanilla extract

½ cup unsweetened applesauce.  (I didn’t have this  so I boiled my other half apple, peeled and chopped, added some water and mashed it to make my own.)  

Topping Ingredients
  • 3 Tbsp raw coarse sugar
  • ½ tsp ground cinnamon
  • 1 Tbsp milk to brush the scones
Instructions

Line a cookie sheet with a piece of parchment to fit. 

In a large mixing bowl, combine the flour, sugar, salt, baking powder, and one teaspoon cinnamon and whisk to combine.

With a pastry blender or fork, add the butter until crumbly.  It doesn’t have to be perfectly even.

Stir in the chopped apple and cinnamon sweet bits.  Add the egg/vanilla/applesauce mixture and stir to combine.

Divide the dough in half and pat each half into a 5 ½ inch circle of even thickness.  I use my silicone mat and transfer the raw dough onto the cookie sheet.  Repeat with the other half. Brush both circles with milk, then sprinkle the sugar topping (the three tablespoons raw coarse sugar and half teaspoon ground cinnamon, combined) evenly on each circle.  With a cold knife, cut the circles into six even triangles and space the triangles out on the parchment so they can spread.  Place the parchment-lined sheet into the freezer for a half-hour, uncovered.

15 minutes after the scones go into the freezer, preheat the oven to 425 degrees with the shelf mid oven.  Once the oven is preheated (mine takes about 15 minutes to reach temperature),  take the scones from the freezer and place them along with the parchment and cookie sheet into the oven and bake 18 minutes until golden brown and cooked through.

Let them cool on the cookie sheet for about 10 minutes and then eat them warm with butter or whipped cream cheese.

Fresh from the oven

Leftover scones can be cooled and wrapped in plastic or sealed Tupperware at room temperature for up to four days. To reheat, remove the plastic wrap and tent with foil;  heat at 300 degrees for seven minutes.  

PS: When COVID is over, I plan to take a weekend class at King Arthur near Seattle.  Who is in??

Share
Posted in Breads | Tagged | 3 Comments

Korean Beef Bowls

Click here to view recipe.

Beautiful Korean Beef Bowl

To keep my daily cooking anything but routine, I have found myself searching for and trying new recipes a few times a week.  I am so pleased that my weekly investigations led me to this Korean beef and cabbage bowl recipe.  I promise it is super quick and easy to make, and if you serve this over cooked basmati or brown rice, you’ll have yourself a meal that kids and adults will love.  If you are not a red meat eater, I bet you could use ground chicken or turkey  – but go for the dark meat so it doesn’t get too dry. You could also stretch this a bit with finely chopped mushrooms, using less meat. 

Korean food has a lot of familiar flavor profiles that you will see in this recipe.  Sesame oil, chili or pepper flakes (kochukaru), soy sauce, garlic, ginger, and scallions. It turns out that all of these spices and ingredients live in my kitchen 99% of the time, so this was a dish I was able to make at the last minute.  And, lucky me, there is a butcher right up the street who has amazing ground organic beef that was perfect for this dish.

The only warning I will give you is that making this in a hot cast iron skillet (best to avoid using a nonstick pan so you end up with crispy edges) produced crispy beef, however – the fat splatters everywhere.  That is not a deal-breaker for me – I just cleaned my stovetop (and floor!) when I was done cooking.  The smell lingers in my kitchen for a few hours and I love it.  I served my Korean beef with rice, but you could easily have some large iceberg lettuce cups if you prefer.  As a bonus, leftovers reheat beautifully.  

Korean Beef Bowls (adapted from The Splendid Table)

Makes 3-4 servings


pf-icon2


Ingredients
  • 1 Tbsp toasted sesame oil
  • 1 Tbsp avocado oil
  • 1 lb lean ground beef
  • 3 cloves minced garlic (I chopped mine by hand)
  • 1 Tbsp peeled, minced fresh ginger root
  • ¼ tsp hot pepper flakes (use more if you love spicy)
  • 2 Tbsp dark brown sugar
  • ¼ cup tamari sauce
  • 4 cups thinly sliced napa cabbage
  • 2 thinly sliced scallions for garnish
  • 2 Tbsp toasted sesame seeds to garnish the top
Instructions

Heat a cast-iron skillet over high heat for four minutes.  Add the oils and swirl around until they are very hot.  Add the ground beef and press it with a spatula into a thinner, even layer.  Let it cook without stirring or bothering it for five minutes so that the edges become dark brown and crispy. 

Add the garlic, ginger and hot pepper flakes and stir to break up the meat, and cook another three minutes until it is mostly cooked through.  

Sprinkle the top with the brown sugar and add the tamari sauce, stir and cook for another half minute.  Add the sliced cabbage, stir and cook a couple of minutes until the cabbage wilts a bit. 

Spoon into lettuce cups or over rice and garnish each serving with sesame seeds and sliced onions.

Share
Posted in Meat | Tagged , | Leave a comment